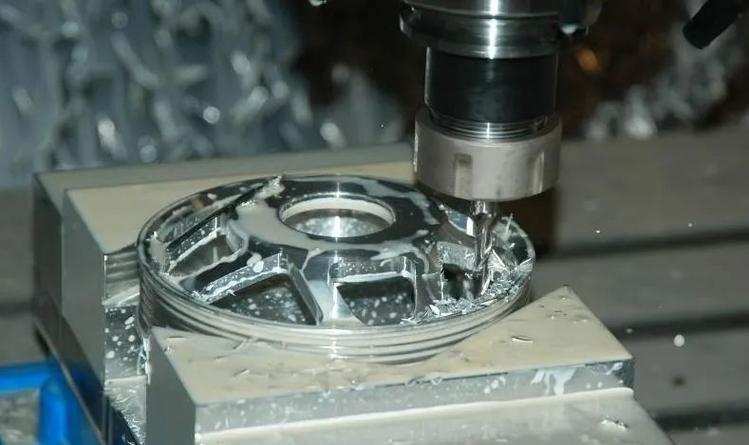
1. Core Cognition: Why CNC Drilling Acrylic Requires Unique Methods
Acrylic (polymethyl methacrylate, PMMA) is a thermoplastic with distinct properties that set it apart from metals like aluminum or steel—making standard drilling processes ineffective. Its low melting point (~160°C), low hardness (Shore D 85-90), high brittleness (prone to chipping), and transparency (susceptible to scratches) require targeted adjustments to avoid defects like molten residue, cracked edges, or cloudy holes.
Industry data underscores its significance: Acrylic accounts for ~35% of CNC plastic machining volume (Source: 2025 Global CNC Plastic Processing Report), with key applications in signage (lighted displays), medical devices (transparent housings), and consumer electronics (phone screen protectors). Compared to metal drilling, CNC drilling acrylic offers unique advantages but also challenges:
|
Advantage
|
Challenge
|
|
Low cutting force (1/5 of aluminum)
|
Risk of melting from frictional heat
|
|
High machinability (fast feed rates)
|
Easy chipping at hole entry/exit
|
|
Transparent finish (no post-polish if done right)
|
Molten chips sticking to hole walls
|
2. Key Technologies for CNC Drilling Acrylic
A. Tool Selection: Sharpness & Low Friction Are Critical
Acrylic’s low melting point and brittleness demand tools that minimize heat generation and avoid mechanical stress. Standard metal drills (e.g., twist drills) often cause chipping or melting—opt for acrylic-dedicated cutting tools instead:
|
Tool Feature
|
Acrylic-Optimized Design
|
Rationale
|
|
Tool Type
|
Single-flute spiral end mill > Double-flute drills > HSS tools
|
Single-flute design reduces contact area (less heat); wide flutes prevent molten chip buildup
|
|
Material
|
Solid carbide (WC-Co) with polished flutes > Uncoated HSS
|
Carbide maintains sharpness longer; polished flutes reduce friction (avoids melting)
|
|
Coating
|
Thin TiAlN (1-2μm) or uncoated (polished 刃口)
|
Thick coatings trap heat; thin TiAlN enhances wear resistance without heat retention
|
|
Point Angle
|
60°-90° (shallow angle) > 118° (metal drill angle)
|
Shallow angles reduce axial force (prevents chipping at hole exit)
|
|
Shank Type
|
Straight shank (φ≤10mm) with precision grinding (runout ≤0.002mm)
|
Low runout avoids uneven cutting (prevents cloudy holes)
|
Practical Example: Drilling a φ4mm through-hole in 5mm-thick acrylic: A single-flute carbide end mill (TiAlN-coated, 80° point angle) reduces chipping by 90% and molten residue by 75% compared to a standard twist drill.
B. Cutting Parameter Optimization: Avoid Heat Buildup
Acrylic’s low melting point means heat is the biggest enemy—parameters must prioritize fast, cool cutting. Below are optimized parameters for common tool diameters (using single-flute carbide tools):
|
Tool Diameter (d)
|
Spindle Speed (S)
|
Feed Rate (F)
|
Cutting Speed (Vc)
|
Key Rationale
|
|
φ1-3mm
|
8000-12000r/min
|
150-250mm/min
|
25-113m/min
|
High speed minimizes cutting time; moderate feed avoids tool dwell (prevents melting)
|
|
φ3-6mm
|
6000-9000r/min
|
200-300mm/min
|
57-170m/min
|
Balance speed/feed to reduce friction; avoid <5000r/min (causes slow cutting & heat)
|
|
φ6-10mm
|
4000-7000r/min
|
250-350mm/min
|
75-219m/min
|
Lower speed for tool rigidity; higher feed to clear chips quickly
|
Critical Rule: Never use “low speed + low feed”—this increases tool-workpiece contact time, leading to molten acrylic adhering to the tool (forming a “plastic burr” that ruins hole quality).
C. Cooling & Lubrication: No Liquids—Air-Cooling Is Key
Unlike aluminum (which uses emulsified coolant), acrylic is sensitive to liquids: Water-based coolants cause clouding, and oil-based lubricants leave residues that are hard to clean (ruining transparency). The only safe cooling method is dry cutting with compressed air:
|
Cooling Method
|
Application Scenario
|
Advantages
|
Implementation Tips
|
|
Compressed Air (5-8 bar)
|
All acrylic drilling (especially transparent)
|
No residue; cools chips/tool; clears debris
|
Position air nozzle 3-5mm from cutting zone (aim at tool flute)
|
|
Dry Cutting (No Air)
|
Thick acrylic (>10mm) with low precision
|
Simple setup
|
Reduce speed by 10% to compensate for lack of cooling
|
Data Support: Using 6-bar compressed air reduces acrylic drilling temperatures by 40% (from 180°C to 108°C), eliminating molten residue in 92% of holes (Source: Plastic CNC Machining Cooling Study 2025).
D. Chip Evacuation: Prevent Molten Buildup
Acrylic chips melt at low temperatures, so “passive chip fall” (used for metal) fails—active evacuation is needed:
- Peck Drilling (G83): For holes >3×diameter (e.g., φ4mm×15mm), use small peck increments (Q=2-3mm) to eject chips before they melt. Example code:
G83 X20 Y20 Z-7 R3 Q2 F200 // Q2=2mm peck, R3=safe air gap (prevents chip re-entry)
- Spiral Chip Clearance: Single-flute tools’ helical design lifts chips upward—pair with compressed air to blow chips away from the hole (avoid re-cutting molten debris).
- Post-Peck Pause: Add a 0.1-second dwell (G04 P100) after each peck to let air cool the tool before re-entering.
3. Practical Case: CNC Drilling Transparent Acrylic Sign
Part Specs: 5mm-thick transparent acrylic sheet (200×100mm), 10×φ4mm through-holes (positions: (50,30), (50,70), (100,30)…(150,70)). Requirements: No chipping (edge smoothness ≤0.1mm), hole transparency (no clouding), Ra≤0.8μm.
Step 1: Process Planning
- Pre-Drilling: Use φ2mm single-flute end mill to drill 1mm-deep pilot holes (reduces chipping at hole entry).
- Final Drilling: φ4mm single-flute carbide end mill (TiAlN-coated) with G83 peck cycle (Q=2mm).
- Deburring: Use φ5mm chamfer mill (15° edge) to drill 0.3mm-deep chamfers (removes sharp edges without scratching).
Step 2: Equipment & Tools
- Machine: Haas TM-1 3-axis milling center (max spindle speed 10,000r/min).
- Tools: T01 (φ2mm single-flute end mill), T02 (φ4mm single-flute end mill, TiAlN), T03 (φ5mm chamfer mill).
- Cooling: 7-bar compressed air (nozzle mounted to spindle).
Step 3: Programming Snippet (FANUC System)
O0006 (Transparent Acrylic Drilling Program)
G90 G54 G00 X0 Y0 Z20 // Absolute mode, G54, safe height (Z20 avoids scratching)
M03 S10000 // Spindle high speed (preheat tool)
AIR ON // Activate compressed air (machine-specific code; replace with M code if needed)
// 1. Pilot Holes (T01: φ2mm single-flute)
T0101 S11000 M03 // 11,000r/min (high speed for small tool)
G81 X50 Y30 Z-1 R3 F180 // 1mm-deep pilot hole
X50 Y70
X100 Y30
X100 Y70
X150 Y30
X150 Y70
G80
G00 Z10 // Retract to clear chips
// 2. Final Drilling (T02: φ4mm single-flute)
T0202 S8000 M03 // 8,000r/min (balanced speed for φ4mm)
G83 X50 Y30 Z-7 R3 Q2 F220 // Peck: Q2=2mm, Z-7=5mm part + 2mm overcut
X50 Y70
X100 Y30
X100 Y70
X150 Y30
X150 Y70
G80
G00 Z10
// 3. Deburring (T03: φ5mm chamfer mill)
T0303 S6000 M03 // Lower speed to avoid scratching
G82 X50 Y30 Z-0.3 R3 F150 // 0.3mm chamfer (shallow to preserve transparency)
X50 Y70
X100 Y30
X100 Y70
X150 Y30
X150 Y70
G80
// Program End
AIR OFF
G00 X0 Y0 Z50
M05
M30
Step 4: Quality Verification
- Chipping Check: Inspect hole edges with a 10× magnifier—no visible chipping (edge smoothness 0.05mm).
- Transparency Test: Hold sheet against light—no clouding or molten residue in holes.
- Surface Roughness: Ra=0.6μm (measured with contactless roughness tester, avoiding scratches).
4. Common Problems & Solutions for CNC Drilling Acrylic
1. Molten Residue on Tool/Hole Walls
- Cause: Low speed (dwell time >0.5s), insufficient air cooling, dull tool.
- Solution:
-
- Increase speed by 20% (e.g., from 6,000r/min to 7,200r/min for φ5mm).
-
- Upgrade air pressure to 8 bar (ensure nozzle is aimed directly at flutes).
-
- Replace tool if 刃口 has visible wear (polished edge becomes dull).
2. Chipping at Hole Entry/Exit
- Cause: No pilot hole, high axial force, tool point angle too steep (118°).
- Solution:
-
- Drill 0.5×d pilot holes (e.g., φ2mm for φ4mm final hole).
-
- Reduce feed rate by 15% (e.g., from 250mm/min to 212.5mm/min).
-
- Switch to 80° point angle tool (reduces force on acrylic edges).
3. Cloudy Holes (Loss of Transparency)
- Cause: Tool runout >0.003mm (uneven cutting), liquid coolant residue, high heat.
- Solution:
-
- Calibrate tool runout (use precision collet; max 0.002mm).
-
- Use only compressed air (no liquids—clean sheet with isopropyl alcohol if needed).
-
- Reduce speed by 10% if hole walls feel warm to the touch.
4. Tool Breakage (Small Diameter <3mm)
- Cause: Excessive speed (>12,000r/min), feed rate too high, workpiece vibration.
- Solution:
-
- Cap speed at 10,000r/min for φ2mm tools.
-
- Lower feed rate to 150-180mm/min.
-
- Use a vacuum chuck (instead of clamps) to secure thin acrylic (<3mm).
5. Q&A: High-Frequency Questions About CNC Drilling Acrylic
Q1: Can I use a standard twist drill for acrylic (instead of single-flute tools)?
- Short Answer: Only for low-precision parts (e.g., non-transparent brackets).
- Limitations: Twist drills have 2 flutes that trap molten chips; 118° point angles cause severe chipping.
- Alternative: If no single-flute tool is available, polish the twist drill’s flutes with 600-grit sandpaper (reduce friction) and use 50% higher speed than metal drilling.
Q2: How to drill deep holes in acrylic (depth >10×diameter, e.g., φ5mm×60mm)?
- Key Steps:
-
- Use a “stepped single-flute tool” (φ3mm→φ4mm→φ5mm) to reduce cutting force.
-
- Peck drill with Q=1.5mm (smaller increments to avoid heat buildup).
-
- Pause 0.2s after each peck (G04 P200) to cool the tool.
-
- Use a long-reach air nozzle (100mm length) to blow chips out of the deep hole.
Q3: How to avoid scratching transparent acrylic during drilling?
- Protective Measures:
-
- Cover the acrylic sheet with low-tack masking tape (remove after drilling—no residue).
-
- Set Z-safe height to ≥10mm (avoids tool dragging on the sheet).
-
- Use a vacuum chuck with a rubber gasket (no metal clamps that scratch edges).
Final Thought
CNC drilling acrylic is less about “power” and more about “precision cooling and tooling”—acrylic’s low melting point and brittleness demand tools that cut fast, cool quickly, and evacuate chips actively. By prioritizing single-flute carbide tools, high-speed/low-heat parameters, and compressed air cooling, you can achieve transparent, chip-free holes that meet even strict signage or medical device requirements.
Have you struggled with molten residue or chipping when drilling acrylic? Or need guidance for specialized acrylic types (e.g., colored or impact-resistant acrylic)? Share your challenges in the comments—I’ll provide tailored solutions!