When purchasing or processing brass precision turned parts in the electronics, automotive, or plumbing industries, many people get stuck on three key points: “material selection,” “precision control,” and “cost optimization.” Combining 10 years of industry practical experience, below we break down the core logic into easy-to-understand details to help you avoid common pitfalls and select/manufacture brass precision turned parts correctly.
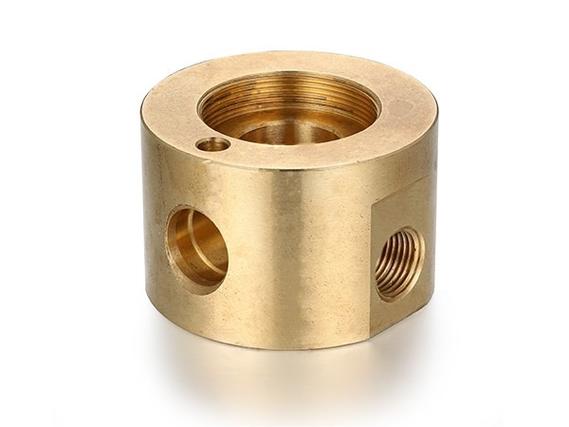
1. How to Select Materials for Brass Precision Turned Parts
You don’t need to guess when choosing materials—just match them to your “application scenario + core needs.” These 3 mainstream models cover over 90% of requirements, and the selection table below makes it even more intuitive:
| Material Model | Core Parameters | Application Scenarios | Reference Cost (RMB/kg) |
|---|---|---|---|
| 360 Free Machining Brass | Cu 61.5%-63.5%, Pb 2.5%-3.7%, compliant with ASTM B16 Standard | Electrical connectors, pipe fittings, automotive sensor pins | 55-65 |
| 385 Leaded Brass | Cu 60%-63%, Pb 1.3%-2.3%, corrosion resistance 20% higher than 360 Brass | Outdoor street lamp terminals, bathroom shower head fittings, coffee machine water pipes | 65-75 |
| 464 Naval Brass | Cu 60%, Zn 39%, Sn 1%, salt spray resistance compliant with ISO 9227 Standard | Marine pipelines, coastal monitoring equipment, chemical industry connectors | 85-95 |
1.1 360 Brass: Top Choice for Cost-Effectiveness
It’s the “all-purpose model” in the industry—when mass-producing electrical connectors, the CNC spindle speed can reach 2000-5000 rpm without tool sticking, and even 0.5mm small holes and 0.2mm threads can be formed in one pass, with tolerance stably controlled at ±0.01mm. More importantly, its raw material cost is 10%-15% lower than other precision brass, making it cost-effective for both small-batch trial production and large-scale mass production.
The only note: Its corrosion resistance is average, so do not use it in scenarios with long-term exposure to strong acids/alkalis (e.g., chemical storage tank fittings).
The only note: Its corrosion resistance is average, so do not use it in scenarios with long-term exposure to strong acids/alkalis (e.g., chemical storage tank fittings).
1.2 385 Brass: Must-Choice for Moist Environments
It has an extra “moisture-resistant bonus” compared to 360 Brass—with a small amount of zinc added, it is less likely to form patina in humid environments. For example, a shower head fitting installed in a bathroom won’t leak due to rust even after 3-5 years of use. No major parameter adjustments are needed during processing; just reduce the CNC feed rate by 5%-10% (to 0.08-0.2 mm/rev), and the precision can match that of 360 Brass.
1.3 464 Brass: Specialized for Extreme Environments
As its name “Naval Brass” suggests, it is highly durable—the 1% tin content allows it to resist seawater and salt spray erosion. When used as a marine pipeline fitting, it won’t rust even after a 48-hour salt spray test (5% NaCl solution). However, during processing, you need to switch to a tungsten carbide coated tool (e.g., TiAlN coating, hardness above HRC 65) and lower the speed (1500-2500 rpm); otherwise, the tool tip will wear too quickly, increasing costs instead.
Supplement: How to Use Lead-Free Brass
If exporting to the EU or the US, lead-free brass (e.g., C69300, lead content ≤0.1%, compliant with RoHS Standard) is required. It uses bismuth and selenium instead of lead, with processing feel similar to 360 Brass, but the cost is 20%-30% higher. It is suitable for parts that come into contact with food or the human body, such as water purifier fittings and medical electronic components.
2. 5-Step Processing for Brass Precision Turned Parts
From brass bar to finished product, each step has a “precision red line”—a wrong step can lead to defective products. We’ll explain the practical details thoroughly:
2.1 Material Preparation: Cut to Exact Length, Remove Burrs
First, select a brass bar (diameters range from 5mm to 50mm) based on the part size. For example, to make a 10mm-long part, you need to leave 1mm of machining allowance and cut the bar into 11mm blanks.
A key point here: Be sure to use a sawing machine with an “automatic material cutting device” to ensure the flatness of the cut surface (tolerance ≤0.02mm)—if the cut surface is skewed, the dimensions will definitely deviate when clamped on the machine for subsequent processing.
A key point here: Be sure to use a sawing machine with an “automatic material cutting device” to ensure the flatness of the cut surface (tolerance ≤0.02mm)—if the cut surface is skewed, the dimensions will definitely deviate when clamped on the machine for subsequent processing.
2.2 Rough Machining: Remove Allowance, Ensure Efficiency
A CNC lathe like the CK6140 with a regular high-speed steel tool (e.g., W18Cr4V) works. Set the spindle speed to 1500-3000 rpm, feed rate to 0.1-0.3 mm/rev, and single-cut depth not exceeding 2mm—otherwise, the brass bar will heat up and deform, making it difficult to correct the dimensions in subsequent finishing. There’s no need to pursue extreme precision in this step; just shape the “rough outline” to reduce the workload for later processes.
2.3 Finishing: Refine Details, Control Tolerance
This step is the “key battle” for precision—switch to a tungsten carbide coated tool and refine the shape according to the drawing: drill small holes, turn threads, cut grooves, and monitor parameters at each step.
Two rigid standards must be met: First, the dimensional tolerance should be controlled between ±0.01mm and ±0.05mm (easily checked with a micrometer); second, the surface roughness should be Ra ≤1.6μm (smooth to the touch without scratches, to avoid dirt accumulation).
For example, when processing an M3 thread, don’t try to form it in one pass—3 passes are more stable: first cut to φ2.8mm, second to φ2.6mm, third to φ2.45mm, ensuring a neat thread profile.
2.4 Deburring & Cleaning: Make Parts “Usable & Clean”
The edges of processed parts will have small burrs. If not removed, they may cause jamming during installation and even scratch hands. Use a 40kHz ultrasonic cleaner to vibrate for 3-5 minutes, or gently polish with 600-grit sandpaper.
After that, soak the parts in a neutral cleaning agent (water-based cleaner with pH 7-8) for 10 minutes to remove residual cutting fluid from processing—otherwise, the residual fluid will cause the parts to oxidize and rust, especially for parts installed in electronic equipment, which must be free of rust.
After that, soak the parts in a neutral cleaning agent (water-based cleaner with pH 7-8) for 10 minutes to remove residual cutting fluid from processing—otherwise, the residual fluid will cause the parts to oxidize and rust, especially for parts installed in electronic equipment, which must be free of rust.
2.5 Inspection: Screen Out Defective Products
The final step must be “rigorous”—each part must undergo inspection: use a caliper to measure length and diameter; use a projector to check if threads are skewed and if hole positions are correct; for corrosion-resistant parts, put them in a salt spray tester to simulate the environment.
There’s an unwritten rule in the industry: The pass rate must be ≥99.5%. Defective parts (e.g., out-of-tolerance dimensions, surface scratches) should either be reworked or scrapped directly—even a tiny deviation in precision parts can cause major problems when installed in equipment.
There’s an unwritten rule in the industry: The pass rate must be ≥99.5%. Defective parts (e.g., out-of-tolerance dimensions, surface scratches) should either be reworked or scrapped directly—even a tiny deviation in precision parts can cause major problems when installed in equipment.
3. Common Issues: How to Fix Pitfalls in Practice
3.1 Why Is the Machining Precision of 360 Brass Always Substandard?
It’s mostly due to mismatched tools and speed—when using a regular high-speed steel tool, if the speed exceeds 5000 rpm, the tool tip wears easily, leading to deviated cutting dimensions.
The solution is simple: Switch to a tungsten carbide coated tool, control the speed at 2500-3500 rpm, and adjust the feed rate to 0.15-0.2 mm/rev—precision will stabilize immediately.
The solution is simple: Switch to a tungsten carbide coated tool, control the speed at 2500-3500 rpm, and adjust the feed rate to 0.15-0.2 mm/rev—precision will stabilize immediately.
3.2 Why Do Parts Rust Soon After Processing?
Either the cutting fluid wasn’t cleaned thoroughly, or the storage environment is too humid (humidity >60%).
Treatment method: Dry the parts with compressed air after cleaning and store them in a dry, well-ventilated area (humidity ≤50%); for parts used outdoors, passivation treatment (e.g., dipping in a chromate solution) can be done to further improve rust resistance.
Treatment method: Dry the parts with compressed air after cleaning and store them in a dry, well-ventilated area (humidity ≤50%); for parts used outdoors, passivation treatment (e.g., dipping in a chromate solution) can be done to further improve rust resistance.
3.3 How to Reduce Machining Costs?
For mass production, choose an “automatic feeding CNC lathe” (e.g., ZK3830 model)—one person can operate 3 machines, reducing labor costs by 60% directly. Additionally, don’t waste leftover materials—collect short bars ≤3mm to make small parts like gaskets and small pins, reducing the scrap rate from 5% to below 2%.
4. Consultation for Selection & Processing
If you need custom brass precision turned parts (e.g., electrical connectors, marine pipeline fittings), you can:
- Send the part drawing (clearly mark dimensions, tolerances, and material requirements) to get a free quote and production cycle;
- Consult industry standards (e.g., ISO 286-2 Tolerance Standard, ASTM B16 Brass Material Standard) to ensure product compliance;
- View practical cases (e.g., mass machining cases of automotive sensor parts, corrosion resistance test reports of outdoor terminals) for greater peace of mind.


