Bro, Let Me Explain This Game-Changer!
CNC machining of auto parts is like the ultimate precision manufacturing superpower! We use computer numerical control technology to make all those tiny, critical parts that make your car run smoothly.
Trust me, with how crazy the automotive industry is getting these days, we need parts that are precise, high-quality, and super complex. CNC machining is the only way to keep up!
I’ve seen what happens when you use cheap parts—total disaster! That’s why CNC machining is so important for making parts that actually work and last.
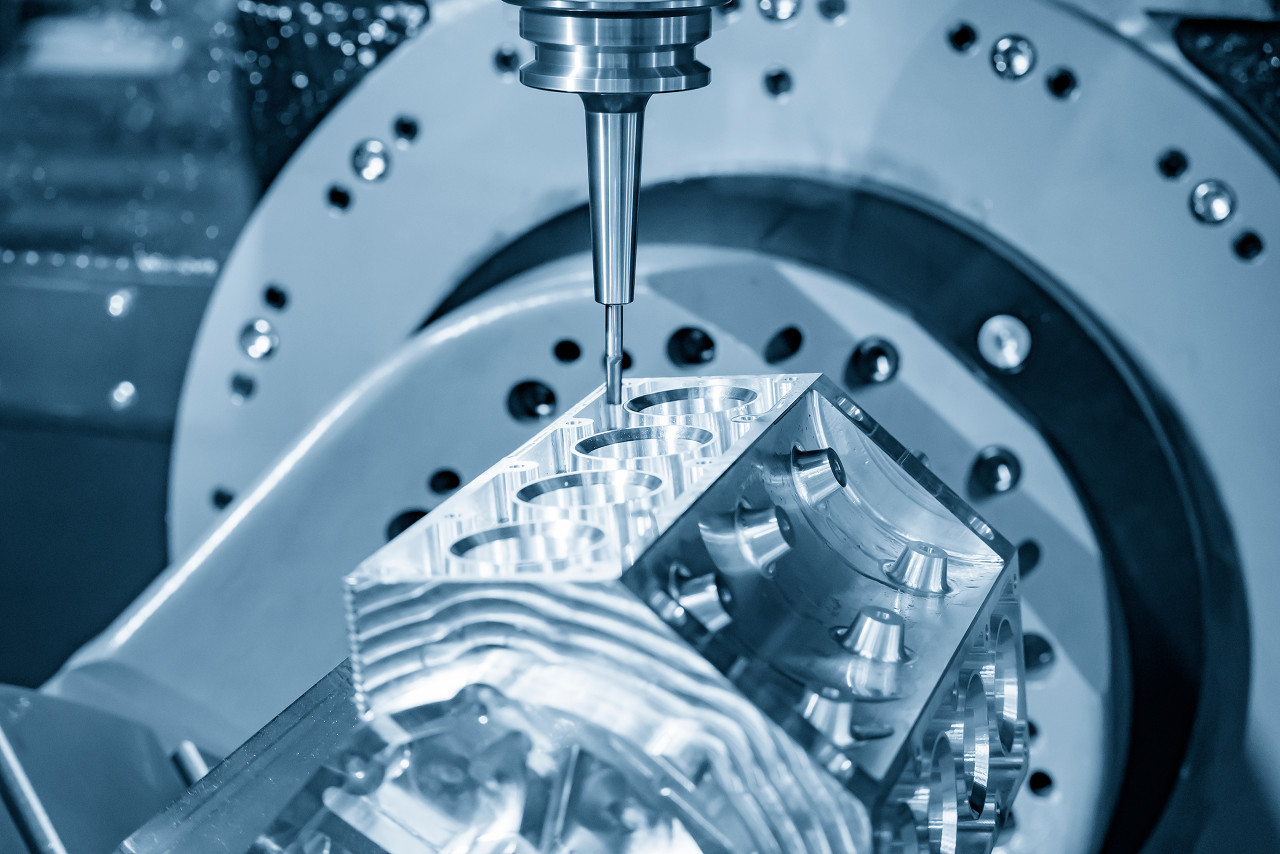
Check out this 5-axis CNC machine carving an aluminum engine block—this is next-level precision!
How to Customize Your Auto Parts (My Pro Tips)
1. Figure Out Exactly What You Need
First things first—you gotta know what you want! Talk to the car manufacturers or parts suppliers to nail down the function, specs, performance requirements, and how many you need.
- Be super specific about performance requirements
- Don’t forget to mention quantity (this affects cost big time!)
- Think about how the part will work with other components
- Consider environmental factors (temperature, humidity, etc.)
2. Design Like a Pro
Get a real engineer to design the parts using CAD software. They’ll think about how everything fits together and make sure it actually works.
- Use professional CAD software (SolidWorks, AutoCAD, etc.)
- Consider assembly relationships and mechanical properties
- Design for manufacturability (DFM is your friend!)
- Add tolerances that make sense (don’t overdo it!)
3. Pick the Right CNC Shop
Not all CNC shops are created equal! You gotta check their equipment, technical skills, quality control, and whether they can actually deliver on time.
- Look at their machine capabilities (5-axis is better for complex parts)
- Check their quality control systems (ISO certifications are a must)
- Ask about their delivery times and flexibility
- Get references from other customers
4. Give Them All the Docs
Don’t make them guess! Give them detailed design drawings, process requirements, and quality standards.
- Provide 2D and 3D drawings
- Include process requirements and quality standards
- Specify material requirements and surface finishes
- Note any special testing requirements
Pro Tip from the Shop Floor:
Always prototype first! Making a small batch of parts to test before full production will save you tons of time and money. I’ve seen so many people skip this step and regret it later!
Materials That Matter (I’ve Used Them All!)
Steel (The Tough Guy)
Steel is the go-to for engine parts and chassis components. It’s strong as hell and can take a beating!
- Carbon steel: Cheap and strong for basic parts
- Alloy steel: Better strength and wear resistance
- Perfect for engine components and chassis parts
- High strength and excellent wear resistance
Test Data (For Reference Only):
Tensile strength: 400-1,200 MPa depending on grade
Hardness: 150-300 HB (Brinell)
Density: 7.87 g/cm³
Aluminum Alloy (The Lightweight Champion)
Aluminum is where it’s at for body structures and engine blocks. Lightweight but still strong!
- Widely used in body structures and engine blocks
- Lightweight with high strength-to-weight ratio
- Excellent thermal conductivity
- Corrosion resistant (especially with proper treatment)
Test Data (For Reference Only):
Tensile strength: 200-500 MPa depending on alloy
Hardness: 60-150 HB (Brinell)
Density: 2.70 g/cm³ (about 1/3 the weight of steel!)
Engineering Plastics (The Smart Choice)
Plastics aren’t just for toys! Modern engineering plastics are tough enough for interior parts and electrical components.
- Nylon: Strong and self-lubricating
- Polycarbonate: Transparent and impact resistant
- Great for interior parts and electrical component shells
- Lightweight and corrosion resistant
Test Data (For Reference Only):
Tensile strength: 50-150 MPa
Hardness: 80-120 HRR (Rockwell R)
Density: 1.0-1.5 g/cm³
Cast Iron (The Old Reliable)
Cast iron might be old school, but it’s still perfect for brake systems and transmission cases.
-
- Commonly used in brake system components
- Great shock absorption and wear resistance
Good vibration damping properties
- Cost-effective for high-volume production
Test Data (For Reference Only):
Tensile strength: 150-400 MPa
Hardness: 180-250 HB (Brinell)
Density: 7.20 g/cm³
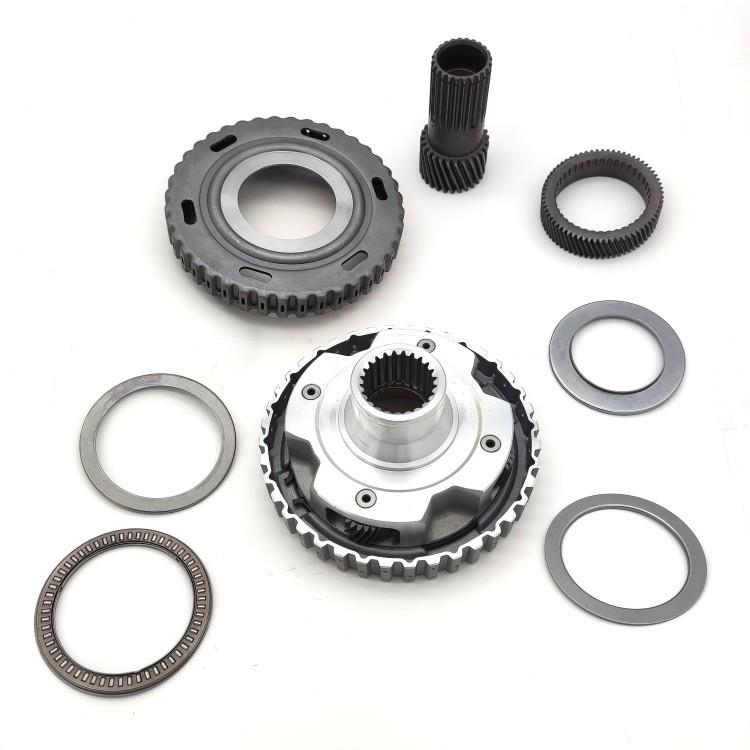
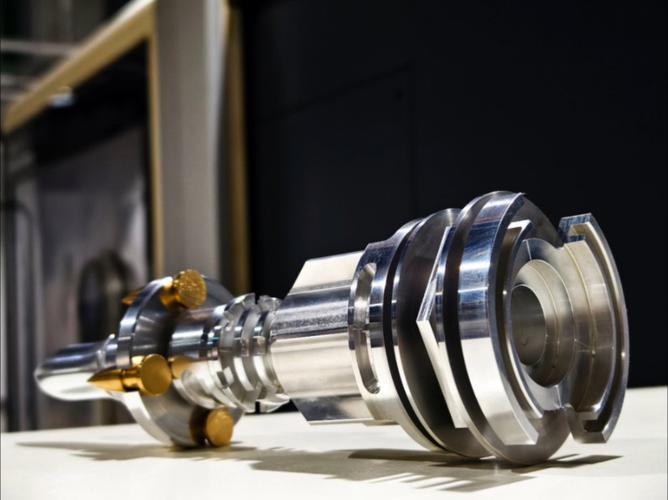
These CNC machined transmission components show the precision possible with modern manufacturing!
CNC Machining Process (Step-by-Step Guide)
1. Programming (The Brainwork)
This is where we turn your design into machine instructions using CAM software. It’s like teaching the machine exactly what to do!
- Use CAM software to generate CNC programs
- Determine tool paths, cutting parameters, and speeds
- Optimize for efficiency and quality
- Simulate the process to catch errors before cutting
Common Software:
Mastercam, SolidWorks CAM, Fusion 360
G-code programming language
2. Raw Material Prep (The Setup)
We start with the right material and prepare it for machining—cutting, forging, or casting it into blanks.
- Select materials that meet your requirements
- Perform preprocessing like cutting, forging, or casting
- Create blanks that are close to the final shape
- Inspect materials for defects before machining
Material Waste:
Typical material removal: 30-70% depending on part complexity
We recycle as much scrap as possible!
3. Clamping & Positioning (The Hold Down)
We gotta hold that material tight! We use precision fixtures to make sure everything stays in place during machining.
- Fix the blank on the CNC machine tool
- Ensure stability and accuracy during machining
- Use precision fixtures and workholding devices
- Verify positioning with measuring tools
4. Rough Machining (The Big Chop)
This is where we remove most of the material to get close to the final shape. It’s like carving a statue from a block of stone!
- Remove most of the allowance
- Initially form the approximate shape of the part
- Use high feed rates and deep cuts
- Leave enough material for finishing operations
Cutting Parameters (For Reference Only):
Cutting speed: 100-300 m/min for aluminum
Feed rate: 0.1-0.5 mm/rev
Depth of cut: 2-10 mm
5. Semi-Finish Machining (The Tune-Up)
We get closer to the final shape and improve dimensional accuracy. This is where things start looking like real parts!
- Further improve shape accuracy
- Enhance dimensional accuracy
- Prepare for finish machining
- Remove most of the remaining material
6. Finish Machining (The Final Touch)
This is where we get that perfect surface finish and exact dimensions. No more material to remove—this is it!
- Achieve final design size
- Meet surface quality requirements
- Use high-speed finishing tools
- Inspect critical dimensions
Surface Finish Standards:
Ra 0.8-3.2 μm for general parts
Ra 0.2-0.8 μm for precision parts
Ra 0.05-0.2 μm for ultra-precision parts
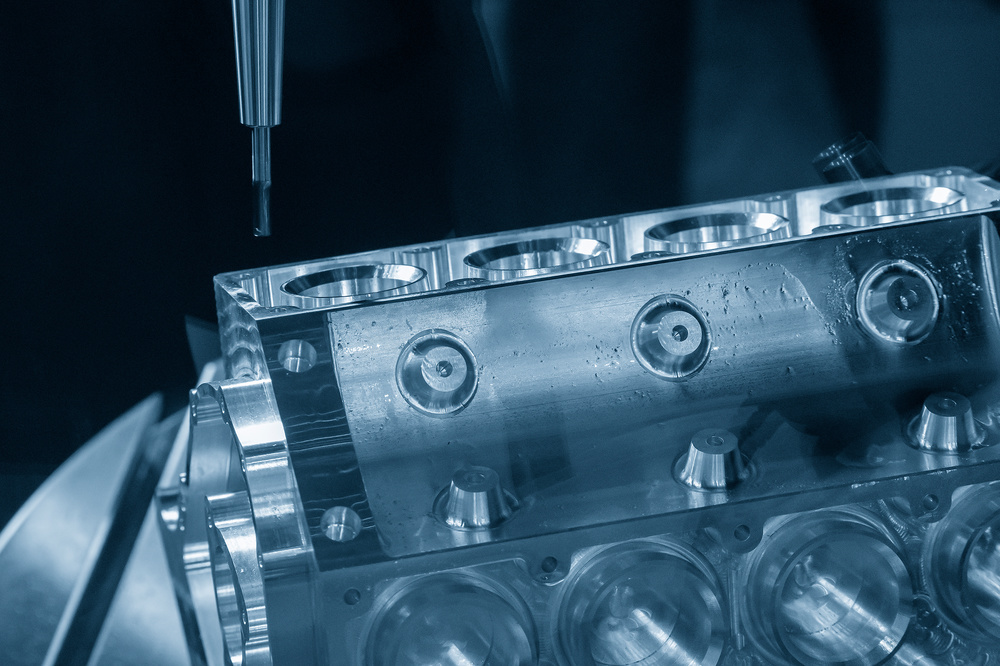
Closeup of CNC machining an aluminum engine block—look at that precision!
Quality Control (We Don’t Skip This Step!)
Inspection Equipment
We use all kinds of fancy equipment to make sure your parts are perfect!
- Coordinate Measuring Machines (CMM): For 3D measurements
- Hardness testers: Check material hardness
- Surface roughness testers: Measure surface finish
- Optical comparators: Check part geometry
Inspection Items
We check everything—size, shape, hardness, you name it!
- Dimensional accuracy: Check all critical dimensions
- Geometric tolerances: Flatness, roundness, etc.
- Surface quality: No scratches or defects
- Material properties: Hardness, strength, etc.
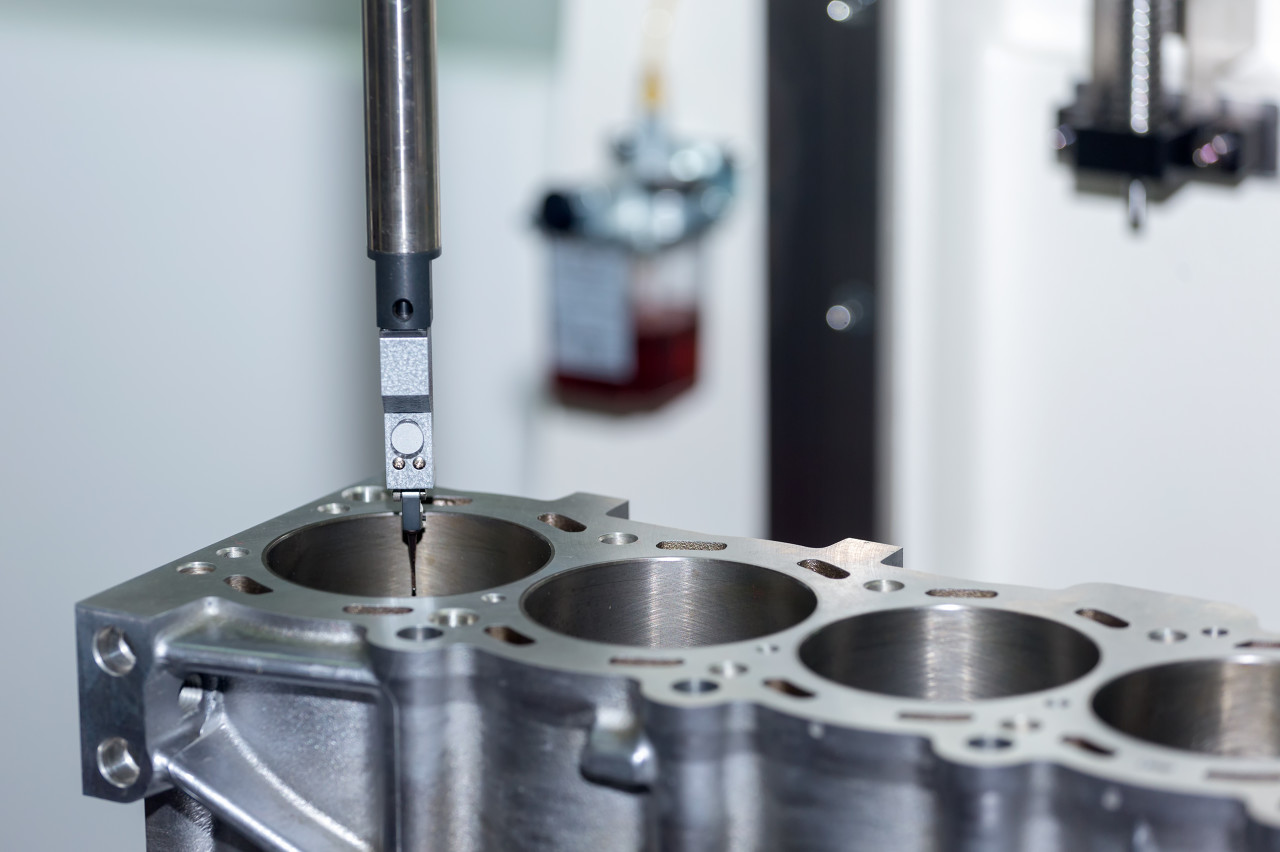
This CMM (Coordinate Measuring Machine) is checking the dimensions of an aluminum automotive part—precision at its best!
Quality Standards We Follow
ISO 9001:2015
Quality management systems
IATF 16949:2016
Automotive quality management
ISO 13485:2016
Medical device quality
AS9100D
Aerospace quality standards
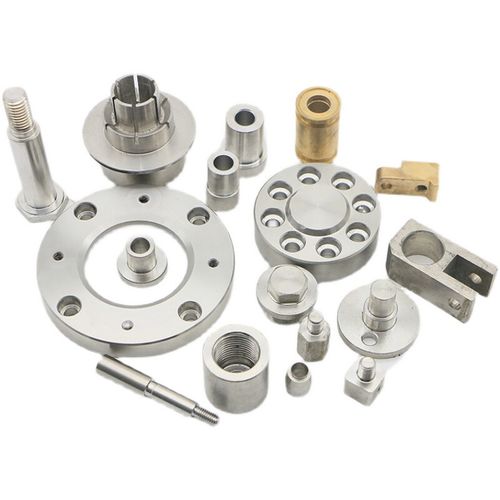
Application Cases (What We Actually Make)
Engine Blocks & Cylinder Heads
These are the heart of your engine! We machine these with super tight tolerances to make sure everything fits perfectly.
- High-precision machining of cylinder bores
- Valve seat rings and other critical parts
- Tolerances as tight as ±0.005 mm
- Surface finishes down to Ra 0.4 μm
Transmission Gears & Shafts
These parts have to handle tons of torque and last forever. Complex tooth shapes require precision CNC machining.
- Complex tooth shapes with high precision
- High-precision shaft parts
- Hardness up to 60 HRC after heat treatment
- Profile accuracy of ±0.01 mm
Body Panel Molds
These molds are used to stamp door panels, engine covers, and other body parts. They need to be perfect!
- High-precision CNC machining
- Ensure quality of molds and stamped parts
- Surface finish down to Ra 0.2 μm
- Durable enough for millions of stamping cycles
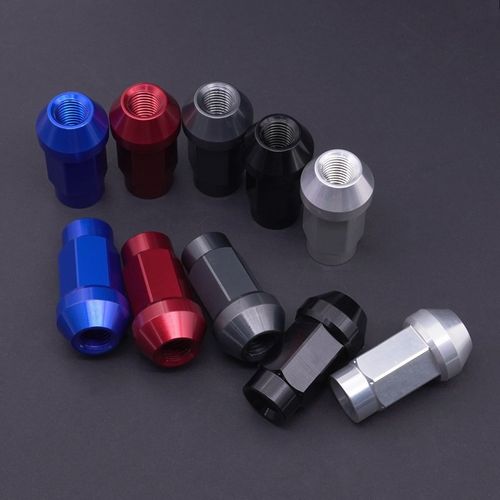
Brake System Components
These parts literally save lives! We machine brake calipers, rotors, and other critical brake components.
- High-strength materials for safety
- Precision machining for proper fit
- Resistant to heat and wear
- 100% inspected for quality
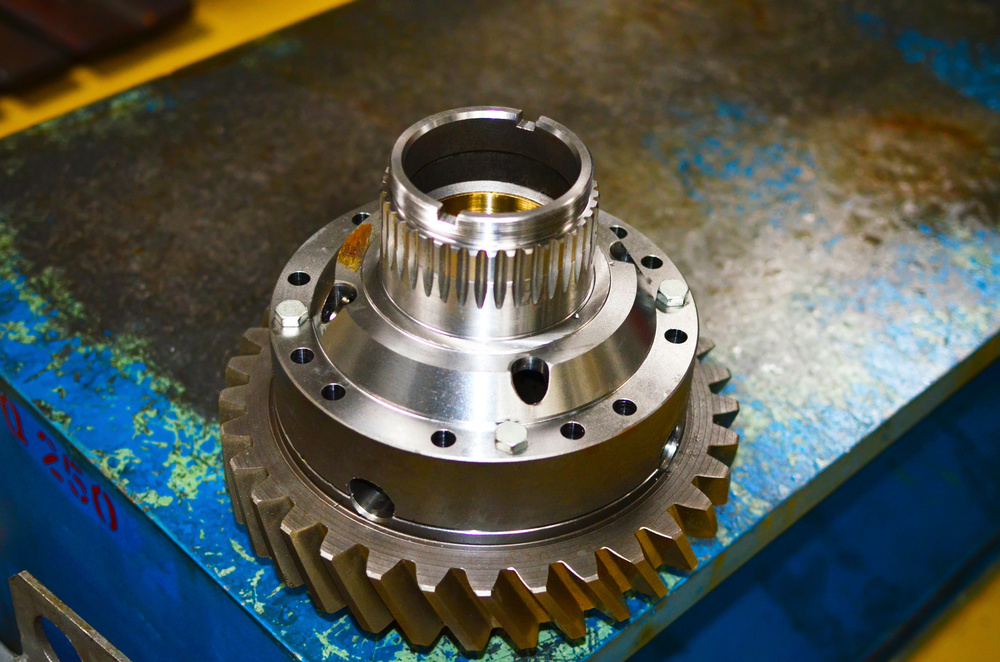
This CNC machined automotive gear shows the precision possible with modern manufacturing—look at those teeth!
Common Problems (I’ve Seen Them All!)
Dimensional Tolerance Exceeded
This is the worst! Parts don’t fit, everything is messed up. Usually caused by worn machines or bad tooling.
- Causes: Machine tool accuracy decrease, tool wear
- Also caused by unreasonable processing technology
- Solution: Regular machine maintenance and tool replacement
- Prevention: Process optimization and quality checks
Surface Quality Defects
Scratches, chatter marks, or rough surfaces make parts look bad and can cause performance issues.
- Scratches, chatter marks, substandard roughness
- Affect appearance and performance of parts
- Causes: Dull tools, improper cutting parameters
- Solution: Sharpen tools, optimize cutting parameters
Deformation Problems
Parts can deform during machining or heat treatment, which ruins everything!
- Happens during machining or after heat treatment
- Affects assembly and use
- Causes: Residual stresses, uneven heating
- Solution: Stress relief, controlled cooling
Cost Control Challenges
High-precision equipment and complex processes make CNC machining expensive. We need to optimize everything!
- High-precision equipment is costly
- Complex processes increase time and cost
- Solution: Optimize processes, improve efficiency
- Benefit: Reduce costs while maintaining quality
Important Notice
All technical data and recommendations above are for reference only. Always consult with experienced engineers and test with actual production conditions before full production runs.
FAQs (You’re Probably Wondering These Things)
Q: How long does CNC machining take for auto parts?
A: It depends on how complex the part is! Simple parts might take a few hours, while complex engine blocks can take days. Always ask for a quote with lead times before starting a project.
Q: What’s the difference between 3-axis and 5-axis CNC machining?
A: 3-axis machines can move in X, Y, and Z directions, while 5-axis can also tilt and rotate. 5-axis is better for complex parts like engine blocks where you need to machine from multiple angles. It’s more expensive but way more versatile!
Q: Can you machine parts from my own design?
A: Absolutely! Just send us your CAD files (STEP or IGES format preferred) and we can work from there. If you don’t have CAD files, we can help you create them from sketches or physical samples.
Q: How do I choose the right material for my part?
A: Think about what the part needs to do! If it needs to be strong, use steel. If it needs to be light, use aluminum. If it needs to insulate electricity, use plastic. We can help you choose based on your specific requirements.
Q: What tolerances can you hold with CNC machining?
A: We can hold tolerances as tight as ±0.002 mm with our high-precision machines! Most auto parts require tolerances between ±0.01 mm and ±0.05 mm. The tighter the tolerance, the more expensive it gets, so don’t overspec!
Ready to Get Your Auto Parts Machined?
Don’t trust your critical auto parts to just anyone. Get high-precision CNC machining from experts who know what they’re doing!