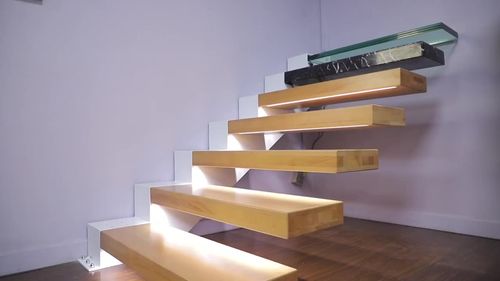
Q1: What Exactly Are White Oak Stair Treads, and Why Choose White Oak Over Other Woods?
|
Feature
|
White Oak Stair Treads
|
Hard Maple Treads
|
Pine Treads
|
Walnut Treads
|
|
Janka Hardness (Lb)¹
|
1,360 (excellent wear resistance)
|
1,450 (slightly harder, but brittle)
|
690 (soft, prone to dents)
|
1,010 (moderate, scratches easily)
|
|
Moisture Resistance
|
Excellent (natural tyloses block water)²
|
Moderate (absorbs spills, stains)
|
Low (warps in humid areas)
|
Good (but less than white oak)
|
|
Grain Stability
|
Low shrinkage (8–12% moisture range)
|
High shrinkage (prone to cracking)
|
Very high shrinkage (bows easily)
|
Moderate shrinkage (needs careful sealing)
|
|
Weight Capacity³
|
500+ kg/sq.m (supports heavy foot traffic)
|
550+ kg/sq.m (but cracks under impact)
|
300+ kg/sq.m (not for commercial use)
|
400+ kg/sq.m (limited to residential)
|
|
Cost (Per Sq.M)
|
(120–)180 (mid-range, high value)
|
(150–)220 (expensive, brittle)
|
(40–)70 (budget, short lifespan)
|
(200–)300 (luxury, low durability)
|
Q2: What Are the Critical Technical Specifications for White Oak Stair Treads?
- Thickness:
-
- Residential stairs: Minimum 38mm (1.5in) for solid white oak—thinner treads (<32mm) flex under weight, leading to cracks.
-
- Commercial stairs (e.g., offices, apartments): Minimum 50mm (2in) to handle 100+ daily users.
-
- Why? White oak’s density requires sufficient thickness to distribute weight—38mm treads can support 500kg/sq.m without bending.
- Width:
-
- Match stairway width: Typically 800–1,200mm for residential, 1,100–1,500mm for commercial.
-
- Edge treatment: Must have a 10–15mm radius (rounded edge) on the front and sides—sharp edges cause trips and wear faster.
- Moisture Content:
-
- Critical range: 8–12% (kiln-dried white oak)—never use treads with moisture >15% (will shrink and gap post-installation) or <7% (will absorb humidity and swell).
-
- How to verify? Use a pin-type moisture meter (insert into the wood’s edge)—avoid “surface-only” measurements (they’re inaccurate).
- Grain Orientation:
-
- Must be “longitudinal grain” (grain runs parallel to the tread’s length)—cross-grain treads split under weight (e.g., a 1,200mm tread with cross-grain may crack after 6 months of use).
-
- Visual check: Look for wood lines running along the tread’s length (not across it)—reputable suppliers mark this on packaging.
Q3: What Is the Manufacturing Process for Quality White Oak Stair Treads?
- Lumber Selection:
-
- Source: Only select “FAS-grade white oak” (Firsts and Seconds)—this grade has <10% knots or defects (knots weaken treads).
-
- Reject: Lumber with “checks” (surface cracks) or “wane” (missing wood on edges)—these expand into full cracks after installation.
- Kiln Drying:
-
- Process: Dry lumber in a controlled kiln (temperature 40–60°C, humidity 30–40%) for 10–14 days to reach 8–12% moisture.
-
- Critical Control: Avoid “fast drying” (high heat, low humidity)—this causes “case hardening” (surface dries faster than core, leading to internal stress and cracking).
- Rough Cutting:
-
- Cut lumber to “oversized” dimensions (e.g., 40mm thick for a 38mm final tread, 1,220mm long for a 1,200mm tread)—leaves room for sanding and trimming.
-
- Use a “rip saw” (cuts along grain) to maintain grain integrity—cross-cutting (against grain) weakens the tread.
- Edge Profiling:
-
- Shape front/sides with a router to add the 10–15mm radius (per IBC safety standards).
-
- For “bullnose treads” (curved front edge), use a CNC router (±0.5mm precision) to ensure consistent curvature—manual shaping leads to uneven edges that catch shoes.
- Sanding:
-
- Sequence: Start with 120-grit sandpaper (removes saw marks), progress to 180-grit (smooths surface), finish with 240-grit (prepares for finish).
-
- Rule: Sand parallel to grain—cross-sanding creates “scratch lines” that trap dirt and wear the finish faster.
- Surface Finishing:
-
- Indoor treads: Apply 2 coats of water-based polyurethane (low VOC, fast-drying) + 1 coat of paste wax (adds slip resistance).
-
- Outdoor/ humid areas (e.g., basement stairs): Use oil-based polyurethane (more moisture-resistant) + a UV inhibitor (prevents yellowing).
-
- Drying Time: Allow 4–6 hours between coats—rushing leads to “tacky” finish that peels.
Q4: What Are the Technical Standards for Installing White Oak Stair Treads?
- Support Structure:
-
- Every tread needs at least 2 support points (e.g., stair stringers, joists) spaced ≤600mm apart. For 1,200mm wide treads, add a third support in the center—prevents flexing.
-
- Support must be “solid wood” (e.g., 2×10 stringers) or steel brackets—never attach treads to drywall or particleboard (fails under weight).
- Fastener Selection:
-
- Use 8–10mm diameter wood screws (not nails)—screws have better holding power (nails loosen over time).
-
- For “hidden fasteners” (no visible screws), use “tread clips” (metal brackets that attach to stringers)—ideal for luxury designs, but ensure clips hold ≥50kg per tread.
-
- Depth: Drive screws 25–30mm into the support (e.g., 50mm screws for 38mm treads)—too shallow = loose treads; too deep = splits the oak.
- Expansion Gap reserve:
-
- Between treads: Leave 2–3mm gap (vertical) to accommodate wood shrinkage/swelling (white oak expands 1–2% in humid months).
-
- Between tread and wall: Leave 1mm gap—prevents “cupping” (tread edges lifting) when wood absorbs moisture.
- Alignment & Leveling:
-
- Use a 4ft level to ensure each tread is “level within ±1mm” (side-to-side and front-to-back)—unlevel treads cause trips and uneven wear.
-
- For curved stairs: Match tread curvature to the stair’s radius (e.g., 1.2m radius stairs need treads cut to the same radius)—use a template to avoid misalignment.
- Adhesive (Optional but Recommended):
-
- Apply a “wood-to-wood construction adhesive” (e.g., Titebond III) to the support before placing the tread—adds 30% more holding power and reduces squeaks.
-
- Note: Adhesive is not a replacement for screws—use both for maximum safety.
Q5: How to Maintain White Oak Stair Treads to Prevent Wear, Stains, and Warping?
- Daily/ Weekly Cleaning:
-
- Dry cleaning: Use a microfiber mop to remove dust and debris—avoid brooms (they scratch the finish).
-
- Spill cleanup: Blot spills (wine, coffee, water) immediately with a dry cloth—never wipe (spreads liquid into grain). For sticky spills (soda, syrup), use a damp cloth with mild soap (e.g., dish soap diluted 1:10 with water), then dry immediately.
- Moisture Control:
-
- Indoor humidity: Keep levels 30–50% (use a dehumidifier in basements, humidifier in dry winters)—extremes (<20% or >60%) cause shrinkage or swelling.
-
- Outdoor treads: Install a overhang (≥500mm) to keep rain off—standing water seeps into grain and causes rot (even white oak needs protection).
- Periodic Finish Maintenance:
-
- Residential treads: Reapply paste wax every 6 months (buff with a lint-free cloth)—restores slip resistance and adds a protective layer.
-
- Commercial treads: Sand lightly with 240-grit sandpaper and reapply 1 coat of polyurethane every 1–2 years—covers wear marks and maintains moisture resistance.
- Repairing Common Issues:
-
- Minor Dents: Place a damp cloth over the dent, apply a hot iron (low heat) for 10–15 seconds—wood swells to fill the dent. Sand lightly and re-wax.
-
- Stains (e.g., water rings): Mix equal parts baking soda and water into a paste, gently rub on the stain (parallel to grain), then wipe clean. For dark stains, use a wood stain remover (test on a hidden edge first—avoids discoloration).
-
- Loose Treads: Tighten loose screws (replace stripped screws with longer ones, 5–10mm longer than original) and add a bead of construction adhesive under the tread—eliminates squeaks and movement.
Q6: What Are the Most Common Mistakes to Avoid With White Oak Stair Treads?
- Mistake 1: Using “Green” (Unkiln-Dried) White Oak
-
- Issue: Green oak has 20–30% moisture—dries post-installation, shrinking 5–8% and creating gaps between treads or cupping (edges lifting).
-
- Fix: Only buy kiln-dried white oak (ask for a moisture test certificate from the supplier). If you accidentally use green oak, let it acclimate in the installation space for 7–10 days before cutting.
- Mistake 2: Installing Treads Without Expansion Gaps
-
- Issue: No gaps = oak swells in humidity, pushing against walls or adjacent treads—causes treads to crack or bow.
-
- Fix: If gaps are missing, use a circular saw to trim 1–2mm from the tread’s edge (only if wood is not yet bowed). For new installs, always measure and mark gaps before fastening.
- Mistake 3: Using Nails Instead of Screws
-
- Issue: Nails loosen over time (white oak’s density pushes nails out) — leads to squeaky, unstable treads.
-
- Fix: Remove nails and replace with 8mm wood screws (drive at a 45° angle to avoid splitting). For hidden fasteners, switch to tread clips rated for white oak’s weight.
- Mistake 4: Over-Sanding or Sanding Against Grain
-
- Issue: Over-sanding thins treads below the 38mm minimum (reduces weight capacity); cross-sanding creates scratches that trap dirt and wear the finish.
-
- Fix: For over-sanded treads, add a 6mm thick white oak veneer (glued and screwed) to restore thickness. For cross-sand scratches, sand again with 240-grit along the grain, then reapply finish.
Final Thoughts: White Oak Stair Treads—Invest in Quality, Reap Longevity
- Prioritize FAS-grade, kiln-dried white oak (8–12% moisture).
- Follow IBC installation specs (support spacing, expansion gaps, fasteners).
- Clean spills immediately and maintain 30–50% humidity.

