Wooden door sills (those wooden strips at the bottom of your door) might seem small, but they’re super important—they keep wind, water, and dust out, and make it easy to step between rooms (no tripping over uneven floors!). But “off-the-shelf” sills (the ones you buy in stores) often don’t fit: maybe your door opening is weirdly wide, or you want it to match your floor wood exactly. That’s where custom wooden door sills come in.
Below, I answer all the questions people actually ask about custom wood sills—no fancy terms, just straight talk about what works, what doesn’t, and how to get it right.
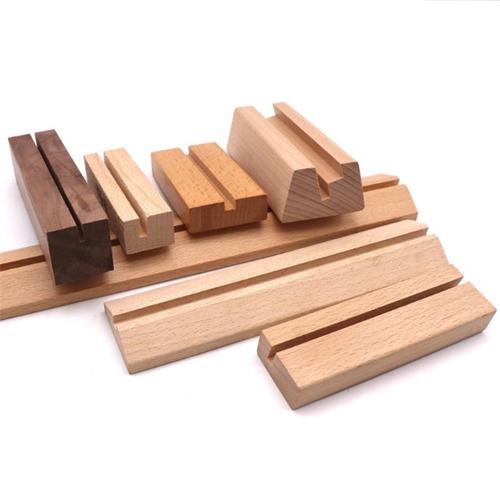
Q1: First, What Even Is a “Custom Wooden Door Sill”? When Do I Need One Instead of a Ready-Made One?
Short Answer: A custom wooden door sill is just a wood strip made exactly for your door: fits your opening’s width/thickness, matches your floor’s wood/style, and fixes problems ready-made sills can’t. You need it when ready-made ones are too big/small, or don’t match your space.
Why Custom Beats Ready-Made (In Plain Terms):
Ready-made sills are “one-size-fits-most”—usually 80cm wide, 5cm thick, and made of cheap pine. But they fail in 3 common cases:
- Your door opening is odd-sized (e.g., old house doors that are 95cm wide, or new rooms with 12cm thick walls).
- You want it to match your floor (e.g., your floor is white oak—ready-made sills are pine, which looks weird next to it).
- Your door is in a tricky spot (e.g., bathroom doorway where water splashes—need a sill that’s extra waterproof, not the flimsy ready-made kind).
Example: My neighbor got a ready-made sill for their bathroom door—was too short (their opening is 90cm, sill was 80cm), so they had to glue two pieces together. 3 months later, it split from the water—total waste. A custom one would’ve fit perfectly and used waterproof wood.
Q2: What Kind of Wood Should I Pick for a Custom Door Sill? I Don’t Want It to Rot or Break!
Short Answer: Pick wood based on where the sill is (wet vs. dry) and how much it gets stepped on. Top picks:
- Wet spots (bathroom, kitchen, entryway): White oak (super waterproof, hard to scratch).
- Dry spots (bedroom, living room): Pine (cheap, matches light floors) or walnut (fancy, matches dark floors).
- Super high-traffic (entryway with kids/pets): White oak or ash (tough, won’t dent easily).
No-Jargon Wood Breakdown:
|
Wood Type
|
Best For (Where?)
|
Pros (Why It’s Good)
|
Cons (What to Watch For)
|
|
White Oak
|
Bathroom, kitchen, entryway
|
Doesn’t soak up water; hard to scratch
|
A bit pricier (but worth it for wet spots)
|
|
Pine
|
Bedroom, living room
|
Cheap; light color (matches light floors)
|
Soft—can dent if you drop heavy things
|
|
Walnut
|
Living room, fancy spaces
|
Dark, rich color (looks high-end)
|
Expensive; not great for wet spots
|
|
Ash
|
Entryway (pets/kids)
|
Tough—won’t dent; flexible (no cracks)
|
Not as waterproof as oak (avoid bathrooms)
|
Pro Tip: If you’re confused, just tell the custom maker: “This sill is for my bathroom door—what wood do you recommend?” They’ll point you to oak 9 times out of 10.
Q3: How Do They Make a Custom Wooden Door Sill? What Steps Happen?
Short Answer: It’s 5 simple steps—nothing crazy. The maker will:
- Measure your door opening (super carefully).
- Cut a piece of your chosen wood to fit.
- Sand it smooth (so you don’t scratch your feet).
- Add a “slope” if needed (so water runs out, not in—great for bathrooms).
- Paint/stain it (to match your floor and keep it from getting ruined).
Step-by-Step (In Plain English):
- Measuring: They’ll measure 3 things:
-
- How wide your door opening is (e.g., 90cm).
-
- How thick your wall is (e.g., 10cm—so the sill sticks out just right, not too far).
-
- How high your floor is (so the sill doesn’t trip you—usually 3-5mm higher than the floor, max).
Why this matters: A bad measurement = a sill that’s too short (gaps for wind) or too tall (you trip over it).
- Cutting the Wood: They’ll take a big piece of your chosen wood (e.g., white oak) and cut it to the exact size from step 1. They’ll also “notch” it if your door has a hinge (so it fits around the hinge, no gaps).
- Sanding: They’ll rub it with sandpaper (starting rough, then smooth) until there are no splinters—run your hand over it, and it should feel like your phone case (no rough spots).
- Adding a Slope (If Needed): For bathrooms/kitchens, they’ll sand a tiny slope (like 1°) so water runs out of the room, not in. No slope = water sits on the sill and rots it.
- Finishing: They’ll paint or stain it to match your floor. For wet spots, they’ll add 2-3 coats of “waterproof finish” (like polyurethane)—this is the stuff that keeps water from soaking into the wood.
Q4: How Do You Install a Custom Wooden Door Sill? Will It Be a Hassle?
Short Answer: Installation is easy if you hire a pro (takes 30-60 minutes). The key steps are: clean the spot, glue it down, and make sure it’s level (so it doesn’t wobble). The biggest hassle to avoid: making it too high (trips) or too low (gaps).
What the Pro Will Do (So You Know What to Expect):
- Clean the Area: They’ll sweep out dust/dirt from the bottom of the door opening—no gunk under the sill (or it’ll wobble).
- Put Down Glue: They’ll spread a thin layer of “construction glue” (the sticky stuff that holds wood to concrete/floor) on the floor where the sill goes.
- Set the Sill: They’ll lay the sill down, then use a “level” (the tool with a bubble) to make sure it’s straight—no tilting (tilting = water sits on one side, or you trip).
- Secure It: If the floor is concrete (like entryways), they might drill small screws into the sill (to hold it tight). If it’s wood floors, just glue is enough (screws would scratch the floor).
- Fill Gaps: If there’s a tiny gap between the sill and wall, they’ll fill it with “caulk” (the flexible white stuff)—stops wind/dust from getting in.
Common Mistake to Avoid: Don’t let anyone install the sill too high! I once had a sill that was 1cm higher than the floor—my kid tripped over it twice. Ask the pro to keep it 3-5mm higher (just enough to stop water, not enough to trip).
Q5: How Do I Keep My Custom Wooden Door Sill From Getting Ruined? Maintenance Tips?
Short Answer: Easy—wipe up spills fast, clean it with mild soap, and touch up the finish once a year. It’ll last 10+ years if you take care of it.
No-Fuss Maintenance Tips:
- Wipe Up Spills Right Away: Especially in bathrooms/kitchens—water sitting on the sill will make it rot. Keep a towel near the door if you splash water.
- Clean It Gently: Use a damp cloth and a little dish soap (no harsh cleaners like bleach—they’ll strip the finish). Wipe it once a week (or when it’s dirty).
- Touch Up the Finish Once a Year: If the sill looks dull, or water soaks into it (instead of beading up), grab a small can of “waterproof finish” (same as the maker used) and brush on 1 thin coat. Let it dry 4 hours—good as new.
- Fix Small Scratches: If your pet scratches the sill, rub a little “wood stain” (matching your sill color) on the scratch with a cotton swab. Let it dry—you’ll barely see the scratch.
What to Do If It Gets Badly Damaged: If the sill is warped (bent) or has a big crack (from water), don’t try to fix it—just get a new custom piece. A warped sill won’t stop water/wind, and fixing it usually looks worse than replacing it.
Q6: What Are the Dumbest Mistakes People Make With Custom Wooden Door Sills? How to Avoid Them?
Short Answer: Most mistakes are easy to avoid—here are the top 3, and how to skip them:
- Mistake 1: Picking the Wrong Wood for Wet Spots
-
- What Happens: Someone picks pine for a bathroom sill—3 months later, it’s soft and moldy.
-
- Fix: Always pick oak for wet spots (bathroom/kitchen/entryway). Tell the maker: “This is for a wet area—give me the most waterproof wood you have.”
- Mistake 2: Not Asking for a Slope in Wet Areas
-
- What Happens: No slope = water sits on the sill, rots it from the bottom.
-
- Fix: When you order the custom sill, say: “Can you add a small slope so water runs out?” It’s free extra work, and saves you from replacing the sill later.
- Mistake 3: Installing It Yourself (If You Don’t Know How)
-
- What Happens: I tried installing a sill myself once—got the measurements wrong, and it was too short. Had to order a new one, wasted $50.
-
- Fix: Hire a pro! It costs (50-)100 for installation, but you won’t mess it up (and waste money on a new sill).
Final Thoughts: Custom Wooden Door Sills Are Worth It
A custom wooden door sill isn’t a “luxury”—it’s a small thing that fixes big problems: no tripping, no water damage, no weird mismatched wood next to your floor. The key is to:
- Pick the right wood for your space (oak for wet, pine for dry).
- Hire a pro to measure/install (avoids mistakes).
- Wipe up spills and touch up the finish once a year.
If you’re still confused—just call a local custom wood shop (search “custom wooden door sills near me”) and tell them your situation. They’ll walk you through it—most shops are happy to explain, even if you’re a total beginner.
Got more questions? Drop a comment—I’ll answer with the same straight talk, no jargon.