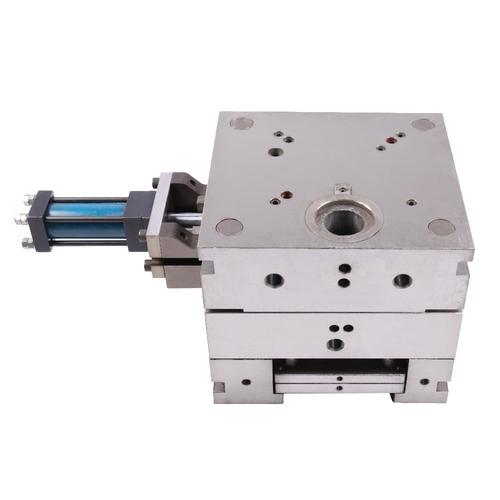
Making a die casting mold (often called a “die”) is a high-precision, multi-stage process that requires tight control over material selection, machining accuracy, and heat treatment. Unlike plastic injection molds, die casting dies must withstand extreme temperatures (380–700°C) and high pressure (1,000–15,000 psi), so every step is optimized for durability, repeatability, and part quality.
The full process typically takes 4–12 weeks (depending on complexity) and follows 8 core stages:
- Demand Analysis & DFM (Design for Manufacturability)
- 3D CAD Design & Simulation
- Mold Material Selection & Cutting
- Rough Machining (Shape the Die Blank)
- Precision Machining (EDM/Wire EDM for Cavities)
- Heat Treatment (Harden the Die)
- Surface Finishing & Die Assembly
- Die Tryout & Optimization
Below, we break down each stage with technical details, equipment specs, and critical quality checks.
Step 1: Demand Analysis & DFM (The Foundation of a Good Die)
Before designing, you must align the die with the final part’s requirements and the die casting machine’s capabilities. This stage avoids costly rework later.
Key Tasks:
- Clarify Part Specifications:
-
- Material (aluminum/zinc/magnesium): Determines die material (e.g., aluminum needs heat-resistant H13 steel).
-
- Tolerance (±0.05mm vs. ±0.1mm): Defines machining precision (tighter tolerances need Wire EDM).
-
- Volume (10k vs. 1M parts): Multi-cavity dies for high volume; single-cavity for low volume.
-
- Critical Features: Undercuts (need slides), thin walls (≥0.8mm for aluminum) that affect cavity design.
- DFM Review (Critical for Cost & Quality):
-
- Optimize part design to simplify the die: Remove unnecessary undercuts (replace with post-machining), add draft angles (1–3° for easy ejection), and ensure uniform wall thickness (avoid >5mm sections to prevent porosity).
-
- Match die size to the die casting machine: Check platen size (die must fit between moving/fixed platens) and maximum clamping force (die weight + injection pressure can’t exceed machine capacity).
Tools & Output:
- Software: SolidWorks, AutoCAD (for part analysis); DFM software (e.g., Sigmetrix) for design validation.
- Output: A DFM report with optimized part design and die feasibility assessment.
Common Mistake:
Skipping DFM leads to dies that can’t eject parts (no draft angles) or produce defective parts (thin walls that don’t fill)—costing 20–50% more to rework.
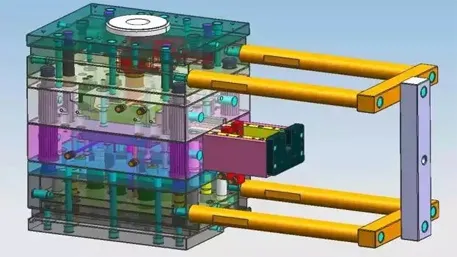
Step 2: 3D CAD Design & Simulation (Digital Prototyping)
This stage creates a detailed 3D model of the die, including all components (cavity, gating, cooling, ejection), and simulates metal flow to predict defects.
Key Tasks:
- Design Die Components:
-
- Cavity: 3D model of the part (add 0.1–0.2mm shrinkage allowance—aluminum shrinks ~1.2% when cooling).
-
- Gating System: Design sprue (main channel), runners (distribute metal), and gates (control flow speed: 5–15 m/s for aluminum). Overflows (1–2x gate size) catch impurities.
-
- Cooling System: Embed water channels (6–10mm diameter) 8–15mm from the cavity—ensure uniform cooling (temperature variation <5°C to avoid warping).
-
- Ejection System: Place ejector pins (3–6mm diameter) in low-stress areas (e.g., part edges) to avoid visible marks.
- Flow Simulation:
-
- Use software like ANSYS Fluent or MAGMAsoft to simulate molten metal filling the cavity:
-
-
- Check for air traps (fix with larger vents: 0.1–0.3mm wide).
-
-
-
- Identify cold shuts (when metal streams don’t merge—increase gate size or flow speed).
-
Tools & Output:
- Software: SolidWorks 3D, AutoCAD Mechanical; Simulation tools (ANSYS, MAGMAsoft).
- Output: A fully annotated 3D die model (with BOM: Bill of Materials) and simulation report.
Critical Check:
Verify that the cooling system covers 80% of the cavity surface—poor cooling doubles cycle time and reduces die life.
Step 3: Mold Material Selection & Cutting
Die material must balance heat resistance, wear resistance, and machinability. The two most common materials are H13 tool steel (for aluminum/magnesium) and P20 pre-hardened steel (for zinc).
Material Selection Guide:
|
Die Material
|
Alloy Compatibility
|
Hardness (HRC)
|
Heat Resistance
|
Lifespan (Cycles)
|
Best For
|
|
H13 Tool Steel
|
Aluminum, Magnesium
|
44–48 (after heat treatment)
|
Up to 650°C
|
500k–2M
|
High-volume, high-temperature casting
|
|
P20 Pre-Hardened Steel
|
Zinc
|
28–32 (pre-hardened)
|
Up to 450°C
|
1M–5M
|
Mid-volume zinc casting (cheaper, easier to machine)
|
Material Cutting:
- Process: Use a bandsaw or CNC cutting machine to cut the steel block (die blank) to the required size (e.g., 300x400x200mm for a small die).
- Precision: Cut with ±1mm tolerance—enough for rough machining later.
Common Mistake:
Using P20 steel for aluminum casting—P20 softens above 450°C, leading to cavity deformation after 10k cycles.
Step 4: Rough Machining (Shape the Die Blank)
Rough machining removes 70–80% of excess material to create the die’s basic shape (fixed die, moving die) and preliminary features (e.g., cooling channel holes).
Key Tasks:
- Machine Fixed/Moving Die Blanks:
-
- Use a CNC vertical machining center (VMC) (e.g., Haas VF-4) with a 10,000 RPM spindle.
-
- Cut the die’s outer 轮廓 (outline) to match the 3D model, and drill pilot holes for cooling channels (oversized by 1mm for later finishing).
- Mill Gating System Pockets:
-
- Cut slots for the sprue and runners (leave 0.5–1mm 余量 for precision machining).
Tools & Parameters:
- Cutting Tools: Carbide end mills (4–12mm diameter) for steel; coolant (water-soluble oil) to prevent overheating.
- Speeds & Feeds: 150–250 SFM (surface feet per minute) for H13 steel; 250–350 SFM for P20 steel.
Critical Check:
Use a coordinate measuring machine (CMM) to verify that the rough-machined die is within ±0.2mm of the 3D model—correct deviations before precision machining.
Step 5: Precision Machining (EDM/Wire EDM—The “Heart” of Die Making)
This stage creates the die’s most critical feature: the cavity (matches the part’s shape) and fine details (e.g., undercuts, vents). Traditional milling can’t reach tight tolerances or complex shapes—so EDM (Electrical Discharge Machining) is used.
A. EDM (Sinker EDM) for Cavities & Deep Features
- How It Works: Uses an electrode (copper or graphite) to erode the steel via electrical sparks (50–100V, 1–100A). The spark gap (0.01–0.05mm) controls precision.
- Key Tasks:
-
- Machine the cavity: Use a graphite electrode shaped like the part (enlarged by 0.02–0.03mm to account for spark gap).
-
- Cut undercuts: Use a “collapsible electrode” for internal undercuts (e.g., pipe fittings).
- Equipment: Sodick AQ35L, Makino EDNC65.
- Parameters:
-
- Rough EDM: High current (50–100A) for fast material removal (surface finish Ra 12.5–25 μm).
-
- Finish EDM: Low current (1–5A) for precision (Ra 0.8–3.2 μm)—matches the part’s required surface finish.
B. Wire EDM for Thin Walls & Precision Holes
- How It Works: Uses a thin brass wire (0.1–0.3mm diameter) to cut through steel via electrical discharge—ideal for straight edges, thin walls (≥0.5mm), and holes (≥0.2mm diameter).
- Key Tasks:
-
- Cut ejector pin holes (±0.001mm tolerance).
-
- Machine slide components for undercuts (must be parallel to the die’s opening direction).
- Equipment: Fanuc Robocut α-C400iB, Mitsubishi MV2400S.
- Parameters: Wire speed 5–15 m/min; spark gap 0.01–0.02mm.
Critical Check:
After EDM, use a CMM to measure cavity dimensions—tolerance must be ±0.005mm for critical features (e.g., part mating surfaces).
Step 6: Heat Treatment (Harden the Die for Durability)
Heat treatment transforms the die steel’s microstructure to improve hardness and wear resistance—critical for withstanding repeated high-temperature cycles.
Process for H13 Tool Steel (Most Common):
- Preheat: Heat to 650–750°C for 2–3 hours (reduces thermal shock).
- Austenitizing: Heat to 1020–1050°C for 1–2 hours (converts steel to austenite).
- Quenching: Cool rapidly in oil (100–150°C) to form martensite (hardens the steel to HRC 58–62).
- Tempering: Heat to 520–580°C for 2–4 hours (reduces brittleness while retaining hardness—final HRC 44–48).
-
- Note: Temper twice (double tempering) to eliminate residual stress.
Process for P20 Steel:
- P20 is pre-hardened at the factory (HRC 28–32), so only stress relief annealing is needed: Heat to 550–600°C for 1–2 hours, then cool slowly (prevents warping after machining).
Common Mistake:
Over-tempering H13 (above 600°C) reduces hardness below HRC 40—die wears out in <100k cycles.
Step 7: Surface Finishing & Die Assembly
Finishing ensures smooth part ejection and prevents corrosion; assembly integrates all die components into a functional unit.
A. Surface Finishing:
- Polishing:
-
- Use abrasive stones (80–1200 grit) to polish the cavity to Ra 0.8–1.6 μm (smooth surface = no part sticking).
-
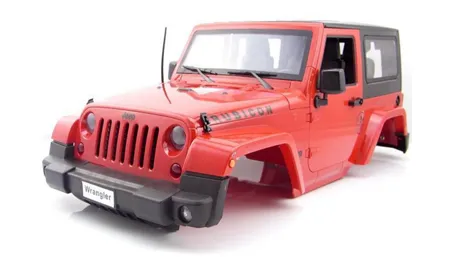
- For cosmetic parts (e.g., die cast model cars), polish to Ra 0.2–0.4 μm (mirror finish).
- Deburring:
-
- Remove burrs from EDM cuts (use a CNC deburring machine or manual tools) to avoid damaging the part during ejection.
- Corrosion Protection:
-
- Coat non-cavity surfaces with anti-rust oil (e.g., Mobil Vactra Oil) to prevent oxidation during storage.
B. Die Assembly:
- Install Components:
-
- Ejection system: Mount ejector pins, plates, and springs (ensure pins move smoothly—no binding).
-
- Cooling system: Install O-rings in cooling channels to prevent water leakage.
-
- Slides (if needed): Attach hydraulic cylinders to slides (align to ±0.01mm to avoid cavity misalignment).
- Align Fixed/Moving Dies:
-
- Use guide pins (4–6mm diameter) to align the two die halves—gap between dies must be <0.01mm (prevents metal flash).
Critical Check:
Test the ejection system manually—ejector pins should extend/retract evenly without sticking.
Step 8: Die Tryout & Optimization (Validate Before Mass Production)
Die tryout (also called “die testing”) is the final stage—mount the die on a die casting machine and produce test parts to identify defects.
Key Tasks:
- Mount the Die:
-
- Secure the fixed die to the machine’s stationary platen and moving die to the movable platen—use bolts torqued to 50–100 N·m (prevents die movement during injection).
- Set Process Parameters:
-
- Injection temperature: 650–700°C for aluminum; 380–420°C for zinc.
-
- Injection pressure: 5,000–10,000 psi for aluminum; 1,000–3,000 psi for zinc.
-
- Cooling time: 10–30 seconds (part must be solid enough to eject without deformation).
- Produce Test Parts (50–100 Units):
-
- Inspect for defects:
-
-
- Porosity (air bubbles): Widen vents or use vacuum die casting.
-
-
-
- Flash (excess metal): Tighten die clamping force or fix guide pin alignment.
-
-
-
- Warping: Adjust cooling channels (add more near warped areas).
-
-
-
- Undersized parts: Increase cavity size by 0.05–0.1mm (account for shrinkage).
-
Tools & Output:
- Inspection Tools: CMM (for dimensions), X-ray machine (for internal porosity), hardness tester (for part strength).
- Output: Optimized die + validated process parameters (ready for mass production).
Common Mistake:
Rushing tryout—skipping defect fixes leads to 10–30% scrap rate in mass production.
Key Quality Control (QC) Nodes (Must Not Skip)
To ensure the die meets standards, perform QC at these 5 critical stages:
- After 3D Design: DFM audit (2+ engineers sign off).
- After Rough Machining: CMM check (±0.2mm tolerance).
- After Precision Machining: CMM cavity measurement (±0.005mm).
- After Heat Treatment: Hardness test (HRC 44–48 for H13).
- After Tryout: X-ray porosity test (<2% porosity for structural parts).
How to Choose a Die Maker (Avoid Low-Quality Dies)
Not all die makers have the expertise to produce high-performance dies—look for these credentials:
- ISO 9001 Certification: Ensures consistent process control.
- Industry Experience: 5+ years in your niche (e.g., automotive die casting vs. toy die casting).
- Equipment List: In-house EDM/Wire EDM (not outsourced—faster lead times).
- Tryout Capabilities: Owns a die casting machine (can test the die before delivery).
Final Takeaway
Making a die casting mold is a technical-intensive process that requires precision, material expertise, and strict quality control. The key to success is:
- Starting with a DFM-optimized part design.
- Using the right material (H13 for aluminum, P20 for zinc).
- Investing in precision machining (EDM/Wire EDM) and thorough tryout.
For complex dies (e.g., multi-cavity with slides), partner with a die maker who offers end-to-end services (design → tryout → maintenance)—this reduces risk and shortens lead times.
Got a specific die project (e.g., “aluminum automotive bracket die”)? Share your part specs in the comments, and we’ll help you outline a custom die-making plan!