I. What is Workpiece Overcut?
Overcut refers to a situation in CNC machining where the actual material removed by the tool exceeds the designed tolerance (excessive material removal), resulting in workpiece dimensional deviation and functional failure (e.g., enlarged holes, missing contour corners). It is one of the most common causes of workpiece scrapping in CNC machining.
II. Overcut Types and Schematic Diagrams (Key Dimensions Marked)
1. Contour Overcut (Most Common)
Scenario: During milling of rectangular or irregular contours, local dimensions are smaller than the designed values.
Schematic Diagram:
[Designed Contour (Solid Line): 10mm×8mm Rectangle]
□——————10mm——————□
| |
8mm | 【Overcut Area】
| | (Dashed Line: Actual Size 9.8mm×7.9mm,
□——————9.8mm————— □ Overcut 0.2mm/0.1mm)
Core Causes: Tool path deviation, excessive feed rate leading to “overshoot”.
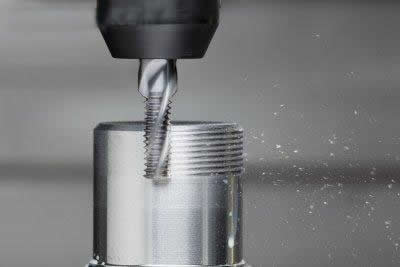
2. Hole Overcut
Scenario: After drilling/boring, the hole diameter is larger than the designed value or the hole position is offset.
Schematic Diagram:
[Designed Hole (Solid Line): φ5mm, Hole Position X=20mm, Y=15mm]
○ φ5mm (Designed)
↓
○ φ5.2mm (Actual, Overcut 0.2mm)
(Hole Position Offset: X=19.9mm, Y=15.1mm, Offset 0.1mm)
Core Causes: Tool wear, incorrect tool length compensation, excessive spindle runout.
3. Curved Surface Overcut
Scenario: During milling of arcs or curved surfaces, the local curvature is smaller than the designed value (“excessive cutting depth”).
Schematic Diagram:
[Designed Curved Surface (Solid Line): Arc Radius R10mm]
⌒ R10mm (Designed)
/
/ 【Overcut Area】
(Dashed Line: Actual Radius R9.8mm, Overcut 0.2mm)
⌒
Core Causes: Low curved surface precision setting during programming, incorrect tool radius compensation parameters.
III. Immediate Overcut Handling Steps (Must Be Done Within 10 Minutes of Discovering Overcut)
Step 1: Emergency Shutdown to Avoid Further Damage
- Immediately press the machine’s “emergency stop button” to cut off spindle and feed movement, preventing the tool from continuing to cut the overcut area;
- Record the current machining step (e.g., “3rd Segment of Right Contour Milling”) for subsequent traceability.
Step 2: Evaluate Overcut Severity (Determine Remediability)
|
Overcut Severity
|
Judgment Criteria
|
Handling Direction
|
|
Minor Overcut
|
Overcut amount ≤0.1mm, no impact on assembly/function
|
Remediation (e.g., polishing, weld repair)
|
|
Moderate Overcut
|
Overcut amount 0.1-0.5mm, partial function affected
|
Redesign local structure and rework
|
|
Severe Overcut
|
Overcut amount >0.5mm, core dimensions scrapped
|
Replace workpiece blank and reprocess
|
Step 3: Troubleshoot Overcut Causes (Targeted Solutions)
Cause 1: Programming Errors (60% of Cases)
- Inspection Method: Open programming software (e.g., Mastercam) and re-simulate the tool path:
① Check for “tool path exceeding the designed contour” (e.g., 0.2mm offset during contour milling);
② Verify cutting parameters: Whether the feed rate is too high (e.g., feed rate >2000mm/min for aluminum alloy milling easily causes overshoot), or the cutting depth exceeds the limit (e.g., finish milling depth >0.3mm).
- Solution: Correct the tool path, reduce the feed rate by 10%-20%, and regenerate the G-code.
Cause 2: Tool Issues (20% of Cases)
- Inspection Method:
① Check tool wear: Whether the edge of the carbide end mill is chipped (observed with a magnifying glass) or the drill bit is dull;
② Verify compensation parameters: Whether the tool length compensation value is entered incorrectly (e.g., actual tool length 50mm, entered as 49.8mm, leading to 0.2mm excessive cutting depth), or tool radius compensation is missing (e.g., forgetting to enter the 5mm tool radius, leading to 5mm contour overcut).
- Solution: Replace with a new tool and re-calibrate tool compensation values (recheck with a tool setter).
Cause 3: Clamping/Alignment Errors (15% of Cases)
- Inspection Method:
① Check the fixture: Whether the vise is loose (tighten the clamping bolts with a wrench to check for displacement), or the vacuum chuck is leaking (vacuum degree <-0.07MPa easily causes workpiece offset);
② Recheck alignment: Use an edge finder to re-detect the workpiece’s X/Y zero point and check for offset from the programming zero point (e.g., 0.15mm offset causing overcut).
- Solution: Re-clamp the fixture, re-align, and correct the zero point coordinates.
Cause 4: Machine Precision Issues (5% of Cases)
- Inspection Method: Use a dial indicator to measure spindle runout (>0.005mm easily causes hole overcut) and a straightedge to measure guideway clearance (>0.003mm easily causes contour offset).
- Solution: Contact machine maintenance personnel to calibrate spindle and guideway precision (daily machine maintenance is required weekly).
Step 4: Test Cutting Verification (Avoid Re-Occurrence of Overcut)
- Replace with a new workpiece blank or use the scrap area of the workpiece to perform a 10-20mm test cut with the corrected parameters;
- Use calipers/micrometers to test the cut dimensions, and proceed with formal machining only after confirming no overcut.
IV. Overcut Preventive Measures (Key to Long-Term Avoidance)
- Programming Phase:
-
- Mandatorily perform “tool path simulation + interference check”, focusing on the distance between the tool, workpiece, and fixture (must be ≥0.1mm);
-
- Adopt “small cutting depth + low feed rate” for finish milling (e.g., cutting depth 0.1-0.2mm, feed rate 800-1500mm/min).
- Tool Management:
-
- Before using a new tool, calibrate its length/radius with a tool setter (tolerance ≤0.002mm);
-
- Check tool wear every 2 hours for metal machining and every 4 hours for plastic machining.
- Clamping Re-Inspection:
-
- After clamping, use a dial indicator to measure workpiece flatness (>0.01mm requires re-leveling);
-
- After alignment, move 10mm in both X and Y directions and recheck coordinate accuracy (to avoid zero point drift).
- Machine Maintenance:
-
- Clean the guideways and add lubricating oil before starting the machine daily;
-
- Calibrate spindle runout and guideway clearance monthly (precision must meet the machine manual requirements).
V. Summary
The core of overcut handling is: “First shut down to stop losses → Then troubleshoot causes and solve → Finally prevent recurrence”. 80% of overcuts are caused by programming and tool issues. Strictly implementing the “simulation + re-inspection” process in daily operations can control the overcut rate within 0.5%.