Core Processing Technologies: Engineering for Model Precision
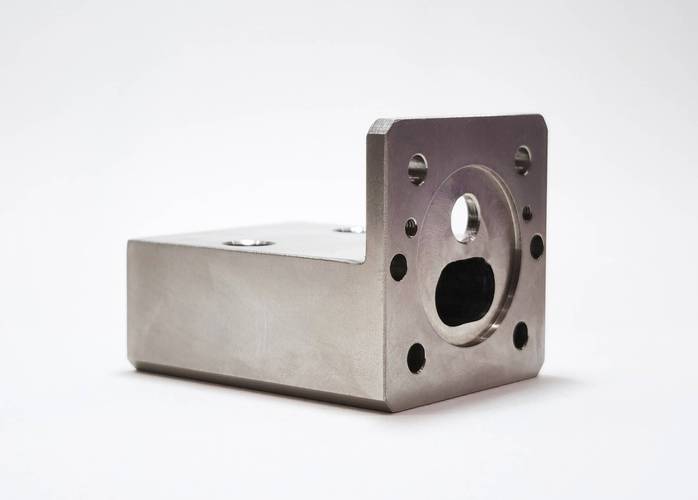
1. 5-Axis CNC Machining
- Multi-axis contouring: 5-axis machines shape complex curved surfaces (e.g., automotive body panels, turbine blades) with ±0.005mm accuracy. A 1:5 scale aerospace engine model achieved 0.02mm alignment between rotating components, enabling realistic functional demonstrations.
- High-speed milling: 30,000 RPM spindles create fine details (e.g., architectural window frames, gear teeth) with Ra 0.8μm surface finish, eliminating post-processing. A 1:10 skyscraper model with 0.5mm-thick metal facades maintained uniform wall thickness (±0.01mm).
- Micro-machining: For small-scale models (e.g., 1:20 industrial valves), 0.1mm diameter tools produce intricate features like threaded holes (M1-M3) and slots, ensuring functional operability.
2. 3D Scanning & Reverse Engineering
- Precision digitization: Artec Space Spider 3D scanners (0.05mm accuracy) capture physical objects, creating 3D models for CNC replication. A vintage car part model was reverse-engineered from a worn prototype, with 99.9% geometric fidelity.
- CAD model optimization: Engineers refine scanned data to enhance machinability—e.g., adding fillets to sharp edges on architectural models to prevent tool breakage during machining.
3. Surface Treatment & Finishing
- Anodizing: Creates durable, decorative finishes (clear, black, gold) on aluminum models, with 5-20μm coating thickness. A 1:8 automotive chassis model with Type II anodizing resisted 500+ hours of handling without scratching.
- Powder coating: Applied to steel models (e.g., industrial machine replicas) for corrosion resistance (1,000 hours salt spray) and color matching (RAL/Pantone codes). A construction equipment model achieved a matte red finish with 95% color accuracy.
- Polishing & buffing: Produces mirror finishes (Ra ≤0.02μm) on stainless steel models, ideal for aerospace prototypes requiring visual clarity of surface contours.
4. Quality Testing for Model Accuracy
- Dimensional inspection: CMMs verify critical dimensions—feature positions (±0.01mm), surface flatness (≤0.02mm/m), and hole tolerances (H7)—ensuring compliance with design specs.
- 3D comparison analysis: Scanned finished models are overlain with CAD files, with color maps highlighting deviations (≤0.03mm acceptable) for architectural and industrial models.
- Functional testing: For operable models (e.g., gear systems), rotation/assembly tests confirm parts move smoothly without binding, meeting client usability requirements.
Material Expertise: Matching Metals to Model Applications
|
Material
|
Key Properties
|
Application
|
Advantages
|
|
Aluminum Alloy (6061, 7075)
|
Easy machining, lightweight, anodizable
|
Architectural models, automotive prototypes
|
30% lighter than steel; fine surface finish (Ra 0.8μm).
|
|
Stainless Steel (304, 316)
|
Corrosion resistance, strength
|
Industrial machine models, marine prototypes
|
Withstands 1,000+ hours salt spray; suitable for outdoor displays.
|
|
Mild Steel (1018)
|
Low cost, high machinability
|
Large-scale models (construction equipment)
|
Economical for 1:5+ scale; easy to weld/assemble.
|
|
Titanium Alloy (Ti-6Al-4V)
|
High strength-to-weight ratio
|
Aerospace models, high-end prototypes
|
40% lighter than steel; ideal for functional stress testing.
|
CNC Metal Model Machining Technologies
- 5-axis simultaneous machining: Enables complex undercuts and curved surfaces (e.g., turbine blade models) to be machined in one setup, reducing alignment errors by 90%.
- Automated tool changing: 20+ tool magazines allow uninterrupted machining of multi-feature models (e.g., architectural facades with holes, slots, and texturing), cutting production time by 40%.
- High-speed spindle technology: 40,000 RPM spindles machine thin-walled features (0.5mm thickness) on aluminum models without deformation, critical for aerospace component replicas.
Custom CNC Metal Model Manufacturing Process
- Design & DFM: Engineers review client CAD files (STEP/IGS) or physical samples, optimizing for CNC machining—e.g., adjusting wall thickness to prevent warping.
- Material selection: Choose aluminum/steel based on model scale, finish requirements, and budget (e.g., 304 stainless for corrosion-resistant marine models).
- CNC machining: 5-axis milling creates base features; high-speed spindles add details; micro-machining refines small components.
- Surface finishing: Anodizing, powder coating, or polishing applied per client specs, with adhesion testing for coating durability.
- Quality validation: CMM inspection, 3D comparison, and functional testing ensure models meet dimensional and visual requirements.
Custom CNC Metal Model Application Fields
- Architectural: 1:100-1:500 scale building models with detailed facades, windows, and structural elements (aluminum 6061).
- Automotive: 1:5-1:20 scale car body, engine, and chassis models for design reviews (aluminum 7075, stainless steel).
- Industrial: 1:10-1:30 scale machine tool, valve, and pump models with operable parts (mild steel, 304 stainless).
- Aerospace: 1:20-1:50 scale aircraft components (turbines, wings) for aerodynamic studies (titanium, aluminum).
- Military: 1:35-1:72 scale vehicle/weapon models with fine details (stainless steel, 6061 aluminum).
Customization Capabilities: From Design to Delivery
- Design collaboration: Work with engineers to refine models—e.g., adding internal supports to 0.8mm-thick aerospace wings for machining stability.
- Scale flexibility: Produce models from 1:1 (full-size prototypes) to 1:1000 (micro-components), with consistent accuracy across scales.
- Production scale: 1-10,000+ units—prototypes in 3-5 days, small batches in 1-2 weeks. A design firm received 50 architectural models in 10 days.
Common Processing Questions
- Q: How to achieve 0.01mm accuracy on a 1:5 scale turbine model?
- Q: Can metal models withstand outdoor display (e.g., architectural expos)?
- Q: What’s the lead time for a 1:10 automotive chassis model (1 unit)?
- Q: How to replicate worn vintage parts (no CAD files) into precise models?
Why Choose Goldcattle?
- Expertise: 26 years in CNC modeling, with 80+ custom designs for architecture, automotive, and aerospace clients.
- Accuracy: 99.9% dimensional fidelity to CAD/samples, with CMM reports provided for critical projects.
- Efficiency: 5-axis machining and automated workflows reduce lead times by 30% vs. traditional methods.
- Quality: ISO 9001/AS9100 certified; 5-year warranty on material defects and machining errors.

