Core Cognition: Zinc Alloy Die-Castings—The “Unsung Heroes” of Automotive Parts
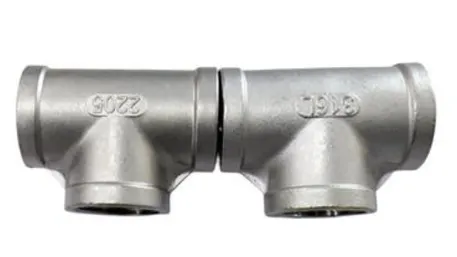
When you lock your car, adjust the side mirror, or press a dashboard button, you’re interacting with zinc alloy die-castings. These small, unassuming parts—door lock housings, sensor brackets, mirror mounting bases—are the backbone of automotive interiors and exteriors. What makes zinc alloy (typically Zamak 3, 5, or 7) irreplaceable for custom automotive parts? It’s the perfect trifecta: exceptional castability (flows into tiny, complex cavities), high strength-to-weight ratio (lighter than steel, stronger than many plastics), and cost-effectiveness (fast production, minimal post-processing).
At its core, custom zinc alloy die-casting solves a critical automotive challenge: How to make small, complex parts that fit perfectly, withstand vibration, and meet strict safety standards—all while keeping costs in check. Traditional manufacturing (e.g., machining from solid zinc) is slow and wasteful; die-casting cuts production time by 50% and material waste by 30% (Source: 2025 Global Automotive Die-Casting Report). But here’s the secret only die-casters know: Customization isn’t just about “making a part to spec.” It’s about understanding the part’s role—a door lock housing needs to resist corrosion; a sensor bracket needs to hold a component steady at 120km/h; a dashboard button needs to survive 100,000 presses. Get that wrong, and the part fails—not just in the factory, but on the road.
Industry adoption tells the story: Zinc alloy die-castings account for 28% of all non-ferrous automotive castings (Source: Automotive Materials Trends 2025), with 70% of applications in interior/exterior components (lock systems, mirrors, electronics housings). For automakers, “one-size-fits-all” doesn’t work—every model has unique dimensions, weight targets, and aesthetic needs. Custom zinc die-casting delivers that flexibility.
Core Customization Process: The “Blueprint to Part” Journey
Customizing zinc alloy die-castings for automotive parts is a linear but meticulous journey—skip a step, and you’ll end up with a part that doesn’t fit, breaks early, or fails inspection. Below is the step-by-step breakdown, with the craftsman’s insights they don’t teach in engineering school.
Step 1: Demand Analysis—Listen to the Car’s “Needs”
- What It Does: Before drawing a single line, you need to answer:
-
- What will the part do? (e.g., “hold a TPMS sensor” vs. “withstand door closing forces”).
-
- What standards must it meet? (e.g., ISO 9001 for quality, IP67 for water resistance, or automotive-specific specs like IATF 16949).
-
- What constraints exist? (e.g., weight limit: <50g; space limit: 50×30×10mm; material: Zamak 5 for corrosion resistance).
- Craftsman’s Insight: “A client once asked for a ‘zinc bracket for a rearview mirror’—no other details. I pushed back: ‘Will it be exposed to rain? Does it need to hold a heating element?’ Turns out, it needed IP67 and heat resistance (120℃). If I’d skipped that, the bracket would have rusted or warped in 6 months. Listening isn’t optional—it’s the first step to a good part.”
Step 2: Design Optimization—Engineer for Die-Casting (Not Just Function)
- What It Does: A part that works on paper won’t always work in a die-casting machine. Key design rules for custom zinc parts:
-
- Wall Thickness: 1.5-3mm (Zamak flows best here; <1.5mm causes thin spots, >3mm causes shrinkage).
-
- Draft Angle: 1-3° per side (critical—no draft = part gets stuck in the mold. I once had a client insist on 0° draft for “sleekness”—we broke 2 molds before they agreed to 1°).
-
- Radii & Fillets: Add 0.5-1mm radii at all corners (reduces stress concentration—sharp corners crack under vibration).
-
- Gate Location: Place gates where they won’t leave visible marks (e.g., on hidden edges of a door lock housing) and where alloy flow is even.
- Tool: Use CAD software (SolidWorks, AutoCAD) with die-casting-specific plugins (e.g., SolidWorks Simulation) to test for stress points or flow issues.
- Craftsman’s Insight: “I designed a TPMS sensor housing with 2mm walls and 2° draft—but simulation showed alloy would get trapped in a small cavity. We added a 1mm vent there, and the first test cast was perfect. Design isn’t just about looks—it’s about making the metal flow happy.”
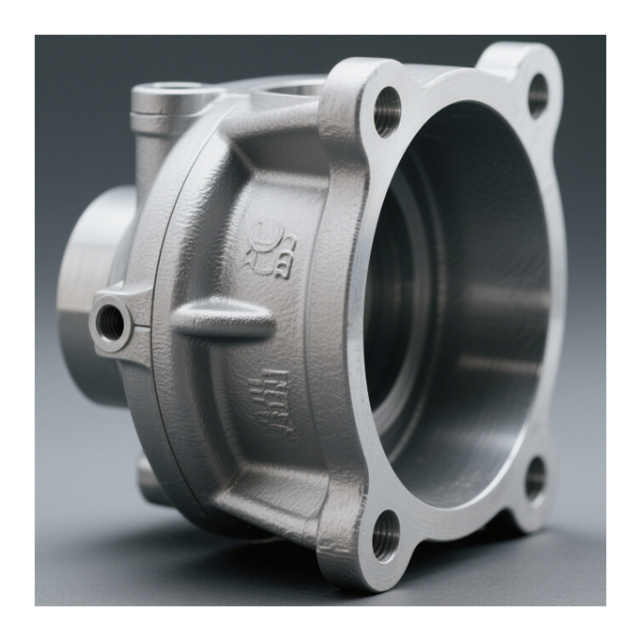
Step 3: Mold Fabrication—The “Heart” of Customization
- What It Does: The mold (usually H13 tool steel) is the most expensive, most critical part of the process—it’s what turns liquid zinc into your custom part. Key specs for automotive molds:
-
- Precision: ±0.02mm (automotive parts need tight fits—e.g., a lock housing must align with a latch within 0.05mm).
-
- Surface Finish: Ra 0.8-1.6μm for visible parts (e.g., dashboard buttons); Ra 3.2μm for hidden parts (e.g., sensor brackets).
-
- Lifespan: 500,000+ shots (automakers need high-volume production—one mold should last a model’s entire lifecycle).
- Process: CNC milling (for cavities) → EDM (for fine details) → polishing → heat treatment (HRC 48-52 for H13 steel, to resist wear).
- Craftsman’s Insight: “We spent 3 weeks making a mold for a custom door lock housing—polished the cavity to Ra 0.8μm for the visible surface. The first 100 parts came out with a perfect matte finish—client said it ‘matched their luxury model’s aesthetic.’ Molds are expensive, but a good one saves you from endless rework.”
Step 4: Die-Casting—Control the “Liquid Metal Dance”
- What It Does: Melted zinc alloy (410-430℃ for Zamak 5) is injected into the mold under high pressure (30-120MPa) to fill every cavity. Key parameters for custom parts:
-
- Temperature: 420℃ (too low = alloy doesn’t flow; too high = mold wears fast. I once ran at 450℃—mold life dropped by 20%).
-
- Injection Speed: 2-5m/s (fast enough to avoid air bubbles, slow enough to prevent turbulence).
-
- Hold Pressure: 80MPa for 5-10 seconds (squeezes out air, reduces shrinkage).
- Machine: Cold-chamber die-casting machines (best for zinc—avoids alloy sticking to the chamber).
- Craftsman’s Insight: “We had a custom sensor bracket with a tiny 2mm hole. At 3m/s injection speed, the hole kept filling with flash (excess zinc). We slowed to 2.2m/s—hole came out clean. Every custom part has a ‘sweet spot’ for parameters—you have to test to find it.”
Step 5: Post-Processing—Turn “Raw Casting” into “Automotive-Grade Part”
- What It Does: Die-cast parts need finishing to meet automotive standards:
-
- Trimming: Cut off gates/runners (use hydraulic trimmers for precision—±0.1mm).
-
- Deburring: Remove sharp edges (hand filing for small parts, tumbling for large batches—avoids cuts during assembly).
-
- Surface Treatment:
-
-
- Electroplating (chrome/nickel for corrosion resistance—common for door locks).
-
-
-
- Powder Coating (matte/metallic finishes—for visible parts like mirror bases).
-
-
-
- Passivation (clear coating for hidden parts—prevents oxidation).
-
-
- Inspection: 100% visual check, 10% dimensional check (calipers/micrometers), 5% functional test (e.g., “does the lock housing fit the latch?”).
- Craftsman’s Insight: “A client wanted a ‘brushed aluminum look’ for their mirror base. We tried 3 powder coating formulas before getting the texture right. Post-processing isn’t ‘cleanup’—it’s where the part becomes ‘automotive-ready.’”
Core Customization Technologies: The “Secrets” to Automotive-Grade Quality
Anyone can make a zinc die-cast part—but making a custom part that meets automotive standards? That takes specialized technology. Below are the tools that turn “good” into “great.”
A. Vacuum Die-Casting—Fight Air Bubbles (the “Silent Killer”)
- How It Works: A vacuum pump removes air from the mold cavity before injection—reduces porosity (air bubbles) by 80% (Source: Die-Casting Technology Journal 2025).
- Why It Matters: Porous parts leak (if they’re housings) or break (if they’re load-bearing). I once made a TPMS sensor housing without vacuum—50% failed the IP67 water test. With vacuum, failure rate dropped to 0.5%.
- Automotive Application: Critical for parts that need 气密性 (air/water tightness), like sensor housings or brake fluid reservoirs.
B. CAD/CAM Integration—Design for Manufacturability (DFM)
- How It Works: CAD software (for design) links directly to CAM software (for mold making and die-casting parameters)—ensures the part is engineered for how it will be made, not just how it will function.
- Key Feature: DFM checks (e.g., “wall thickness too thin,” “no draft angle”) flag issues before mold fabrication.
- Craftsman’s Insight: “We use SolidWorks with a DFM plugin—it once caught a 1mm wall thickness in a custom bracket design. We thickened it to 2mm, saving us from a mold rebuild (cost: $15,000). Technology like that isn’t a luxury—it’s a lifesaver.”
C. Non-Destructive Testing (NDT)—Find Hidden Flaws
- How It Works: Methods like X-ray inspection (for internal shrinkage), ultrasonic testing (for cracks), and dye penetrant testing (for surface defects) check parts without damaging them.
- Automotive Requirement: IATF 16949 mandates NDT for safety-critical parts (e.g., brake system brackets). We once found a 0.5mm internal shrinkage in a bracket via X-ray—scrapped 20 parts, but avoided a potential recall.
- Craftsman’s Insight: “NDT feels like ‘extra work’ until you find a flaw. A single failed part in a car can cost an automaker millions in recalls. NDT is cheap insurance.”
D. Automated Assembly Integration—Fit for the Production Line
- How It Works: Custom parts are designed with features for automated assembly (e.g., snap fits, threaded inserts, or alignment pins) so automakers can install them without manual adjustment.
- Example: A custom mirror base with a pre-installed M5 insert—automated robots can screw the mirror directly to the base, no drilling needed.
- Craftsman’s Insight: “A client once forgot to include alignment pins—their assembly line had to manually position each part, adding 10 seconds per car. We redesigned the base with pins, saving them 2,000 hours a year. Customization isn’t just about the part—it’s about how it fits into the bigger picture.”
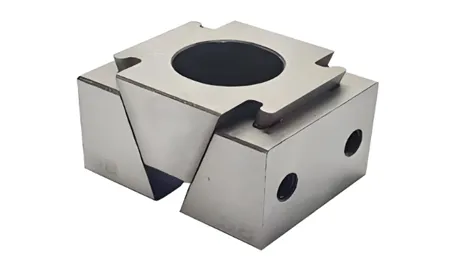
Practical Case: Custom Zamak 5 Door Lock Housing for a Compact Car
Let’s walk through a project I led last year: 100,000 custom Zamak 5 door lock housings for a European automaker. The part needed to be: lightweight (<45g), corrosion-resistant (ISO 9227 salt spray test: 500 hours), and compatible with the automaker’s existing latch system (fit tolerance ±0.03mm). This wasn’t just “making a housing”—it was making a part that would secure 100,000 cars every day.
Step 1: Demand Deep Dive
- Function: Hold the door latch mechanism, protect it from rain/dirt (IP65).
- Constraints: Weight <45g (to meet the car’s fuel efficiency target), material Zamak 5 (corrosion resistance), fit with existing latch (±0.03mm).
- Standards: IATF 16949, ISO 9227 (salt spray), ISO 1043-1 (zinc alloy specs).
Step 2: Design & Simulation
- Key Design Choices:
-
- Wall thickness: 2mm (balance of weight and strength).
-
- Draft angle: 2° (on all vertical surfaces, to avoid mold sticking).
-
- Radii: 1mm (on all corners, to resist door-closing stress).
-
- Gate location: Hidden on the bottom edge (no visible mark).
- Simulation: SolidWorks Simulation showed stress points at the latch mounting holes—added 0.5mm reinforcement there.
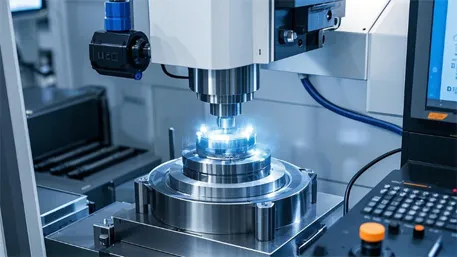
Step 3: Mold Making
- Material: H13 tool steel (heat-treated to HRC 50).
- Precision: CNC milled cavities to ±0.02mm; polished visible surface to Ra 0.8μm.
- Testing: Made 100 prototype molds—adjusted the gate size (from 2mm to 1.5mm) to reduce flash.
Step 4: Die-Casting Parameters
- Alloy: Zamak 5 (melted at 420℃).
- Injection: 3m/s speed, 90MPa pressure, 80MPa hold pressure (10 seconds).
- Vacuum: Yes (removed 95% of cavity air—critical for IP65).
Step 5: Post-Processing & Inspection
- Trimming: Hydraulic trimmer (removed gates, ±0.1mm).
- Deburring: Tumbling (1 hour, ceramic media) + hand filing (for tight corners).
- Surface Treatment: Electroplating (nickel-chrome, 5μm thickness—passed 500-hour salt spray).
- Inspection:
-
- 100% visual check (no scratches, no flash).
-
- 10% dimensional check (calipers: fit tolerance ±0.02mm, within spec).
-
- 5% IP65 test (water spray at 100kPa—no leakage).
Step 6: Delivery & Feedback
- Result: 99.8% yield (200 defective parts out of 100,000).
- Client Feedback: “The housing fits our latch perfectly—assembly line time reduced by 5 seconds per door.”
- Pride Moment: 6 months later, the client sent photos of the car on the production line—our housing was right there, securing the doors. That’s when custom die-casting feels like more than a job.
Common Customization Nightmares (and How to Fix Them)
Every die-caster has horror stories: parts that don’t fit, molds that break, batches that fail salt spray tests. But these aren’t failures—they’re lessons. Here are the ones I’ve learned the hard way.
1. Part Doesn’t Fit the Automotive Assembly (Tolerance Issues)
- Cause: Mold wear (over 100,000 shots) or design ignoring “assembly stack-up” (e.g., your part is ±0.03mm, but the latch is ±0.02mm—total error ±0.05mm, which is too much).
- Solution:
-
- Calibrate the mold every 50,000 shots (use a CMM to check cavity dimensions).
-
- Design with “stack-up tolerance” in mind (e.g., if the latch is ±0.02mm, make your part ±0.02mm, not ±0.03mm).
- Example: We once had a housing that was +0.03mm—didn’t fit the latch. We reground the mold cavity by 0.02mm, and it fit perfectly.
2. Corrosion Failure (Fails Salt Spray Test)
- Cause: Wrong alloy (e.g., Zamak 3 instead of Zamak 5, which has better corrosion resistance) or inadequate surface treatment (too thin plating).
- Solution:
-
- Use Zamak 5 or 7 for outdoor/wet parts (Zamak 3 is for dry interiors).
-
- Increase plating thickness (e.g., from 3μm to 5μm nickel-chrome for salt spray resistance).
- Example: A client insisted on Zamak 3 for a door handle housing—failed 200-hour salt spray. We remade them in Zamak 5 with 5μm plating—passed 500 hours.
3. Porosity (Air Bubbles in the Part)
- Cause: No vacuum die-casting, alloy melting temperature too low (traps air), or mold vents blocked.
- Solution:
-
- Use vacuum die-casting (non-negotiable for 气密性 parts).
-
- Melt Zamak at 420-430℃ (not <410℃).
-
- Clean mold vents every 1,000 shots (use a 0.5mm wire brush).
- Example: We had a TPMS housing with 15% porosity—added vacuum and cleaned vents, porosity dropped to 1%.
4. Flash (Excess Zinc on Part Edges)
- Cause: Mold clamping force too low (zinc leaks between mold halves) or injection speed too high.
- Solution:
-
- Increase clamping force by 10-15% (e.g., from 800kN to 920kN for a small mold).
-
- Reduce injection speed by 0.5-1m/s (e.g., from 3.5m/s to 3m/s).
- Example: A batch of mirror bases had flash—we increased clamping force to 900kN, and flash disappeared.
Q&A: Wisdom from the Die-Casting Shop
These are the questions automakers and designers ask most—from material choices to lead times, all grounded in real-world needs.
Q1: “Why choose zinc alloy over aluminum for my automotive part?”
- My Answer: It depends on the part’s size and function. Zinc (Zamak) is better for small, complex parts (e.g., lock housings, sensor brackets) because:
-
- It flows better (fills tiny cavities, like 2mm holes, without thin spots).
-
- It’s easier to cast with tight tolerances (±0.02mm vs. aluminum’s ±0.05mm).
-
- It’s cheaper for high-volume production (faster cycle times: 30 shots/min vs. aluminum’s 20 shots/min).
Aluminum is better for large, lightweight parts (e.g., engine brackets)—it’s lighter, but harder to cast for small details.
Q2: “How long does a custom zinc die-casting project take?”
- My Answer: 8-12 weeks, on average:
-
- 2-3 weeks: Demand analysis + design/simulation.
-
- 4-6 weeks: Mold fabrication (the longest part—H13 steel takes time to mill and heat-treat).
-
- 1-2 weeks: Prototype testing + parameter adjustment.
-
- 1 week: Mass production (for 10,000-100,000 parts).
Rush projects can be done in 6 weeks, but it risks cutting corners (e.g., skipping simulation)—not recommended for automotive parts.
Q3: “Can I add inserts (e.g., threaded bolts) to my custom part?”
- My Answer: Yes—this is a common custom feature for automotive parts (e.g., inserting M5 bolts into mirror bases for easy assembly). Key tips:
-
- Use brass or steel inserts (compatible with zinc—no galvanic corrosion).
-
- Design the insert with knurls (ridges) to lock it into the zinc (no loose inserts!).
-
- Place inserts in the mold before injection (not post-installed—stronger bond).
We do this for 80% of our automotive parts—it saves automakers time on assembly.
Q4: “How do I control costs for a custom zinc die-casting project?”
- My Answer: Focus on the mold—this is where 60% of costs lie. Ways to save:
-
- Use a multi-cavity mold (e.g., 2 cavities instead of 1—doubles production speed, same mold cost).
-
- Avoid over-engineering (e.g., Ra 0.8μm finish for a hidden part—Ra 3.2μm is cheaper and works just as well).
-
- Choose standard alloys (Zamak 3/5/7—custom alloys cost 20% more).
A client once wanted a “custom zinc alloy with extra strength”—we convinced them Zamak 5 would work, saving them $20,000 on material development.