Design: Steer Clear of the “Looks Good but Hard to Make” Trap
Poor design can directly double costs or delay delivery. Based on industry standards, here are the key pitfalls to avoid:
-
Manufacturability Principles
- Fillets & Internal Corners: Never design completely sharp internal corners—you must use fillets, with a radius at least half the diameter of the cutting tool. For example, a 10mm tool needs a fillet of at least 5mm; otherwise, the tool might get stuck or the surface will be rough.
- Wall Thickness & Hole Depth: Metal parts need a minimum wall thickness of ≥0.76mm, while plastic parts need ≥1.52mm. Blind holes (holes that don’t go all the way through) can’t be deeper than 4 times their diameter—if they are, you’ll need step-by-step drilling.
- Feature Orientation: Arrange key features (like holes or slots) along the X/Y/Z axes. This cuts down on complex programming for multi-axis machines and can reduce machining time by 20%.
-
Mistakes in Drawing Labeling
- If you don’t mark tolerances, manufacturers will default to ±0.1mm—but this might not work for assembly. For example, holes that need to slide with a shaft should be ±0.01mm, and fixed-fit holes need ±0.005mm. Every time you tighten tolerance by one level, costs can rise 30%-50%.
- Be sure to provide complete documents: 2D drawings (with tolerance marks), 3D models (in STEP/IGS format for programming simulations), and surface roughness requirements (e.g., “Ra 1.6μm” means a mirror-like finish).
-
Matching Materials to Design
- Aluminum alloy 6061-T6 is easy to machine and cost-effective, great for structural parts. Stainless steel SUS316 is corrosion-resistant but wears tools faster—leave more clearance in your design. Titanium alloy TC4 is strong but prone to heat deformation, so reserve 0.2-0.3mm of machining allowance.
- For medical or food industry parts, avoid deep cavities (they trap cutting fluid). Use through-holes or sloped transitions instead.
Choosing a Manufacturer: 4 Criteria for Reliable Partners
Picking the right manufacturer is key to getting your project right. Focus on these four areas:
-
Hard Technical Indicators
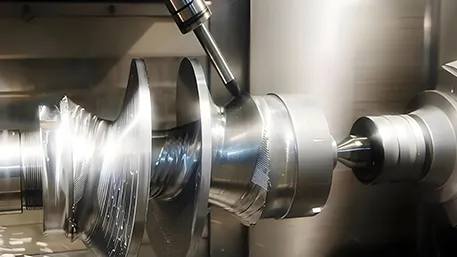
- Equipment: Prioritize manufacturers with imported machines like Mikron (Switzerland) or DMG MORI (Germany)—their positioning accuracy reaches ±0.0025mm, way better than ordinary domestic machines (±0.01mm). For complex curved parts, confirm they have 5-axis machining centers and recent case studies (e.g., aerospace blades, auto molds).
- Inspection Capabilities: They must have equipment like Coordinate Measuring Machines (CMM) and optical projectors, and be able to provide Full Inspection Reports (FAIR). For medical parts, they should also support Statistical Process Control (SPC) records.
-
Quality & Compliance
- The basic requirement is ISO 9001 certification. For aerospace, look for AS9100; for medical, ISO 13485. Ask for their defect rate data from the last 6 months—top manufacturers have a batch defect rate below 0.5%.
- Check their traceability system: Can they provide Material Test Certificates (MTC) and machining parameter records by batch? This helps quickly fix issues if they arise.
-
Transparent Quotations
- A reliable quote should break down costs: material costs (e.g., titanium alloy is ~$30-50/kg), machining hourly rates ($50-80/hour for standard machines, $150-200/hour for 5-axis), post-processing fees (anodizing is $2-5/sq dm), and inspection fees. Avoid “one-price” quotes—they might hide extra costs later.
- Prefer manufacturers who respond to quotes within 24 hours and proactively offer DFM (Design for Manufacturability) advice. For example, some might say, “Changing a φ3mm hole to φ4mm will reduce drill breakage and cut costs by 15%.”
-
Delivery Capabilities
- Ask for a production schedule and make sure their machine utilization rate is no more than 85% (rates that are too high lead to delays from rushed orders). Local manufacturers are better—for example, suppliers in East China can source aluminum 3-5 days faster than those in remote areas.
- Clarify late-delivery clauses (e.g., 1% of the order value deducted per day late). Avoid unnecessary rush orders—they cost 20%-50% extra and might hurt precision if processes are cut short.
Cost vs. Precision: Tighter Tolerance Isn’t Always Better
Blindly chasing precision can blow your budget, but loose tolerance ruins functionality. The key is to “customize based on needs”:
-
Choosing the Right Tolerance
- Standard structural parts only need bilateral tolerance (e.g., ±0.02mm). Fitting surfaces (for assembly) need unilateral tolerance (e.g., +0.00/-0.03mm to avoid oversized parts). Only high-precision fields (like aerospace) need GD&T tolerance (to control geometric features like flatness or concentricity).
- Example: For a medical equipment connecting shaft, relaxing the tolerance of non-fitting sections from ±0.001 inches to ±0.01 inches cut the unit cost from $120 to $85—with no impact on performance.
-
Practical Cost-Saving Tips
- Choose standard materials: Aluminum 6061 costs 25% less to machine than 7075 and works for most structures.
- Combine features: Turn multiple small slots into one wide slot to reduce tool changes.
- Skip unnecessary post-processing: Non-visible parts don’t need anodizing—save $3-8 per part.
- Optimize small batches: For 10-50 parts, combine your order with others using the same material. This spreads programming costs and cuts 15%-20% off the price.
Delivery Management: How to Avoid Delays
Queries about “CNC parts lead time” are up 45% yearly. Delays usually happen in 4 areas—here’s how to fix them:
| Delay Stage | Main Cause | Solution |
|---|---|---|
| Design Confirmation | Repeated drawing revisions, unclear tolerances | First use 3D printed prototypes to test assembly; have the manufacturer pre-check tolerances |
| Material Sourcing | Shortages of special materials (e.g., titanium TC4) | Choose manufacturers with stock; confirm material lead times 1-2 weeks in advance to lock supplies |
| Production | Machine breakdowns, scheduling conflicts | Pick manufacturers with ≥5 machines; sign a production schedule confirmation letter to clarify start/end times |
| Quality Inspection | Long full-inspection times for precision parts | Agree on inspection items in advance; spot-check non-critical dimensions; ask the manufacturer to share inspection data in real time |
Typical lead times: 3-7 days for simple parts (e.g., flat brackets), 7-15 days for medium-complexity parts (e.g., parts with curved slots), and 20-30 days for high-precision parts (e.g., aerospace connectors). For rush orders, choose manufacturers that offer “AI programming + night shifts”—this cuts lead times by 30%, but always check if precision will be affected first.
Summary: The “Success Formula” for Custom CNC Parts
Clear requirements (material/tolerance/delivery) + manufacturable design (follow machining rules) + reliable manufacturer (full equipment/compliance/good service) + process follow-up (confirm schedules/inspection points) = low-cost, high-precision, on-time delivery. Save the standards and checklists in this guide—they’ll help you avoid most pitfalls next time you order custom CNC parts.

