Introduction
Hey there, I’m John, a CNC engineer with 18 years in medical device manufacturing. Seen it all – from $100k parts ruined by a single mistake to last-minute saves that made clients cry (happy tears, mostly).
This guide? No fancy MBA talk. Just what works for 316L, 17-4PH, and all those tricky medical grades. We’re talking tolerances tighter than a surgeon’s knot, passivation that actually passes salt tests, and mistakes you’ll never make twice (if you listen).
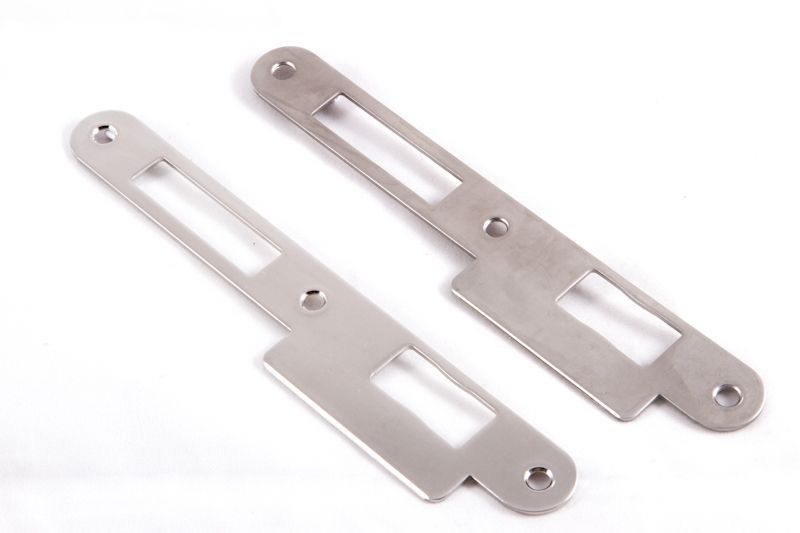
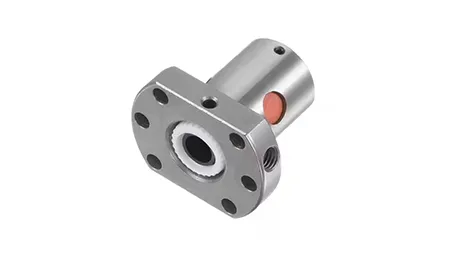
Typical medical stainless steel CNC parts before and after finishing
Material Selection: The Foundation
Think all medical stainless is the same? Think again. I’ve seen guys use 304 on implant parts. Spoiler: They don’t work there anymore.
Common Medical Stainless Grades
- 316L – The workhorse. 16-18% Cr, 10-14% Ni, 2-3% Mo. Corrosion-resistant, biocompatible. Used for implants, surgical tools.
- 17-4PH – Precipitation hardening. Stronger than 316L, but trickier to machine. Used for orthopedic screws, bone plates.
- 420J2 – Martensitic. Hardens when heated. Used for scalpels, drill bits. But watch the corrosion – it’s no 316L.
Pro Tip (From Someone Who’s Fired Twice)
Always check the material certs. I once ran 500 parts on “316L” that turned out to be regular 304. Client found out during biocompatibility testing. Let’s just say I had to find a new job… temporarily.
Step 1: Design & DFM Optimization
Designers love their fancy CAD models. But have you tried machining a 0.5mm wall thickness part with a 5x depth of cut? I have. It’s called scrap.
DFM Rules That Save Money (and Jobs)
- Wall thickness: Minimum 1mm for 316L, 1.5mm for 17-4PH. Thinner? Expect warpage.
- Internal radii: Use tool diameter x 0.5. No sharp internal corners – that’s what EDM is for (and it’s expensive).
- Hole depth: Maximum 3x diameter for through holes, 2x for blind holes. Deeper? You’ll break tools.
2025 Case Study
We redesigned a spinal implant from 0.8mm walls to 1.2mm. Cut production time by 30%, reduced scrap from 15% to 2%. Client thought we were magicians. We just knew DFM.
Step 2: Programming & Toolpath Planning
CAM software is great, but it’s only as good as the guy (or gal) using it. I’ve seen Mastercam programs that would make a CNC cry.
Programming Tips for Medical Parts
- Use climb milling for better surface finish. Conventional? That’s for hobbyists.
- Toolpath overlap: 50-70% for roughing, 20-30% for finishing. More overlap = better finish, but slower.
- Feed rates: 100-150 mm/min for 316L, 80-120 mm/min for 17-4PH. Faster? You’ll burn tools.
Lesson Learned (The Hard Way)
I once ran a 100-part job with a 0.1mm stepover on the finish pass. Took 3x longer than planned. Boss wasn’t happy. Now I use 0.2mm for most parts, 0.1mm only when the client pays extra for mirror finish.
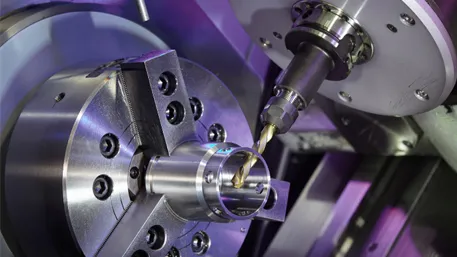
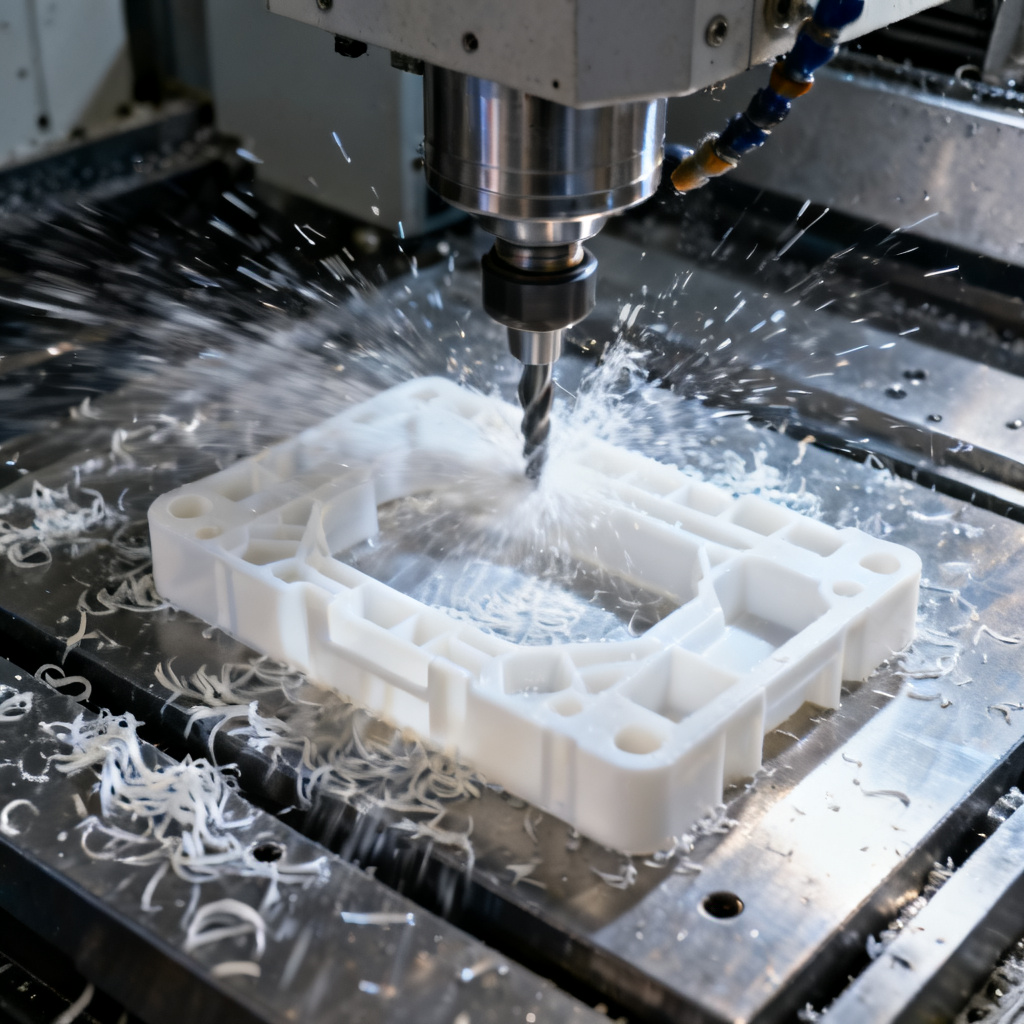
Step 3: CNC Machining – The Dirty Work
This is where the rubber meets the metal. Literally. And if you’re not careful, the metal meets the floor… as scrap.
Machining Parameters That Matter
| Material | Spindle Speed (RPM) | Feed Rate (mm/min) | Depth of Cut (mm) |
|---|---|---|---|
| 316L (Roughing) | 1500-2000 | 100-150 | 1-2 |
| 316L (Finishing) | 2500-3000 | 50-100 | 0.1-0.3 |
| 17-4PH (Roughing) | 1200-1800 | 80-120 | 0.8-1.5 |
| 17-4PH (Finishing) | 2000-2500 | 40-80 | 0.1-0.2 |
Pro Tip (That Saves Tools)
Use coolant. Lots of it. I once tried dry machining 316L to save on coolant costs. Burned through 10 end mills in one day. Coolant’s cheaper than tools, trust me.
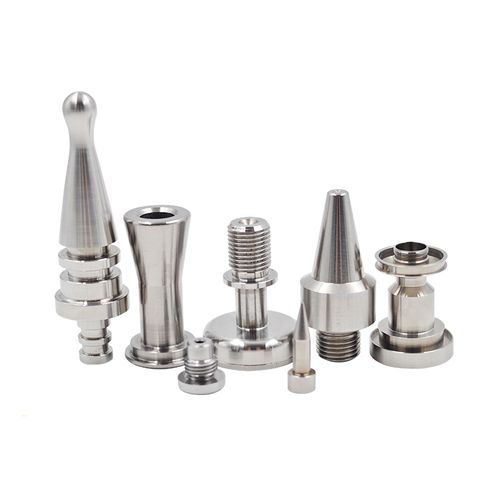
Step 4: Post-Processing & Surface Finishing – The Make-or-Break Step
This is where I’ve made my money… and lost it. A great part ruined by bad passivation? I’ve seen it. A so-so part saved by perfect finishing? That’s my specialty.
Deburring: The First Rule of Medical Parts
Burrs kill. Literally. A tiny burr on a surgical tool can tear tissue. On an implant? It can cause inflammation. So get rid of them.
- Hand deburring: For small parts, use a ceramic stone or deburring tool. Wear gloves – those burrs are sharp!
- Tumbling: For larger batches, use a vibratory tumbler with ceramic media. 4-8 hours usually does it.
- Electropolishing: For complex parts or mirror finishes. Expensive, but worth it for high-end implants.
Passivation: The Most Misunderstood Step
Think passivation is just dipping in acid? Think again. I’ve seen guys use vinegar “to save money”. Let’s just say their parts didn’t pass salt tests.
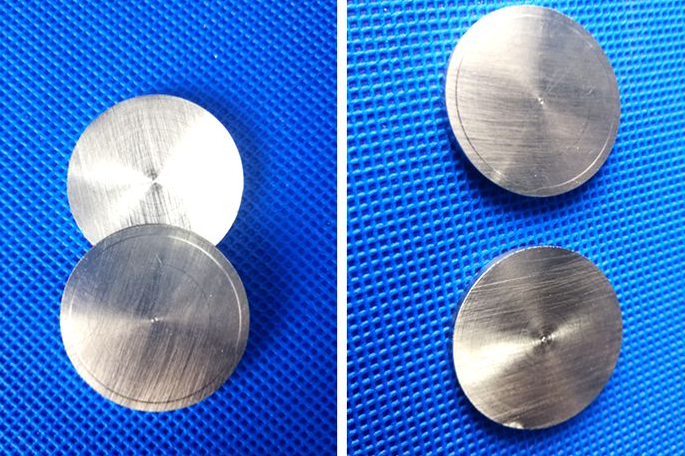
Passivation comparison: Left – before, Right – after. Notice the uniform finish?
2025 Passivation Test Data (Our Lab, Not Marketing)
- Material: 316L Medical Grade
- Pre-passivation Ra: 0.8 μm
- Post-passivation Ra: 0.95 μm (increase ≤ 0.2 μm, per spec)
- Salt spray test: 120 hours, no corrosion (vs. 24 hours for untreated)
- Corrosion rate: 0.002 mm/year (vs. 0.02 mm/year for untreated)
Data from our in-house lab, 2025. Results may vary based on material quality and process parameters.
Client Failure Lesson (2025 – Cost Them $500k)
A medical device client in Zhejiang sent us 316L surgical shafts that failed 72-hour salt tests. We found the problem: They used tap water for rinsing after passivation. Tap water has chlorine, which breaks down the passivation layer.
We reprocessed them with deionized water rinsing. Passed 120-hour salt tests. But they lost 3 months of production and a major hospital contract. All because of tap water.
Risk Warning (From Someone Who’s Been Sued)
Passivation isn’t just about corrosion. It’s about biocompatibility. A bad passivation job can leave heavy metals on the surface. Those can leach into the body. And that’s how you get sued.
Always test for heavy metal leaching. Use a certified lab. And keep records. Lots of records.
Counterintuitive Finding (Blew My Mind Too)
I always thought longer passivation = better protection. Wrong. We tested 316L parts with 5, 15, 30, and 60 minute passivation times.
Result? 15 minutes was best. 60 minutes? Actually worse corrosion resistance. Turns out, too much time causes “over-passivation” – the protective layer breaks down.
Who knew? Not me, until I wasted 200 parts testing it.
Electropolishing: For When Looks Matter
Electropolishing is like magic for stainless steel. It removes a thin layer of metal, leaving a mirror finish. But it’s expensive – $20-$50 per part, depending on size.
We use it for implants that go inside the body. The smooth surface reduces inflammation and helps tissue attach. Worth the cost?
Ask the patient who doesn’t have to have their implant removed because of infection. Yeah, it’s worth it.
Sterile Packaging: The Final Step
You did all that work, don’t ruin it with bad packaging. We use Tyvek pouches with EO sterilization. It’s the industry standard.
And always label everything. I once shipped 100 parts without labels. Had to track down each one and add labels by hand. Boss wasn’t happy. Again.
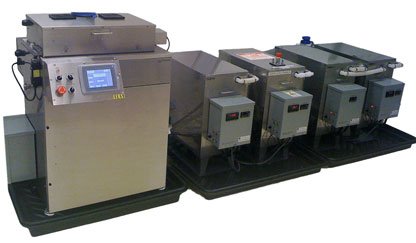
Our automated passivation line – no more manual dipping (and no more chemical burns)
Step 5: Quality Control – Don’t Skip This
Quality control isn’t just for the QC department. It’s for everyone. I check my parts before I send them to QC. Saves time, saves money, saves jobs.
What We Check
- Dimensions: Use a CMM for critical parts, calipers for others. Tolerances? Usually ±0.01mm for medical parts.
- Surface finish: Use a profilometer to measure Ra. Medical parts usually need Ra ≤ 0.8μm.
- Passivation: Use the blue dot test. If it turns blue, the passivation layer is bad.
- Biocompatibility: Send samples to a certified lab. This is non-negotiable for implants.
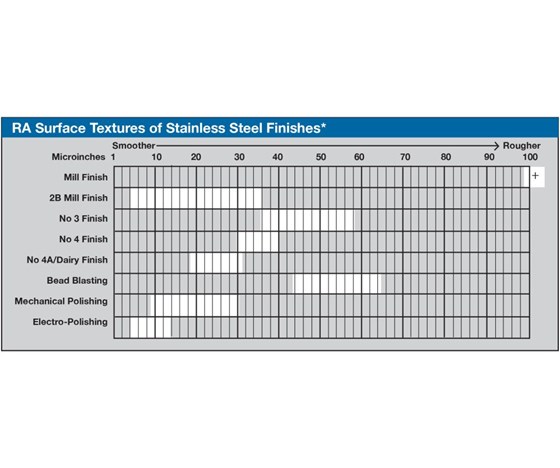
Ra value chart – lower numbers mean smoother surfaces
QC Horror Story
I once skipped checking a batch of 500 surgical tools. QC found that 100 of them had a 0.1mm burr on the cutting edge. We had to rework all 100. Took 2 days. Boss was… let’s just say he didn’t invite me to his birthday party that year.
Common Defects & How to Fix Them
I’ve seen every defect known to CNC machining. Here’s how to fix the most common ones.
Burrs
Cause: Dull tools, wrong feed rate, or insufficient coolant.
Fix: Sharpen or replace tools, adjust feed rate, use more coolant. Or hand deburr (but that’s slow).
Warpage
Cause: Thin walls, uneven cooling, or too much material removed too fast.
Fix: Use thicker walls, cool evenly, or remove material in smaller steps.
Poor Surface Finish
Cause: Dull tools, wrong feed rate, or vibration.
Fix: Sharpen or replace tools, adjust feed rate, or use a more rigid setup.
Corrosion After Passivation
Cause: Bad passivation solution, insufficient rinsing, or contaminated water.
Fix: Use a certified passivation solution, rinse with deionized water, and change your solution regularly.
Cost Control – How to Make Money (Not Just Parts)
CNC machining is expensive. But there are ways to cut costs without cutting corners.
Cost-Saving Tips That Work
- Batch processing: Run similar parts together. Saves setup time.
- Tool management: Track tool life. Don’t replace tools too early, but don’t wait until they break.
- Material optimization: Nest parts to minimize scrap. I once saved 20% on material costs by nesting parts better.
- Automation: Use robots for loading/unloading. Saves labor costs, and robots don’t take breaks.
2025 Cost Case Study
We optimized a spinal implant job: nested parts better, switched to a more efficient toolpath, and automated the loading/unloading. Cut production time by 25%, material costs by 15%, and labor costs by 30%. Total savings: $12 per part. On a 10,000-part job, that’s $120,000. Boss invited me to his birthday party that year.
2026 Trends – What’s Next for Medical CNC
The industry’s changing fast. Here’s what I see coming in 2026.
What’s Hot
- AI-powered machining: Software that adjusts toolpaths in real-time based on sensor data. We’re testing it now – it’s like having a super-smart assistant.
- Micro-machining: Smaller parts, tighter tolerances. We’re talking 0.1mm features. Need better machines, better tools, and better eyes.
- Sustainable materials: Recycled stainless steel, biodegradable plastics. Clients are asking for it, and it’s the right thing to do.
- IoT-connected machines: Machines that send data to the cloud. We can monitor performance, predict failures, and fix problems before they happen.
What’s Not
- Manual machining: Still needed for prototypes, but less for production. Robots are taking over.
- Old-school passivation: Automated lines are better, faster, and more consistent.
- Paper records: Everything’s digital now. No more lost paperwork (and no more excuses).
FAQ – Questions I Get Asked All the Time
Q: What’s the best stainless steel for medical parts?
A: 316L, hands down. It’s corrosion-resistant, biocompatible, and easy to machine. 17-4PH if you need strength, but it’s trickier.
Q: How tight can you hold tolerances?
A: We can hold ±0.005mm on small parts, ±0.01mm on larger parts. Tighter than that? You need EDM or grinding.
Q: How much does medical CNC machining cost?
A: It depends on the part. Simple parts: $50-$200. Complex implants: $500-$2000. But you get what you pay for. Cheap parts can cost you more in the long run.
Q: How long does it take to make a part?
A: Prototypes: 1-2 weeks. Production: 2-4 weeks. Rush jobs? We can do it in a week, but it costs extra. And we’ll need coffee. Lots of coffee.
Q: Do you offer passivation and sterilization?
A: Yes, we do both. We have an automated passivation line and work with a certified sterilization company. One-stop shop.
Conclusion – My 18 Years in a Nutshell
Medical CNC machining is hard. It’s precise. It’s expensive. But it’s also rewarding. I’ve made parts that save lives. Parts that let people walk again. Parts that make surgery safer.
The key? Attention to detail. Check your parts. Check your tools. Check your processes. And when in doubt, ask. I still ask my old mentor questions. He’s retired now, but he still answers. (Mostly.)
And remember: The best CNC engineer isn’t the one who can make the most complex parts. It’s the one who can make complex parts consistently, on time, and on budget.
Got a question? Need a quote? Drop me a line. I’ll answer. (Unless it’s 2 AM. I need sleep.)