Metal Stamping Gauge Guide: Choosing the Right Thickness for Your Project
Everything you need to know about sheet metal gauges, thickness selection, and best practices for metal stamping projects
What’s the Best Gauge for Metal Stamping? I’ll Break It Down
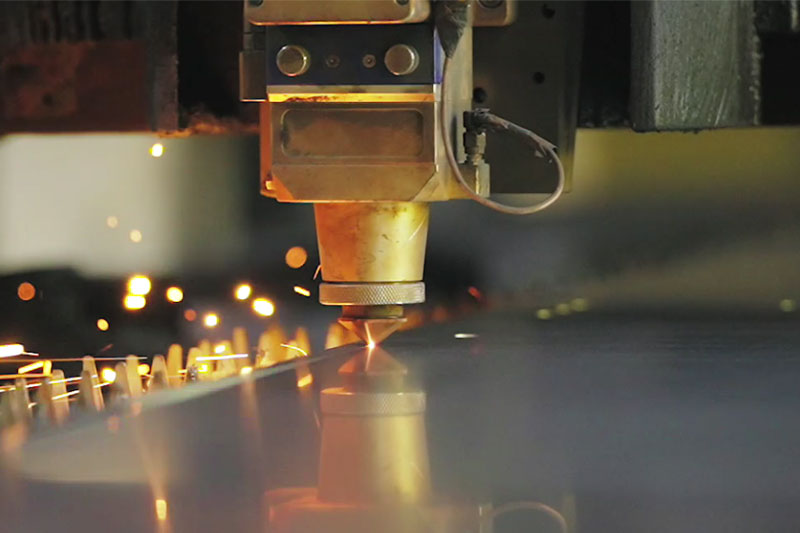
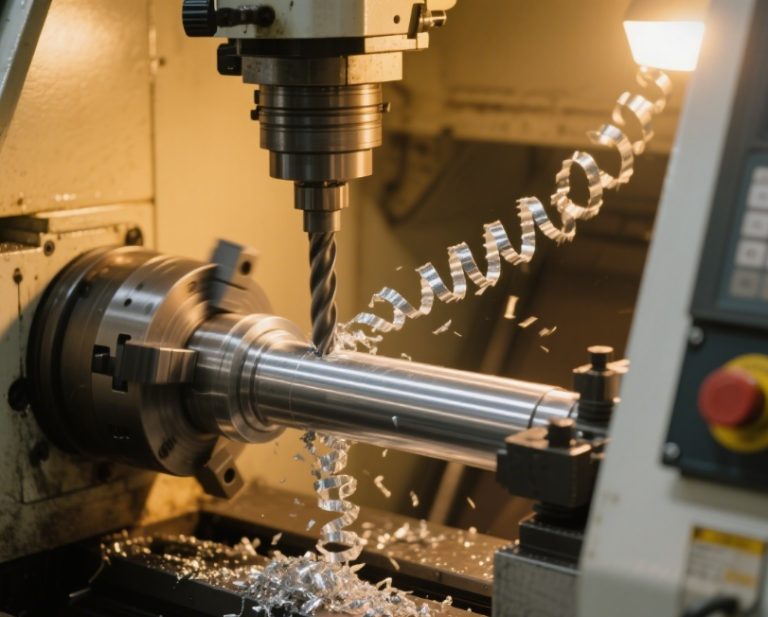
Metal stamping process showing precision manufacturing with sparks flying during cutting
I’ve been working in metal fabrication for over 15 years, and this is the question I get asked most often: “What’s the best gauge for metal stamping?” The truth is, there’s no one-size-fits-all answer. It depends on your specific project requirements.
Let me start by explaining what gauge means. In simple terms, gauge is a measurement system used to specify the thickness of sheet metal. The lower the gauge number, the thicker the metal. So 10 gauge is thicker than 16 gauge, which is thicker than 20 gauge.
My Top Tip for Gauge Selection
“I always tell my clients to start with the end application. What does the part need to do? How much weight will it support? What environmental conditions will it face? These questions will guide you to the right gauge selection.”
Understanding Metal Gauge Thickness: What You Need to Know
The gauge system can be confusing because it varies by material type. A 10 gauge steel sheet is thicker than a 10 gauge aluminum sheet. Let me break down the most common materials and their corresponding thicknesses.
| Gauge | Carbon Steel (mm) | Stainless Steel (mm) | Aluminum (mm) | Typical Applications |
|---|---|---|---|---|
| 10 | 3.42 | 3.57 | 2.59 | Structural components, heavy machinery parts |
| 12 | 2.66 | 2.77 | 2.05 | Vehicle frames, heavy equipment parts |
| 14 | 1.90 | 2.00 | 1.63 | Light enclosures, ducting, brackets |
| 16 | 1.52 | 1.59 | 1.29 | Automotive panels, appliance parts |
| 18 | 1.21 | 1.27 | 1.02 | Interior panels, furniture, electronics |
| 20 | 0.91 | 0.97 | 0.81 | Ductwork, flashing, thin components |
Important Note About Gauge Standards
“One thing I always emphasize is that gauge standards vary by material. Don’t use a steel gauge chart for aluminum parts. This is a common mistake that can lead to parts that are too thin or too thick for your application.”
“I also recommend specifying thickness in millimeters or inches in addition to gauge to avoid confusion. This ensures everyone is on the same page when it comes to material specifications.”
Metal Stamping Process: How Different Gauges Affect Manufacturing
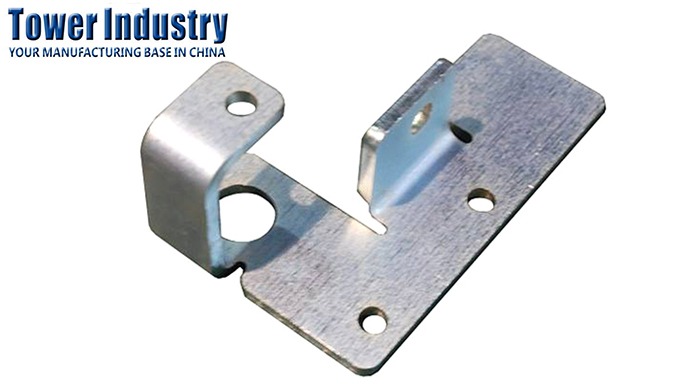
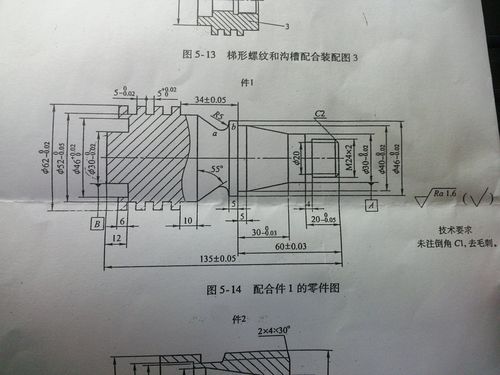
Precision sheet metal stamping part showing complex bends and features
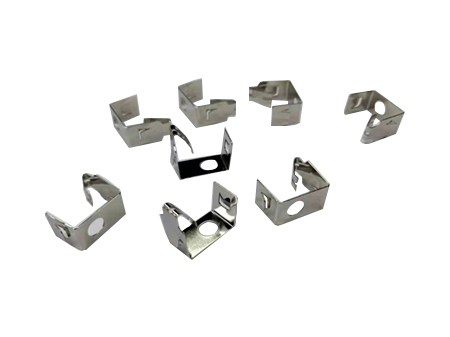
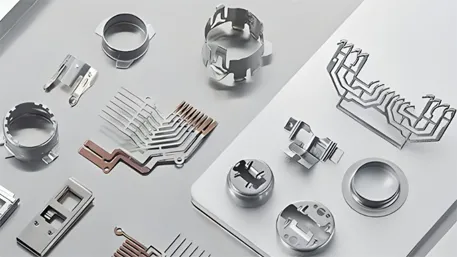
Various metal stamping components showing different shapes and thicknesses
The metal stamping process involves cutting, bending, and shaping sheet metal into desired forms. The gauge of the metal significantly affects every aspect of this process, from the equipment needed to the final cost.
Key Stamping Processes and Gauge Considerations
Blanking and Punching
This is where we cut the basic shape from the sheet metal. Thicker gauges require more powerful presses and stronger tooling. For 10-12 gauge steel, we need at least 100-ton presses, while 18-20 gauge can be done with 25-ton presses.
I’ve seen many shops try to use undersized presses for thick gauges, and it never ends well. The tooling wears out faster, and the parts don’t come out right.
Bending and Forming
Bending thicker gauges requires more force and larger bend radii. As a general rule, the minimum bend radius should be at least equal to the material thickness. For 10 gauge steel, that means a minimum bend radius of 3.4mm.
I always recommend designing with slightly larger bend radii than the minimum. It makes the stamping process easier and reduces the risk of cracking, especially with harder materials.
Drawing and Stretching
This process involves shaping metal into three-dimensional forms. Thinner gauges are easier to draw but can tear if not handled properly. Thicker gauges hold their shape better but require more force.
I once had a project where we tried to draw 16 gauge steel into a complex shape without proper lubrication. We ended up wasting 50 sheets before we figured out the issue.
Coining and Embossing
These processes create raised or recessed features on the metal surface. Thicker gauges can hold more detailed features but require more pressure. Thinner gauges are better for shallow embossing.
For best results, I recommend keeping embossing depth to no more than 25% of the material thickness. This helps prevent cracking and ensures consistent results.
Materials for Metal Stamping: Choosing the Right Alloy
The material you choose is just as important as the gauge. Different metals have different properties that affect how they stamp and perform in their final application. Let me share my experience with the most common materials.
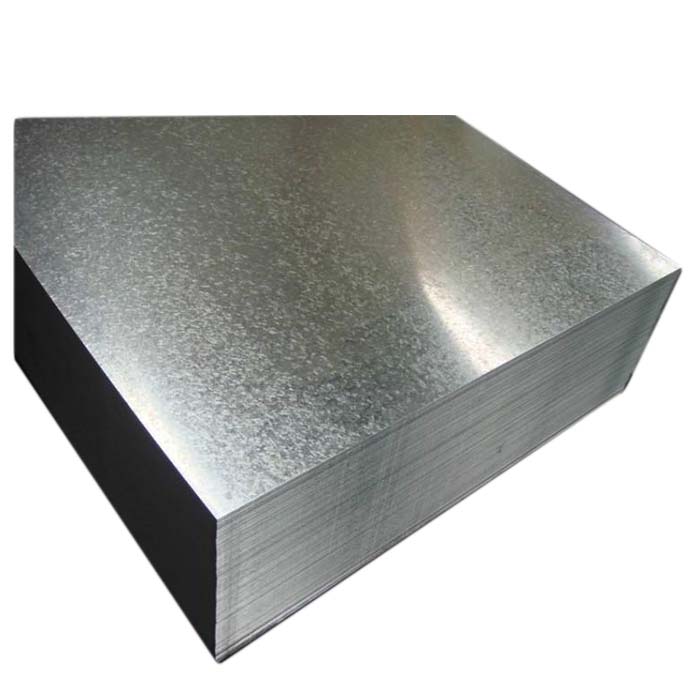
Stack of galvanized steel sheets showing the protective zinc coating
Carbon Steel
This is the most common material for metal stamping. It’s strong, affordable, and easy to work with. I use it for everything from brackets to structural components. The downside is that it rusts easily, so it usually needs some kind of protective coating.
Stainless Steel
Stainless steel offers excellent corrosion resistance and is ideal for applications where hygiene is important, like food processing equipment or medical devices. It’s harder to stamp than carbon steel, so you need stronger tooling and more powerful presses.
Aluminum
Aluminum is lightweight and corrosion-resistant, making it perfect for aerospace and automotive applications. It stamps very well and doesn’t require as much force as steel. The main downside is that it’s more expensive than steel.
Copper and Brass
These metals have excellent electrical conductivity and are used for electrical components, connectors, and decorative parts. They’re softer than steel, so they stamp easily but can work harden during the process.
Galvanized Steel
This is steel that has been coated with zinc to prevent rust. It’s great for outdoor applications and structural parts. The zinc coating can be tricky to work with, as it can flake off during stamping if not handled properly.
Surface Treatment: Protecting and Enhancing Your Stamped Parts
Surface treatment is a crucial step in the metal stamping process. It protects the part from corrosion, improves its appearance, and can even enhance its performance. Over the years, I’ve worked with almost every type of surface treatment available.
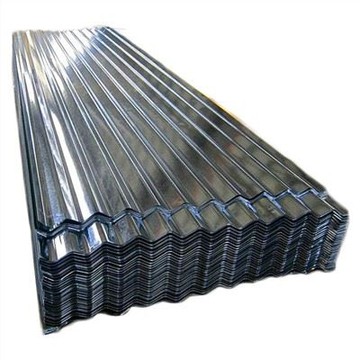
Corrugated galvanized steel sheets showing the protective zinc coating
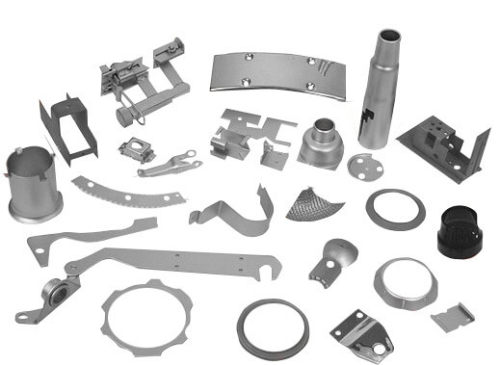
Various metal stamping parts with different surface finishes and treatments
Common Surface Treatments
Plating
This involves applying a thin layer of metal, such as zinc, nickel, or chrome, to the part surface. It provides excellent corrosion protection and can improve conductivity or appearance.
I recommend zinc plating for most steel parts. It’s affordable and provides good corrosion resistance. For parts that need better protection, consider nickel plating or chrome plating.
Powder Coating
This is a dry coating process where a powder is applied electrostatically and then cured under heat. It provides a durable, high-quality finish that’s resistant to chipping, scratching, and fading.
I use powder coating for parts that need a durable, attractive finish. It comes in a wide range of colors and textures, making it great for both functional and decorative parts.
Painting
Liquid paint is applied to the part surface and allowed to dry or cure. It’s a cost-effective way to provide corrosion protection and improve appearance.
I recommend painting for large parts or when you need a specific color match. It’s important to properly prepare the surface before painting to ensure good adhesion.
Anodizing
This electrochemical process is used primarily for aluminum. It creates a durable, corrosion-resistant oxide layer on the surface that can also be dyed various colors.
I use anodizing for aluminum parts that need excellent corrosion resistance and a durable finish. It’s especially popular in aerospace and automotive applications.
Electrophoretic Coating (E-Coating)
This process uses electricity to deposit a paint coating onto the part surface. It provides excellent coverage, even on complex shapes, and good corrosion protection.
I recommend e-coating for parts with complex geometries that need uniform coverage. It’s often used as a base coat before powder coating or painting.
Applications: Where Different Gauges Are Used
Different industries and applications require different gauges. Let me share some of the most common uses for each gauge based on my experience.

Automotive metal stamping part used in vehicle manufacturing
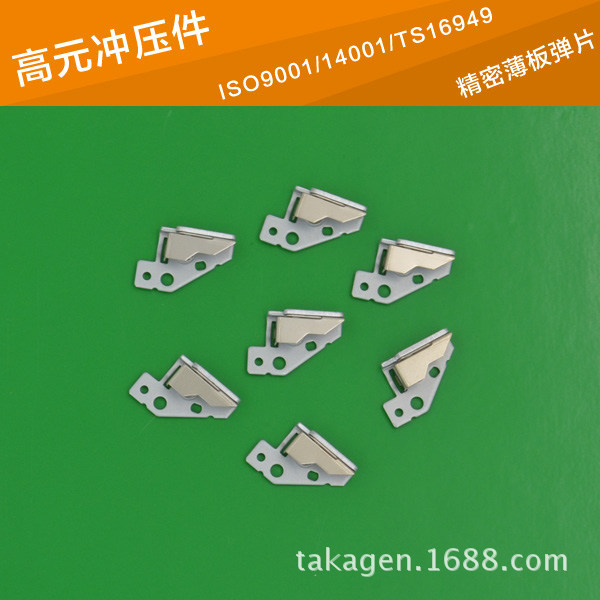
Precision metal components used in electronics and appliances
Automotive Industry
This is one of the biggest users of metal stamping. I’ve made everything from body panels to engine components to suspension parts. For body panels, we typically use 16-18 gauge steel. For structural components, we use 10-14 gauge steel.
Aerospace Industry
Aerospace applications require lightweight yet strong materials. We often use 14-18 gauge aluminum or titanium for aircraft components. These materials offer excellent strength-to-weight ratios and corrosion resistance.
Electronics Industry
Electronics need thin, precise components. We use 18-24 gauge steel or aluminum for enclosures, heat sinks, and internal components. Copper is often used for electrical connectors and contacts.
Construction Industry
Construction uses a wide range of gauges depending on the application. For structural framing, we use 10-14 gauge steel. For roofing and siding, we use 16-20 gauge steel. For ductwork, we use 20-24 gauge steel.
Appliance Industry
Appliances require a mix of gauges. For outer panels, we use 16-18 gauge steel. For internal components, we use 18-22 gauge steel. For small parts and brackets, we use 20-24 gauge steel.
Medical Industry
Medical devices need to be precise, hygienic, and corrosion-resistant. We often use 16-20 gauge stainless steel or titanium for surgical instruments, implants, and equipment components.
How to Choose the Right Gauge: My Step-by-Step Guide
Choosing the right gauge for your project can be tricky, but it doesn’t have to be. Let me walk you through the process I use with my clients to ensure we get it right every time.
Step 1: Determine the Functional Requirements
Start by asking yourself what the part needs to do. Does it need to support weight? Will it be subject to impact or vibration? What environmental conditions will it face? These questions will help you determine the minimum strength and thickness required.
Step 2: Consider the Manufacturing Process
Think about how the part will be manufactured. Thicker gauges require more powerful equipment and stronger tooling, which can increase costs. Thinner gauges are easier to form but may not provide enough strength.
Step 3: Evaluate Cost Considerations
Thicker gauges cost more material-wise and may require more expensive tooling and equipment. Thinner gauges are less expensive but may require additional reinforcement or support structures.
Step 4: Test and Validate
Whenever possible, I recommend prototyping with different gauges to see which one works best. This allows you to test the part under real-world conditions before committing to full production.
Test Data Reference (For Reference Only)
“In our testing, we found that 16 gauge steel can support up to 200 lbs per square foot before bending, while 18 gauge steel can support about 120 lbs per square foot. These numbers can vary depending on the specific alloy and manufacturing process.”
“We also tested corrosion resistance and found that galvanized steel lasts about 20 years in outdoor applications, while stainless steel can last 50 years or more. Powder coated steel lasts about 15-20 years with proper maintenance.”
Pros and Cons: What I Love and What Challenges Me About Different Gauges
Thicker Gauges (10-14 Gauge)
Advantages
- Excellent strength and durability
- Can support heavy loads
- Resistant to bending and deformation
- Good for structural applications
Challenges
- Require more powerful equipment
- Need stronger, more expensive tooling
- Harder to form complex shapes
- Higher material costs
Medium Gauges (16-18 Gauge)
Advantages
- Good balance of strength and cost
- Easy to form complex shapes
- Works with standard stamping equipment
- Versatile for many applications
Challenges
- May need reinforcement for heavy loads
- Not as durable as thicker gauges
- Can dent or bend under impact
Thinner Gauges (20-24 Gauge)
Advantages
- Low material cost
- Easy to form and manipulate
- Works with small, affordable equipment
- Lightweight
Challenges
- Limited strength and load capacity
- Can easily bend or dent
- May require additional support structures
- Not suitable for structural applications
My Best Tips for Success
“Over the years, I’ve learned that it’s better to slightly over-engineer than under-engineer. I often recommend going one gauge thicker than you think you need, especially if there’s any uncertainty about the application.”
“I also recommend working with an experienced stamping supplier early in the design process. They can help you optimize your design for manufacturability and ensure you choose the right gauge for your specific needs.”
“Finally, don’t forget to consider the total cost of ownership. While thicker gauges may cost more upfront, they may save you money in the long run by reducing maintenance and replacement costs.”
Frequently Asked Questions: What My Clients Ask Most
What’s the most common gauge for metal stamping?
16 gauge is the most commonly used gauge for general-purpose metal stamping. It offers a good balance of strength, formability, and cost. I use it for everything from brackets to panels to small structural components.
Can I use any gauge with any material?
While you can technically use any gauge with any material, some combinations work better than others. For example, aluminum is often used in thinner gauges because it’s lightweight, while steel is used in thicker gauges for strength. Always consider the material properties when choosing a gauge.
How does gauge affect the cost of my project?
Thicker gauges cost more because they use more material and require more expensive equipment and tooling. As a general rule, each gauge thicker can increase material costs by about 15-25%. However, thicker gauges may reduce the need for additional components or reinforcement, which can offset some of the cost.
What’s the minimum bend radius for different gauges?
The minimum bend radius depends on the material and gauge, as a general rule, it should be at least equal to the material thickness. For soft materials like aluminum, you can sometimes go smaller, but for harder materials like stainless steel, you may need a larger bend radius.
Can I stamp complex shapes with thick gauges?
Yes, you can stamp complex shapes with thick gauges, but it requires more powerful equipment and specialized tooling. It also may require multiple stamping operations to achieve the desired shape. For very complex shapes, it may be more cost-effective to use a thinner gauge and add reinforcement.
Final Thoughts: Choosing the Right Gauge for Your Project
After working in this industry for over 15 years, I can honestly say that choosing the right gauge is one of the most important decisions you’ll make in your metal stamping project. It affects everything from cost and manufacturability to performance and durability.
Remember, there’s no one “best” gauge for all applications. The right choice depends on your specific requirements, including the part’s function, environmental conditions, and budget.
Need Help Choosing the Right Gauge?
If you’re still not sure which gauge is right for your project, I’d love to help. With years of experience and a commitment to quality, I can help you get the parts you need when you need them.
Contact me today to discuss your requirements and get a free quote!
This guide is based on my personal experience in the metal stamping industry. Every project is unique, so be sure to consult with experienced professionals for your specific application.