Custom Stainless Steel Sheet Metal Enclosures
You asked for a stainless enclosure. Whether it survives the installation is decided by four things — the grade, the condition of the welds, the state of the surface, and the crevices the design leaves behind. This page works through all four, in the order they bite.
At a Glance
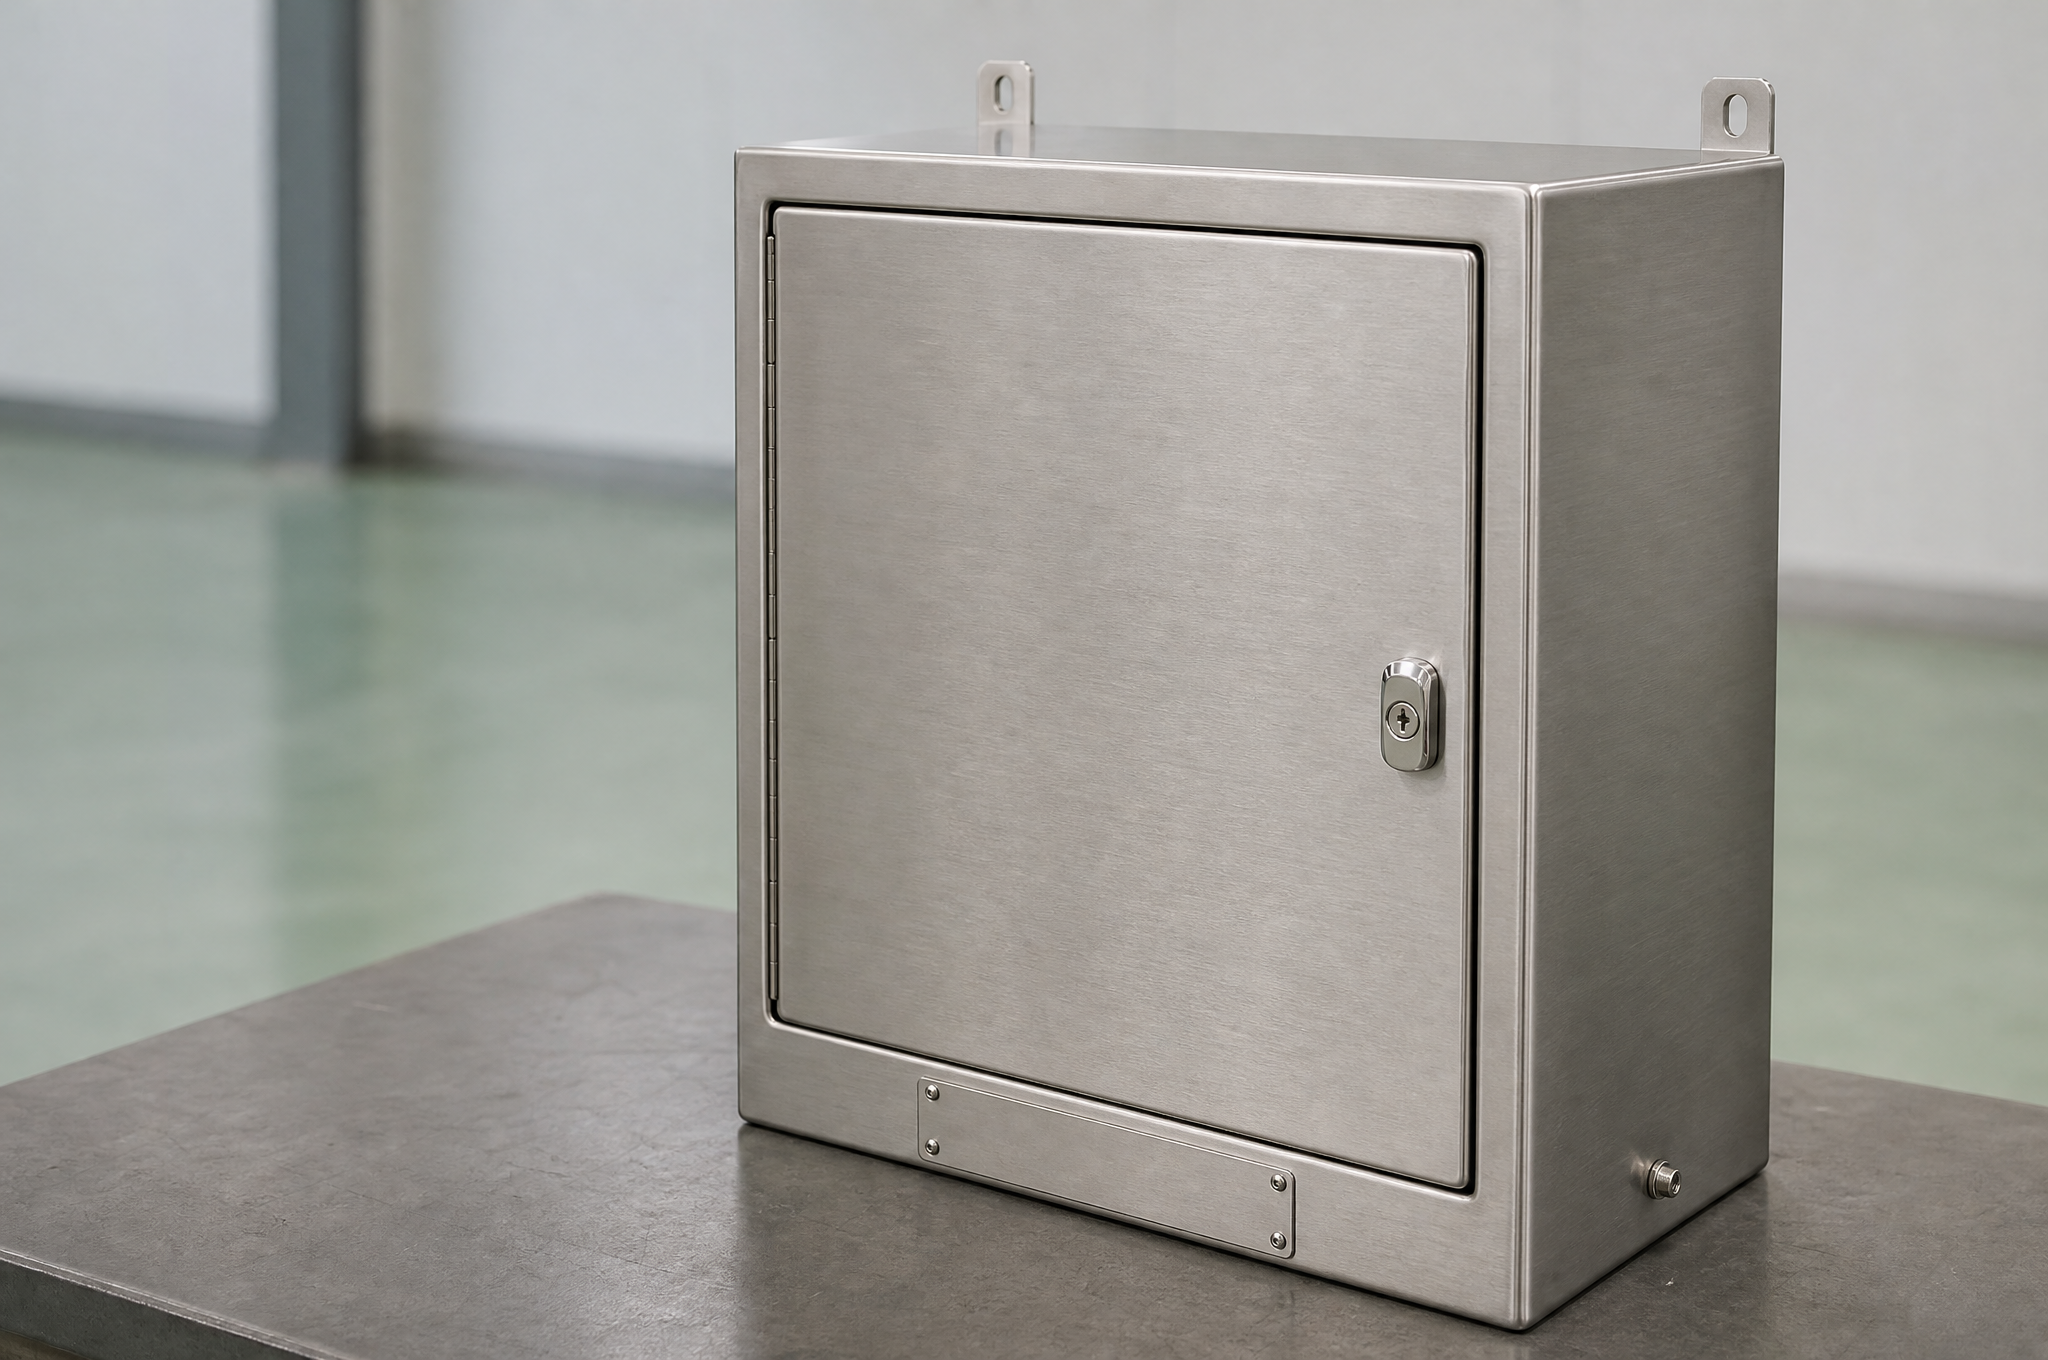
A stainless enclosure is a corrosion specification, not a material order. 304 and 316L are both austenitic and both depend on a chromium-oxide film a few nanometers thick; molybdenum is what separates them against chloride pitting, and a chromium-depleted surface is what defeats either. Four variables decide whether the finished box lasts: the grade, the condition of the weld and its heat-affected zone, the surface state left by fabrication, and the crevices the design creates — the gasket groove first among them. A protection rating belongs to the complete assembly that was tested, never to the sheet it was made from.
Why “Stainless” Is Not a Corrosion Specification
Stainless steel is not a metal that ignores its environment. It is a metal that protects itself with a passive film — an oxide layer roughly 1–2 nanometers thick, dominated by chromium, that forms in air within minutes of a fresh surface being exposed and re-forms immediately if it is scratched. The bulk alloy supplies the chromium; the film does the work. Roughly 18% chromium in 304 is not a corrosion allowance, it is the reservoir that keeps the film repairing itself.
That model explains everything that goes wrong on a stainless enclosure, because the film only fails in a small number of ways, and each one is a process or design decision rather than a material fault:
- The film is broken locally by chlorides. Chloride ions attack the weakest point of the film and prevent it from repassivating, which is pitting. Stagnant chloride on a horizontal surface is the classic case.
- The film cannot repair where oxygen cannot reach. Inside a gap — under a gasket, inside a lap joint, beneath a bolted gland plate — oxygen is consumed faster than it diffuses in, the film cannot rebuild, and the gap becomes an acid-filled pit. This is crevice corrosion, and it is the dominant enclosure failure mode.
- The chromium is taken out of the metal by welding heat. Between roughly 425 °C and 870 °C, carbon and chromium combine at grain boundaries as chromium carbide, leaving the adjacent metal short of chromium. That is sensitization, and it is why a welded seam can corrode while the sheet next to it is untouched.
- The surface is contaminated by foreign metal. Iron particles embedded from a mild-steel brush, a shared grinding disc or a steel bench sit on top of the stainless, rust, and are read as material failure.
Every one of the four is decided inside the fabrication process. None of them appears on the mill certificate, which is why a certificate alone does not tell a buyer what the finished box will survive.
| Variable | What it actually decides | Where you influence it |
|---|---|---|
| Grade | How much chloride the surface tolerates before pitting starts | Drawing, and the environment data behind it |
| Weld condition | Whether the seam and its heat-affected zone keep their chromium | Process route, shielding, post-weld treatment |
| Surface state | Whether chlorides can sit and concentrate; whether the film can rebuild | Finish choice, pickling, handling discipline |
| Geometry | How many permanent crevices the design contains | Gasket detail, joint design, drain paths |
Choosing Between 304, 304L, 316 and 316L
The four grades differ along two axes, and buyers usually conflate them. The alloy axis is molybdenum: 316 and 316L carry roughly 2–3% Mo, 304 carries none, and molybdenum is what raises resistance to chloride pitting. The carbon axis is the L suffix: 304L and 316L are limited to about 0.03% carbon instead of about 0.08%, which leaves less carbon available to form chromium carbide during welding.
Those are separate decisions. Buying 316L when the problem is a crevice and the welds are left with heat tint solves nothing; buying 304L when the problem is salt spray does not either.
| Service exposure | First grade to evaluate | Why | What to confirm before ordering |
|---|---|---|---|
| Indoor, dry, controlled humidity | 304 | No chloride load worth paying molybdenum for | That the interior really stays dry; condensation is the usual surprise |
| Indoor with washdown or condensation | 304, or 316L if the cleaning chemistry contains chloride | Water alone is not the issue; what is dissolved in it is | Cleaning agent, concentration, temperature, contact time |
| Outdoor, sheltered, low chloride | 304 | Rain sheds and dilutes; UV does not attack the alloy | Drain paths, and that no horizontal ledge holds water |
| Coastal, marine, de-icing salt | 316L | Airborne chloride is the dominant load | Distance from the shoreline, prevailing wind, wetting frequency |
| Chemical or process area | Not selectable from this table | The medium decides, not the environment label | Actual chemistry, concentration, temperature, aeration |
| Repeated high-temperature cleaning | 316L, subject to the cleaning chemistry | Hot chloride solutions are far more aggressive than cold ones | Peak temperature and dwell, and gasket compatibility at that temperature |
| Welded, thick section, corrosive service | 304L / 316L | L-grade keeps carbon out of the sensitization reaction | Weld procedure and whether post-weld pickling is specified |
What PREN does and does not answer
Pitting resistance equivalent number is the standard shorthand for comparing grades on paper: PREN = Cr + 3.3×Mo + 16×N, using the composition on the mill certificate. Typical values land around 18–20 for 304 and 24–28 for 316L. It is a useful cross-check when a supplier offers "316" with no composition data.
It is not a selection tool for an enclosure, for two reasons. First, PREN describes resistance to pitting initiation on a clean, freely exposed surface. An enclosure is full of crevices, and crevice corrosion starts at a lower chloride level than pitting on the same alloy — so a grade that is adequate on the outside face can still fail at the seal line. Second, PREN says nothing about the metallurgical condition of the surface you are actually shipping: a sensitized heat-affected zone or a chromium-depleted tint band has the chemistry of the certificate and the corrosion resistance of something considerably worse.
Where the L grades genuinely matter on a sheet enclosure
It is worth being precise here, because the L suffix is routinely oversold. Sensitization needs time as well as temperature: the steel must sit in the 425–870 °C window long enough for carbon to diffuse and precipitate. On a 1.2–2.0 mm sheet, a TIG weld cools through that window in seconds, which limits how much chromium carbide can form. On thicker sections, on multi-pass welds, and around a heavy fitting welded into the wall, the time in the window is longer and the L grade earns its premium.
So the honest rule: L is most defensible where the section is thick, where several passes overlap, or where the weld will sit in a corrosive service without post-weld pickling. On thin sheet that is pickled after welding, standard 304 or 316 with a controlled weld procedure frequently achieves the same outcome. If the drawing already specifies L, that is a valid conservative choice — just do not assume it removes the need for post-weld treatment. It does not. For how these same grades behave under cutting tools rather than under a welding torch, see the 304 vs 316 machining guide.
What Chlorides Actually Do to an Enclosure
Enclosures fail in four recognisable ways, and each one has a signature location on the box. Knowing which one you are designing against changes the grade, the weld treatment and the gasket detail — often in different directions.
| Mode | Where it shows up on an enclosure | What actually controls it |
|---|---|---|
| Pitting | Top face, under a dirt trail, in a weld spatter pit, at a scratch that holds water | Molybdenum content; surface roughness; keeping surfaces self-draining |
| Crevice corrosion | Gasket groove, lap joint, under the gland plate gasket, between subpanel and stud, under a washer | Geometry first, grade second; crevices start at lower chloride levels than open surfaces |
| Sensitization / weld decay | A band a few millimeters wide either side of a weld, worst on the inside where the root was not shielded | Carbon content, heat input, and post-weld pickling |
| Galvanic corrosion | At the contact between stainless and a zinc-plated latch, a carbon steel subpanel, or an aluminum bracket | Dissimilar metal pairing and whether the joint stays wet |
The gasket-groove paradox
A door gasket is specified to keep water out of the box. It does that job and, at the same time, creates a permanent, oxygen-starved, chloride-trapping gap on the outside face that is never washed or drained. That is why an enclosure can be bone dry inside and still show its worst corrosion at the seal line — and why the failure is so often reported as "the stainless was faulty" when the geometry, not the alloy, was the cause.
There are only three real responses, and they should be chosen deliberately rather than inherited from a template: design the groove so it drains rather than traps, accept the crevice and upgrade the grade to compensate, or move the sealing function off the exposed face entirely with a formed flange that sheds water away from the gap.
The fastener is usually the galvanic victim
Stainless sits high in the galvanic series, which means that in a wet joint it behaves as the cathode and the other metal corrodes. Put a zinc-plated latch, a zinc-plated hinge pin or a carbon steel subpanel against a stainless body and the stainless stays bright while the fitting disappears. The visible result is a rusted latch on an immaculate enclosure, and the common misdiagnosis is that the enclosure is at fault.
The fix is at specification level: stainless or appropriately coated hardware on wet joints, a barrier washer or sealant where dissimilar metals must meet, and a subpanel material chosen for the same environment as the box rather than for cost alone.
Cutting and Forming Stainless Sheet
In the shop, stainless is not "steel sheet with a different label". Three of its properties change the process plan, and a part designed as if it were cold-rolled steel will either crack, or spring back out of tolerance, or both.
It work-hardens. Cold deformation raises the strength of the material as it is formed, so the first bend in a part behaves differently from the fourth. A flange sequence copied from a cold-rolled steel part will need more force by the last station, and a bend placed close to an earlier one is forming metal that has already been hardened. This is the single most common reason a stainless part that formed well as a prototype drifts in a production run.
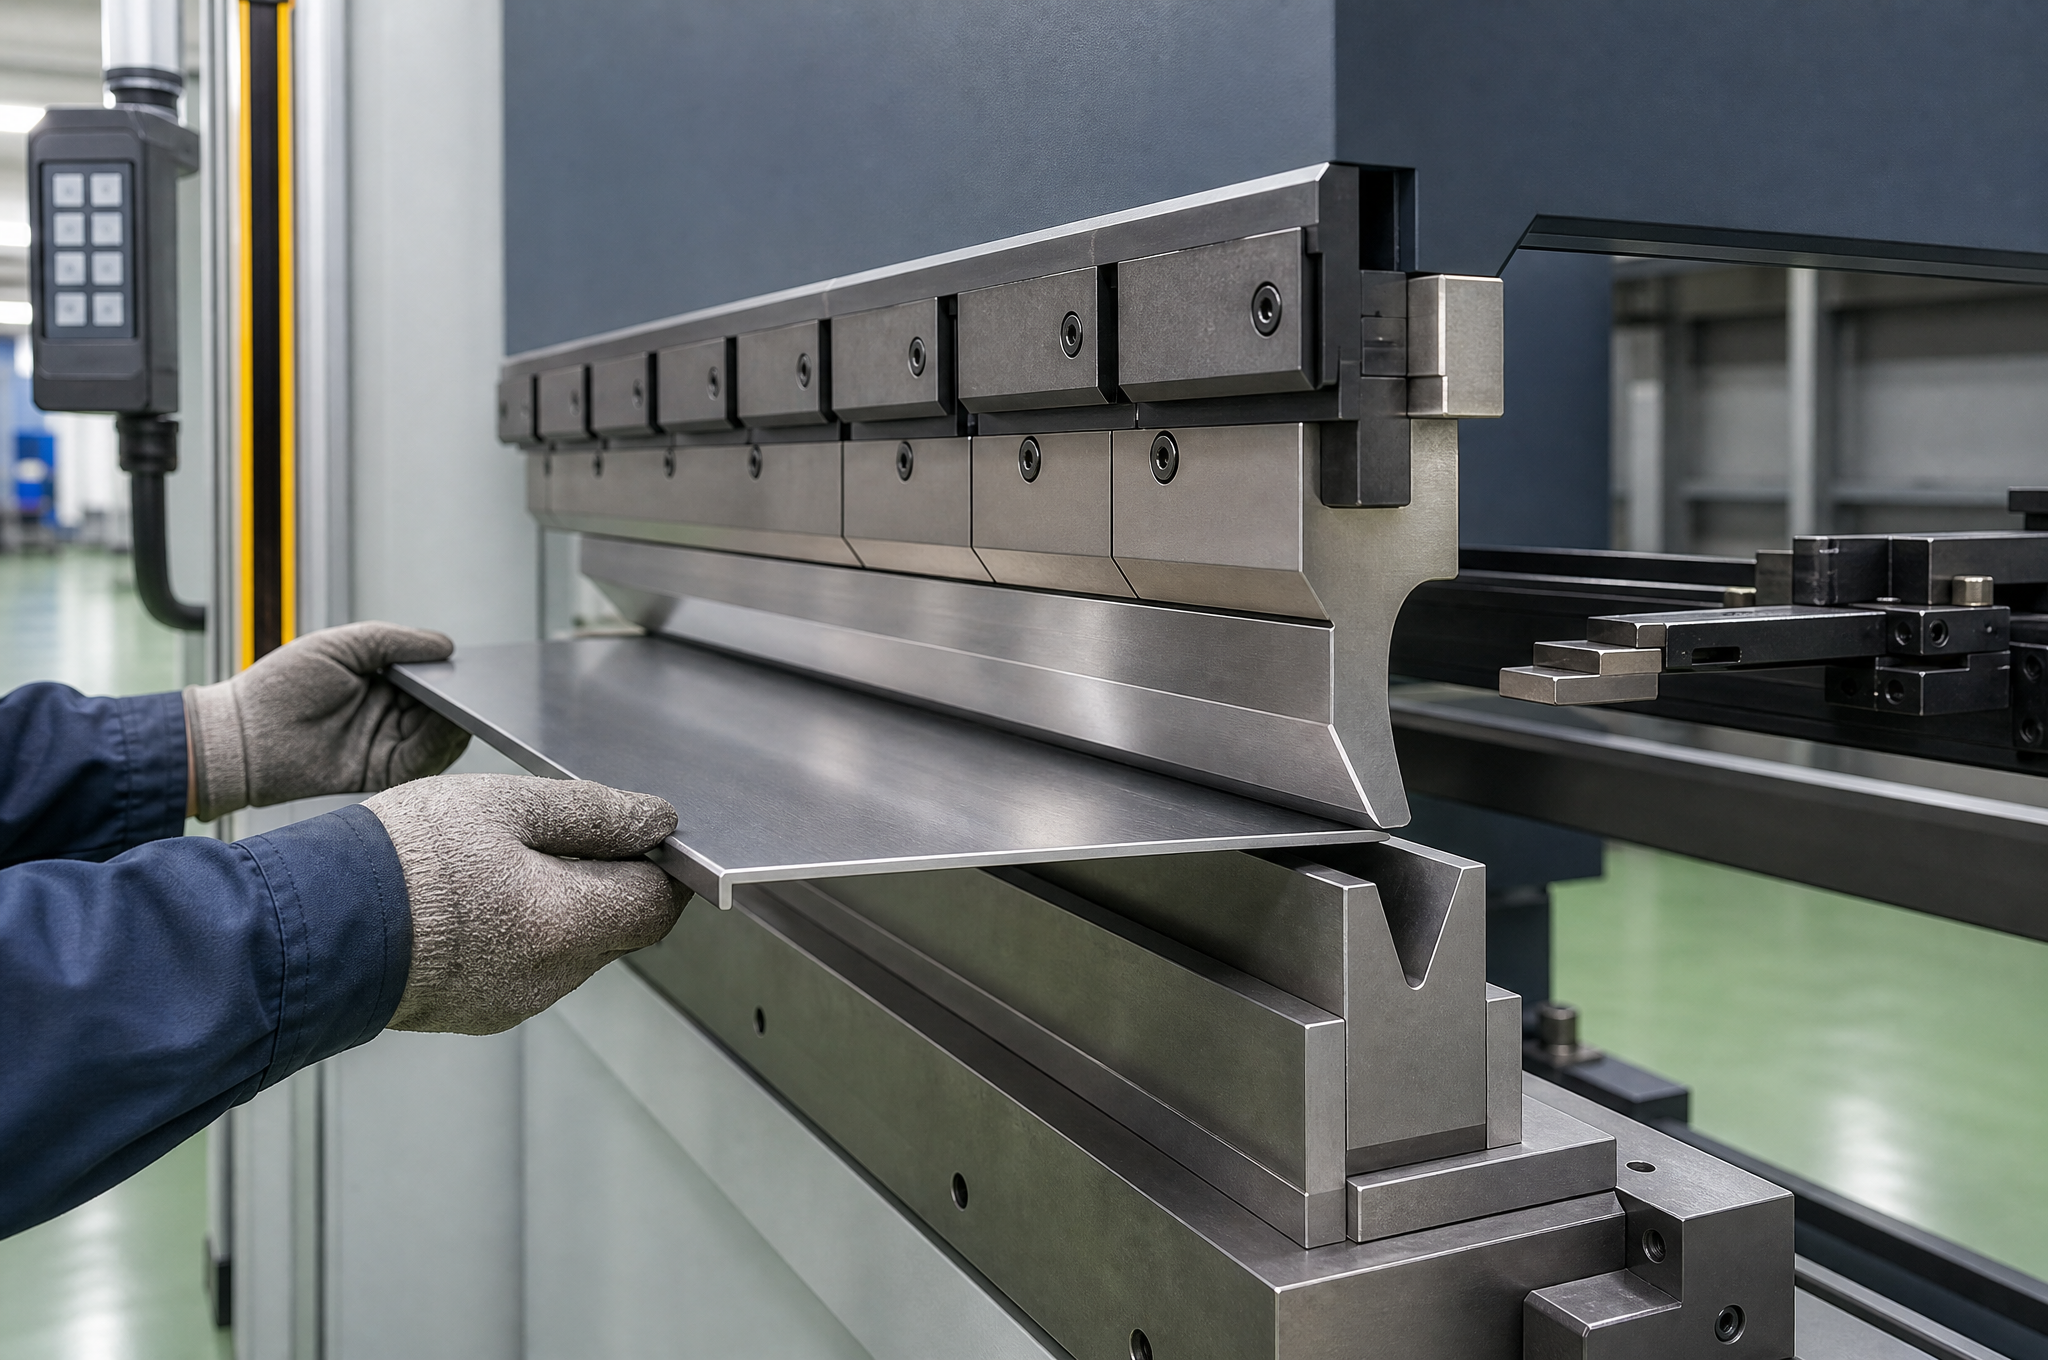
It springs back more. Higher yield strength relative to stiffness means the material returns further when the punch releases. The correction is not a manual habit but machine control — angle measurement with automatic ram compensation, which is how the press brake line here is set up, plus an offline program that carries the measured correction forward. Springback also varies with the die opening and the bend radius, so a value carried over from one tool set is not transferable to another.
It has a grain direction. Sheet is rolled, and the rolling direction leaves a texture. Bending across the rolling direction is the easier case; bending parallel to it puts the outer fiber in tension along the grain and is more prone to cracking, particularly at tight radii. Where the layout allows it, part orientation on the nest is a bend-quality decision, not just a material-yield decision.
| Operation | What changes versus carbon steel | What belongs on the drawing |
|---|---|---|
| Fiber laser cutting | Nitrogen assist gives a clean, oxide-free edge that welds and passivates properly; oxygen assist is faster but leaves an oxidized edge | Assist gas where the cut edge is welded or left visible |
| Bending | Higher springback, higher forming force, work hardening at each successive bend | Inside radius, bend allowance, and which edges are cosmetic |
| Minimum bend radius | A working minimum near 1× thickness is a reasonable starting point for annealed 304, but it is not a rule that survives every gauge and grain orientation | Whether a tighter radius is a hard requirement or a preference |
| Punching | Higher shear loads and faster tool wear; slug pull and edge burnish differ | Hole size relative to thickness, and hole position tolerance |
| Handling | Scratches are permanent — there is no coating later that will hide them | Which faces are class-A visible, so protective film and handling can be planned |
Welding the Box: Heat Input, Purge and the Root
Welding 1.2–2.0 mm stainless is the opposite problem from welding plate. On thick sections the risk is lack of fusion and the remedy is more heat. On sheet the operating window is narrow in both directions: too much heat and the corner burns through or the panel dishes; too little and the seam is a cosmetic bead sitting on unfused metal that will open at the first thermal cycle. The controlling variables are heat input, travel speed and how rigidly the parts are held.
TIG is used where the seam is visible, continuous, or thin. It gives independent control of arc energy and filler addition, which is what makes a consistent 3–4 mm bead possible on 1.5 mm sheet. MIG and pulsed MIG take over on longer runs and heavier sections where deposition rate matters more than bead appearance.
The root is decided before the box is closed
On a corner seam the back of the weld is the inside of the enclosure. If that side is left unshielded, the hot metal reacts with air and forms a rough, black, heavily oxidized root — sometimes called sugaring. It is not cosmetic damage. It is a chromium-depleted, high-surface-area layer sitting inside the box, exactly where condensation collects, and once the enclosure is welded shut there is no access to pickle it out.
So the purge is a fixture decision made at quoting time, not a welding decision made at the bench: an inert gas backing, a purge dam, or a copper chill bar that both shields the root and pulls heat out of the joint. If a drawing calls for continuous internal seams on a closed box, that requirement has to be visible in the process plan.
Distortion, and why it is a sequence problem
A continuous corner weld shrinks along its length as it solidifies. On a 600 mm corner that contraction is enough to pull the box out of square and to bow the door aperture, which then shows up as an uneven door gap. The controls are all sequencing: balanced tacking rather than tacking one corner at a time, backstep or alternating direction along the seam, chill bars behind the joint, and fixturing that holds the diagonal while the weld cools.
The check that matters is not "did it distort" — it always moves a little. It is whether the door aperture and the gasket land are still flat enough for the gasket to seal, which is measured after welding and before finishing.
Weld Heat Tint, Pickling and Passivation
This is the part of stainless fabrication that separates a supplier who welds stainless from one who understands it, so it is worth stating precisely.
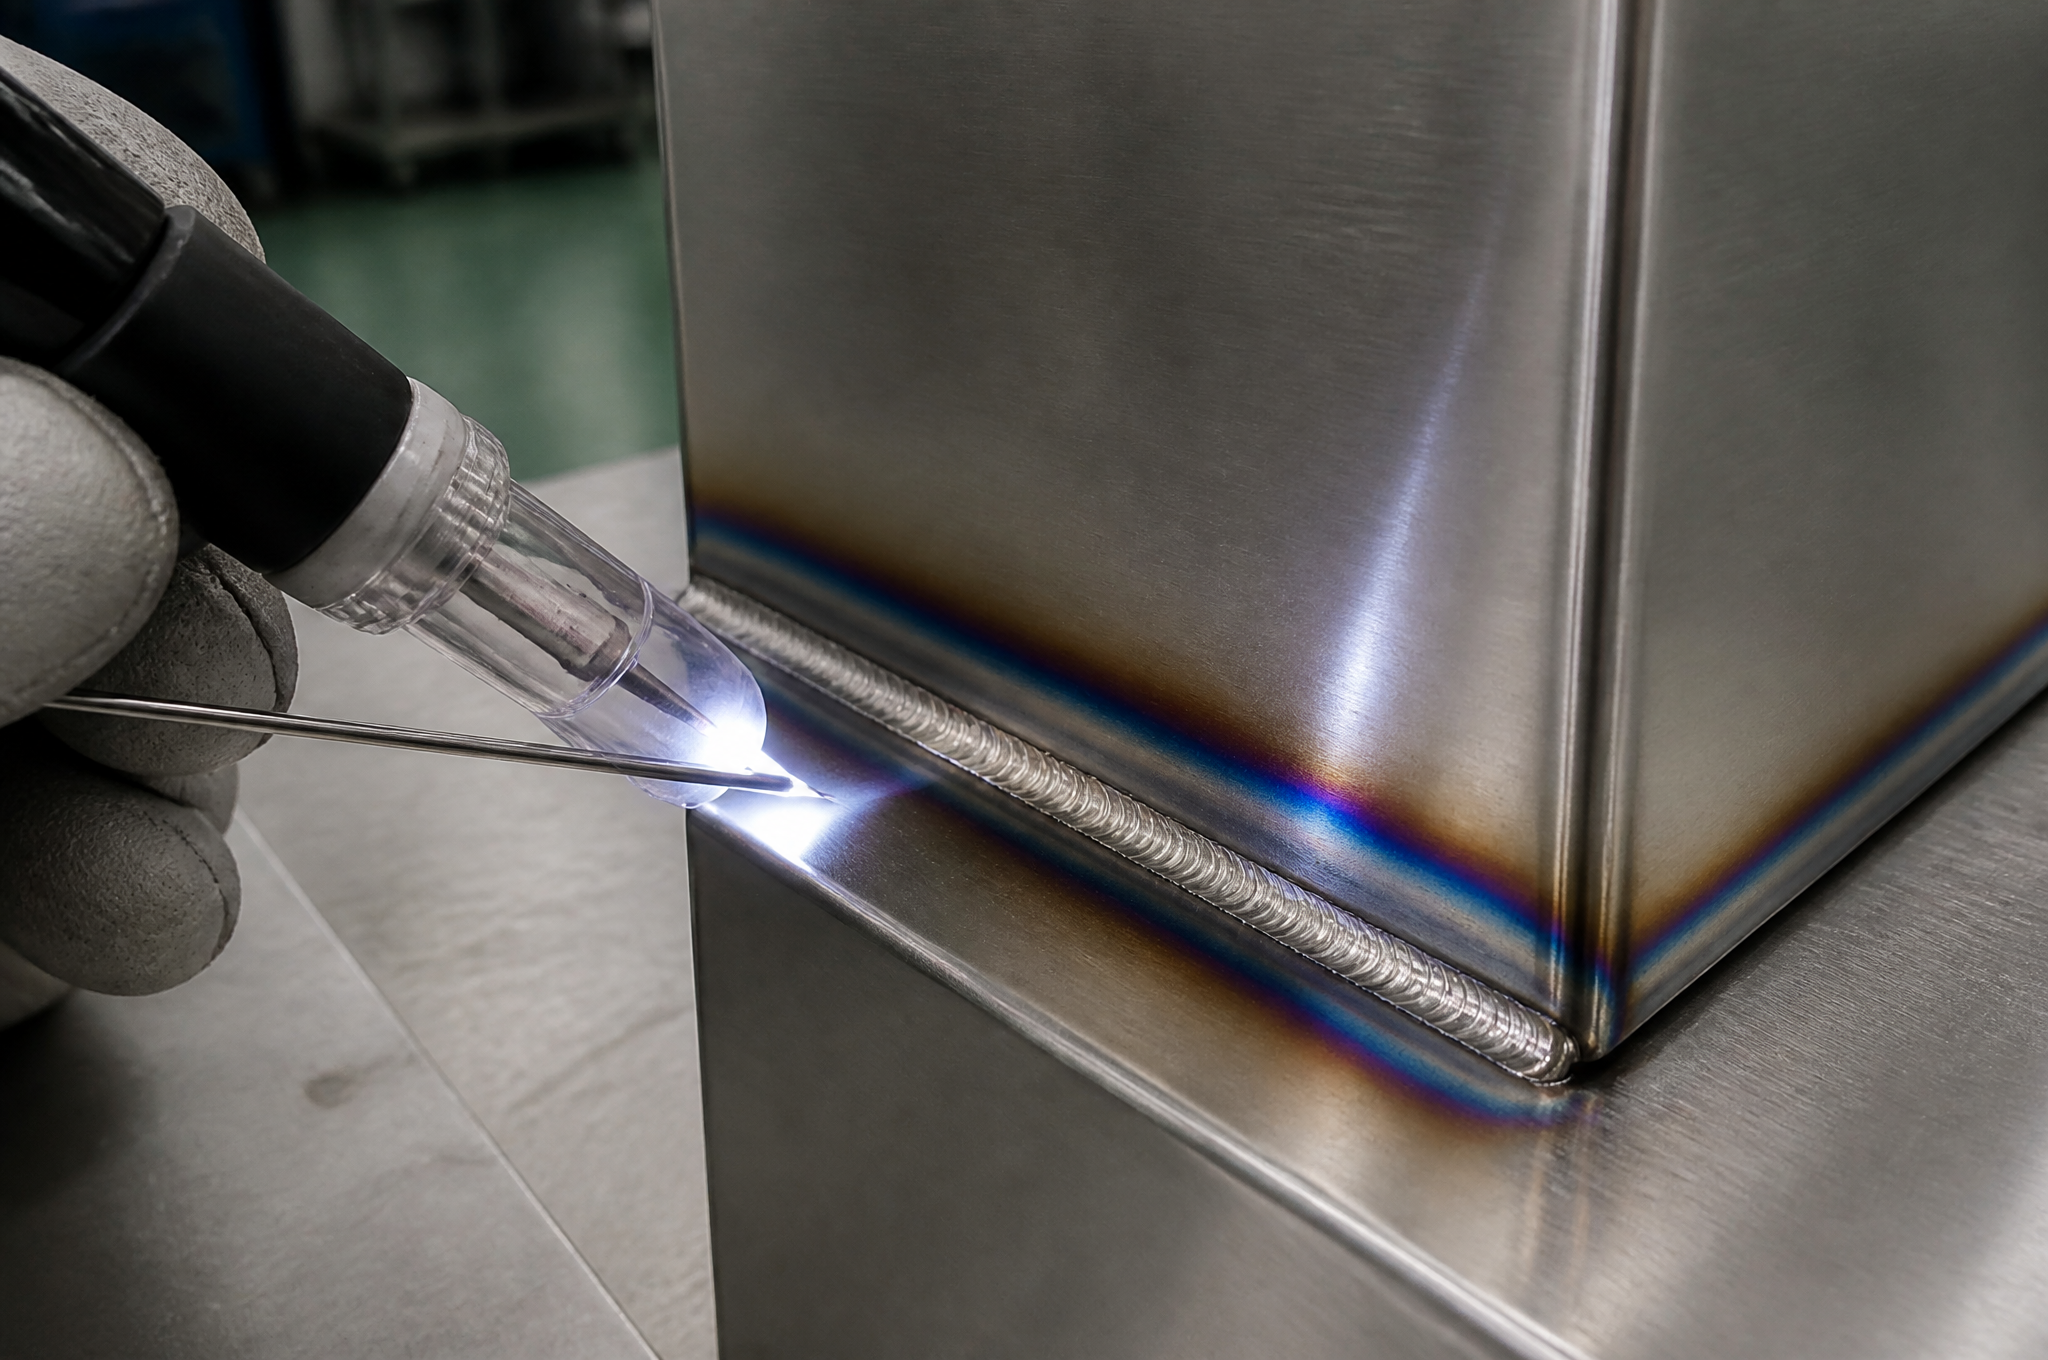
Heat tint is not discoloration sitting on the surface. It is a thickened oxide that grew while the metal was hot, and growing it consumed chromium from the alloy immediately beneath. The visible color is a rough indicator of how thick that oxide is, and therefore of how deep the chromium-depleted zone under it runs:
Indicative progression only. Actual color depends on peak temperature, cooling rate, oxygen availability and alloy, so it is read as an indicator of severity, not as a measurement.
The grinding trap
Grinding removes the visible oxide. It does not remove the chromium-depleted metal underneath it, because that layer is part of the parent sheet, not a coating. The result is the most misleading surface in stainless fabrication: a weld that looks bright, smooth and finished, and that is still the least corrosion-resistant area on the enclosure. Under a chloride load it will pit first, and the pit will appear next to a weld that a buyer has every reason to believe was properly dressed.
The only reliable removal is chemical. Pickling dissolves the oxide scale and the depleted layer beneath it, returning the surface to parent-metal chemistry and leaving a uniform matte grey. Passivation then does a different job: it removes free iron contamination and rebuilds the passive film on metal that is already clean. Passivation is not a substitute for pickling where tint exists, and pickling without a subsequent passivation leaves a surface that will re-film on its own but without the contamination control.
| Treatment | Removes | Does not remove | Specify it when |
|---|---|---|---|
| Grinding / blending | Weld bead profile, spatter, visible oxide color | The chromium-depleted layer beneath the tint | The seam must be flush or visually uniform |
| Pickling | Oxide scale and the chromium-depleted zone; restores parent chemistry | Weld undercut or geometry errors | Any visible tint remains, or the weld sits in a corrosive service |
| Passivation | Free iron contamination; rebuilds the passive film on clean metal | Heavy tint or heat scale | After pickling, or after any operation that could embed foreign iron |
| Electropolishing | Levels micro-peaks, brightens, improves cleanability and release | Heavy scale or a deeply depleted zone on its own | High-cleanliness surfaces where Ra and cleanability are specified |
Free iron: the failure nobody specifies against
The most common cause of "the stainless is rusting" on a new enclosure is not the stainless. It is iron that arrived from somewhere else — a grinding disc previously used on mild steel, a carbon steel wire brush, a steel bench, a fork truck tine, swarf from an adjacent job. Particles embed in the softer stainless surface, rust in the first damp week, and the stain spreads and reads as a material defect.
Control is procedural and cheap: stainless-only abrasives and brushes, segregated benches and tooling, and pickling after any operation where contamination is possible. Where the customer requires evidence, an iron-detection test on the finished surface — a ferroxyl-type test that shows free iron as blue spots — converts the claim into a record.
Surface Finish: What 2B and No.4 Actually Specify
Finish on an enclosure does two jobs at once — it sets the appearance and it sets how easily the surface can be cleaned and how chlorides behave on it. The common commercial combination is a 2B interior and a No.4 exterior, and the reasoning is practical rather than decorative: the interior is never seen and only needs to be clean and weldable, while the exterior is what the customer's customer looks at.
| Finish | What it is | Where it belongs on an enclosure | Note |
|---|---|---|---|
| 2B | Cold rolled, annealed and pickled, then skin passed — smooth, low reflectivity, non-directional | Interior faces, subpanels, structural parts | The default supply condition; cheapest and easiest to weld cleanly |
| BA | Bright annealed — higher reflectivity than 2B | Visible parts where a brighter look is wanted without a polish | Shows handling marks more than 2B |
| No.4 | Directional abrasive grain, typically 120–150 mesh, producing a visible brushed texture | Exterior door and body faces | Grain direction must be consistent across door and body or the mismatch is obvious |
| Polished | Progressive abrasives to a specified reflectivity | Architectural or high-visibility equipment faces | Cost rises steeply with area; specify the standard, not the word "polished" |
| Electropolished | Anodic dissolution that levels micro-peaks and brightens | Hygienic, pharmaceutical and high-vacuum-adjacent surfaces | Also improves cleanability and reduces product adhesion |
Why "Ra ≤ 0.8 µm" is not a finish specification
Ra is an amplitude average measured across a defined cut-off length in a defined direction. On a directional No.4 finish the value measured along the grain and the value measured across it are not the same number, and a reading taken on the door face is not the reading taken in the gasket groove or next to a weld. A drawing that states an Ra value without stating the measurement position, the direction, the instrument and the cut-off has not specified anything that can be accepted or rejected.
Two workable alternatives: either specify the finish by its process name and a visual master sample agreed at first article, or specify Ra together with the measurement plan — locations, direction relative to grain, instrument, cut-off and the sampling frequency. The second is the correct route for hygienic and pharmaceutical work. For the broader family of mechanical finishes and how they are applied, see the surface finishing guide.
Thickness Is a Structural Decision, Not a Catalog Number
There is no correct stainless sheet thickness for an enclosure. There is a correct thickness for a body of a given span carrying a given door, on a given mounting. The 0.5–4.0 mm range in the capability table is what the equipment can handle — it is not a recommendation, and any supplier who publishes a single figure for "stainless enclosures" is describing their standard product, not your part.
The reason to split the question is that the three sheet components of an enclosure carry completely different loads:
| Component | What it actually has to do | What decides its thickness | What this means on the drawing |
|---|---|---|---|
| Body | Hold the door aperture flat enough to seal, resist panel drumming and handling damage, carry the wall fixings | Span between folds and stiffeners, not the pressure; aperture size relative to sheet gauge | Door aperture flatness, and whether stiffening folds or a return flange are permitted |
| Door | Stay flat against the gasket line under latch load, without corner lift or sag at the free edge | Door aspect ratio, hinge spacing, latch positions, gasket load | Hinge and latch locations, and the allowable gap at the free corner |
| Mounting plate | Carry the weight of the components and not deflect into the door travel | Component mass and its distribution, stud spacing, plate material | Component weights, fixing centers, clearance to the door swing |
Note what is absent from that table: a pressure rating. A vented or unsealed enclosure mostly resists handling and its own door load. Once the box is sealed, the load case changes — a sealed enclosure taken from a cold store into a warm room, or shipped over a mountain pass, sees a real pressure differential across a large door, and the deflection of that door is what opens the seal.
The door gap is a gasket calculation, not a folding tolerance
Most arguments about door gaps come from treating the seal as a consequence of good folding. It is the other way round: the gasket sets the load, the load deflects the door, and the resulting gap is what the customer measures. Three numbers control it, and they are all supplier data rather than opinions:
- Groove fill. Gasket cross-section area divided by groove cross-section area. Below roughly 70% the gasket has room to roll or extrude out of the groove under compression; above roughly 85–90% there is not enough void for the rubber to displace into, the door stands off the flange, and the latches cannot pull it down. Both ends of that band produce a leak, for opposite reasons.
- Squeeze. For a round-section EPDM gasket the working band is roughly 15–25% of section. Below that the seal is not established; well above it the rubber takes a permanent compression set, so the door is easy to close on the first assembly and progressively harder to seal after each service opening.
- Seal line load. Ask the gasket supplier for the compression load deflection curve at your intended squeeze, read the load per millimeter of seal length, and multiply by the seal perimeter. That number is the force your latches must hold and your door must resist without bowing between them.
Once that number exists, latch spacing stops being a styling decision. A door with latches only at two corners bows outward at mid-span under gasket load, and the leak appears at the middle of the longest unsupported run — not where the latches are.
Door, Flange and Gasket Geometry
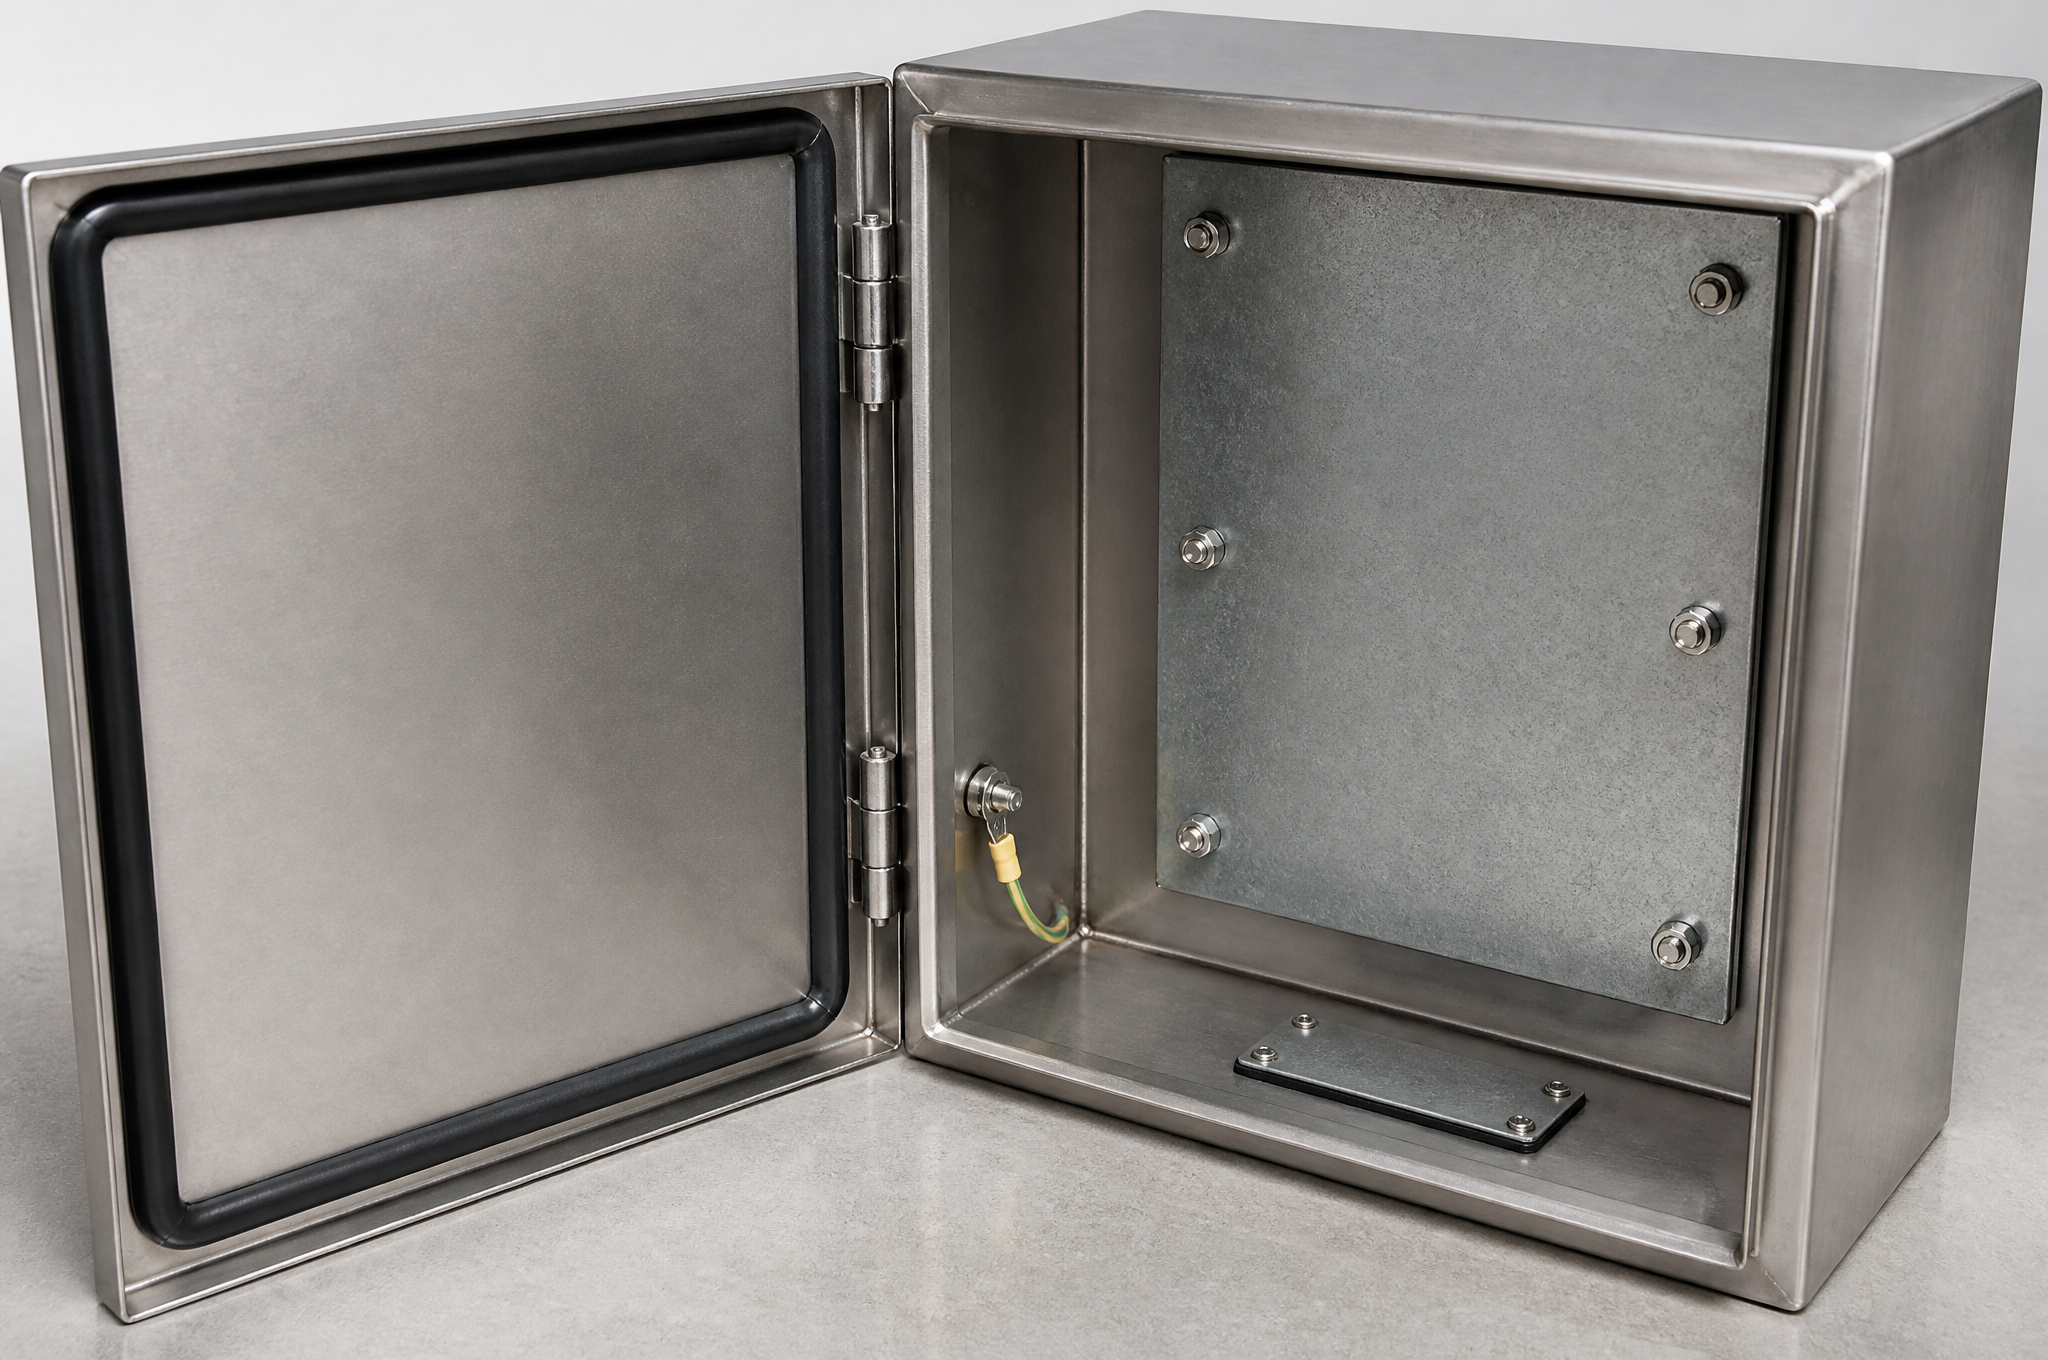
A door seals when four conditions hold at once: a continuous land with no interruption, a groove that locates the gasket so it cannot migrate, enough compression at every point along the perimeter, and a latch layout that holds that compression between the latches as well as at them. Miss any one and the other three do not compensate.
Choose the gasket for the chemistry, not the temperature alone
The gasket is the part of a stainless enclosure that fails first, and it usually fails because it was selected on temperature while the real load was the cleaning agent. A 316L box washed with a chloride-based sanitizer will corrode at the seal line even though the alloy was chosen for exactly that environment — because the elastomer degraded, the seal began to weep, and the weep created the crevice.
| Gasket material | Typical continuous service | Works with | Avoid where |
|---|---|---|---|
| EPDM | Roughly −40 to +120 °C | Water, steam, outdoor UV, most washdown detergents | Mineral oils, fuels, aromatic solvents |
| Silicone | Roughly −55 to +200 °C | Wide temperature range, dry heat, some food contact duties | Steam, and where tear strength or oil resistance is needed |
| Neoprene (CR) | Roughly −30 to +100 °C | Oils, moderate ozone and weather | Strong acids and ketones |
| Nitrile (NBR) | Roughly −30 to +100 °C | Mineral oils, fuels, hydraulic fluid | Ozone, ketones, strong acids, outdoor UV |
| FKM | Roughly −20 to +200 °C | Aggressive chemicals and high temperature together | Low temperature, and cost-sensitive large perimeters |
Ranges are indicative for typical compounds; the supplier's data sheet for the specific grade governs, and compression set at your temperature is the number that matters, not the headline maximum.
Three geometric errors that produce leaks by design
- A fastener through the seal land. A latch, stud or screw that passes through the gasket line creates a leak path that no amount of gasket compression closes. Fixings belong outside the seal line, or must carry their own seal — and if they carry their own seal, that seal is a second component that has to be specified and inspected.
- A closed groove on a washdown enclosure. The groove that correctly locates a gasket on a standard industrial box becomes a trap on a hygienic one: wash water enters, product residue stays, and the groove cannot be cleaned without removing the door. The hygienic detail is an open, drainable channel or a flush-mounted gasket.
- Interrupted land. A cable entry, a window cutout or a stiffening rib that crosses the gasket line breaks the continuous land. Each interruption is a separate sealing problem and needs its own frame or gasket.
IP, NEMA and UL: What the Rating Is Attached To
Three separate systems get quoted interchangeably in enclosure purchasing, and they do not mean the same thing.
IEC 60529 (IP) describes ingress only. The first digit covers solid objects and dust, the second covers water: IP66 is dust-tight plus protection against powerful water jets, IP69K adds high-pressure high-temperature washdown, IPX4 is splashing water. Nothing in the IP code addresses corrosion, and nothing in it addresses mechanical impact — that is IEC 62262 (IK) in a separate code.
NEMA 250 describes enclosure types for defined environments and is broader than ingress. Type 4 covers indoor and outdoor use with hose-directed water; Type 4X adds a corrosion-resistance requirement that has no IP equivalent at all. That single difference is why "IP66 stainless" and "NEMA 4X" are not the same claim, and why a supplier who answers an IP question with a NEMA type, or the reverse, has not answered it.
UL adds a third layer that is frequently misapplied. UL 50 and UL 50E are the enclosure standards. UL 508A is the standard for the assembled industrial control panel — it belongs to the panel builder who wires the components, not to the sheet metal shop that supplies the empty housing. UL 94 is a flammability classification of a plastic material at a given thickness, not a property of a metal enclosure. None of the three transfers to a stainless box because the box is made of stainless.
| Requirement | Comes from | What it actually tests | What it does not test |
|---|---|---|---|
| IP66 | IEC 60529 | Dust tightness; powerful jets against the assembled enclosure | Corrosion, impact, UV, gasket aging |
| IP69K | IEC 60529 | High-pressure, high-temperature jet washdown | Chemical compatibility of the gasket with your sanitizer |
| NEMA Type 4 | NEMA 250 | Indoor/outdoor use, hose-directed water, limited dust | Corrosive atmospheres |
| NEMA Type 4X | NEMA 250 | Type 4 plus resistance to corrosion | Any specific chemical at a specific concentration |
| IK08 | IEC 62262 | Mechanical impact energy on the enclosure | Ingress, corrosion |
| UL 508A | UL, panel level | The assembled, wired industrial control panel | Anything about the empty sheet metal housing |
A rating belongs to the assembly that was tested
Every one of these ratings is a property of a complete, assembled configuration: the weld integrity, the gasket and its compression, the gland plate and its gasket, each cable entry, every window, every vent, the latch torque. Change any one of them and the previous result no longer describes the product. Adding a breather drain to a Type 4X enclosure makes it no longer Type 4X unless the drain itself is rated for that type — a change that looks like an improvement and voids the rating.
| For a stated protection target, we do | We do not |
|---|---|
| Design and fabricate to the geometry the rating depends on: continuous welds, uninterrupted gasket land, controlled groove fill and squeeze, gland plate with its own gasket | Certify, list or self-declare an IP or NEMA type from a drawing |
| Hold the door aperture flat and the gasket land continuous, and report the measurements | Guarantee a rating for an assembly that was never tested as delivered |
| Supply material certification with heat numbers, and welding and finishing records | Substitute a material grade claim for an enclosure rating |
| Support a third-party test program with parts, records and drawing revisions | Absorb the cost or the lead time of that test into a standard quote without it being stated |
Washdown and Hygienic Geometry
In a food, beverage or pharmaceutical area the enclosure is cleaned every shift, often with hot water and a chemical agent, and the dominant failure mode changes. Corrosion is still a risk, but the first failure is usually retention: product residue and wash water held in a place that cannot be reached, which then becomes a corrosion site and a contamination source at the same time.
The geometric consequences are specific and they mostly cost nothing at the drawing stage while being expensive to retrofit:
| Hygienic requirement | Geometric consequence | What to put on the drawing |
|---|---|---|
| No surface that holds water or product | Sloped or crowned top; no upward-facing ledges; no flat-topped stiffening ribs | Slope direction and angle, and where water is allowed to run |
| Cleanable internal corners | Radiused corners rather than square internal junctions; welds ground flush and pickled | Minimum internal radius, and that all product-side welds are ground flush and pickled |
| No traps at the closure | Open, drainable gasket channel instead of a closed groove; gasket removable for cleaning | Gasket detail as a section, not a note |
| No exposed threads or fasteners on the product side | Fixings from the inside, or capped and sealed; studs welded rather than through-bolted | Fastener access direction and any sealing requirement |
| Drainable interior | The lowest point is a drain, not a corner; the gland plate does not create a sump | Drain position and size, or an explicit statement that the box is not drainable |
| Material compatible with the cleaning regime | 316L where the sanitizer contains chloride; verify gasket compound against the same agent | Cleaning agent, concentration, temperature and dwell time |
Inspection and Material Traceability
What is inspected on a welded stainless enclosure is not a general tolerance statement. It is the short list of features that decide whether the box closes, seals and bolts to the machine — and then the metallurgical evidence that the surface was left in a condition worth sealing.
| Check | Method | When it has to happen |
|---|---|---|
| Overall dimensions and door aperture | Caliper, height gauge, or CMM for the aperture and diagonals | After welding, before finishing — a distortion found after painting is a scrap decision |
| Flatness of the gasket land | Surface plate or CMM across the flange face | After welding; this is the feature the seal depends on |
| Door-to-frame gap | Feeler gauge at fixed stations around the perimeter, in the assembled state | At assembly, with the specified gasket fitted and the latches at working torque |
| Hinge, latch and gland-plate hole position | CMM or fixture check from the welded-state datum | After welding and before final drilling — never from a pre-weld reference |
| Weld continuity and tint condition | Visual against an agreed acceptance sample; dye penetrant where specified | Before pickling, so a repair is still possible |
| Leak / ingress test | Bubble test, pressure decay or water spray, to the agreed method | On the assembled configuration, if a protection target is claimed |
| Free iron contamination | Ferroxyl-type test on agreed surfaces | After finishing, before packing |
| Material identity | Certificate review against the heat number; PMI where grade substitution is a risk | On receipt of sheet, and carried through to the delivery documents |
The tolerance that belongs on a welded enclosure
Sheet metal work is quoted at roughly ±0.05–0.20 mm depending on feature and process, and that range describes a cut or formed feature measured on a flat part. A welded assembly is a different object. Welding moves the box, grinding removes material, and the door is a separate part hinged to a frame that was measured before it was welded. Putting ±0.05 mm on a 1,200 mm welded span does not buy precision; it buys a rejected batch.
The workable structure is to tolerance the interfaces instead of everything: the door aperture and gasket land get a flatness callout, the hardware holes get position tolerances from a stated datum, and the overall envelope gets a commercial tolerance that reflects how the box is actually made.
What makes a material certificate worth having
An EN 10204 3.1 certificate is a mill declaration of the chemical composition and mechanical properties of the material supplied, signed off by the producer's independent inspection. Its value on an enclosure project is entirely in the heat number: the number that ties the certificate to a specific coil, and therefore to the parts cut from it. A certificate without a heat number cannot be linked to your box, and a box without a recorded heat number cannot be traced back if a question arises eighteen months later.
So the document set that actually functions is short: certificate with heat number, a record of which heat went into which production lot, a dimensional and flatness report, a first-article inspection report on the first piece, a record of the pickling and passivation operation, and weld procedure and welder qualification records where the drawing or the end customer calls for them.
Stainless, Carbon Steel or Aluminum
Stainless is the right answer less often than it is specified. The honest comparison matters because an enclosure that is over-specified costs the buyer money on every unit and buys nothing, while an under-specified one fails in the field and takes the reputation with it.
| Factor | Stainless 304 / 316L | Carbon steel + coating | Aluminum 5052 / 6061 |
|---|---|---|---|
| Corrosion resistance | Good to excellent depending on grade and surface state; no coating to damage | Entirely dependent on the coating staying intact; a scratch or a missed edge starts rust | Good in most atmospheres; poor in chloride without anodizing or coating |
| Weight | High — roughly 7.9 g/cm³ | High, similar to stainless | Roughly a third of steel, at equal thickness |
| Strength at equal thickness | High; allows thinner gauges in some structures | High | Lower stiffness; needs more thickness or more folds to match |
| Formability | Work hardens; higher springback; larger minimum radii | Most forgiving of the three | Good, with its own springback behavior |
| Finish options | 2B, No.4, polished, pickled and passivated, electropolished — intrinsic, not applied | Powder coat, zinc plating, e-coat — all applied, all damageable | Anodize, powder coat, chromate conversion |
| Typical use | Washdown, coastal, chemical, pharmaceutical, outdoor without maintenance | Indoor industrial, controlled atmosphere, cost-sensitive volume | Weight-sensitive equipment, clean indoor environments, portable units |
| When it is the wrong choice | Indoor dry installation where a coated steel box would last the life of the machine | Any washdown or chloride exposure, or anywhere the coating will be abraded in service | Coastal or chloride exposure, or high impact without extra thickness |
Two design cautions sit on top of that table. First, mixing materials inside one enclosure creates galvanic couples: a stainless body with a zinc-plated latch or a carbon steel subpanel will corrode the fitting, not the box, so the internal hardware has to be chosen for the same environment as the shell. Second, aluminum and stainless in contact is a worse pairing than either alone in a wet environment — if they must meet, the joint needs a barrier.
Where the enclosure is structural as well as protective — a load-bearing frame that carries equipment rather than only covering it — the design questions move from corrosion to datums and stiffness, which is the subject of the sheet metal chassis fabrication page. Where the requirement is a non-metallic housing with integrated bosses and no corrosion path, injection molded electronics enclosures cover that route instead. For the wider capability set behind both, see sheet metal fabrication services and the material properties guide.
What Actually Drives the Cost of a Stainless Enclosure
Buyers usually arrive with one cost question — how much more is 316L than 304 — and it is the least stable number on the page. The alloy premium tracks the nickel and molybdenum markets, so any figure quoted today is a snapshot, not a rule. What does not move is the structure of the cost, and that is what a buyer can act on.
| Cost driver | Why it moves | Where there is room to trade |
|---|---|---|
| Grade | Molybdenum content is the premium in 316/316L over 304; nickel content sets the base level against carbon steel | Choose the grade from the actual medium rather than by habit; do not pay for Mo where the risk is a crevice |
| Sheet thickness | Sheet is bought by weight, so cost scales almost linearly, and scrap is priced at the same rate | Thickness where the span allows it; stiffening folds instead of gauge |
| Nest efficiency | Stainless offcut has low recovery value compared with carbon steel | Part layout on the sheet — a 5% better nest is a real saving at volume |
| Cut length and hole count | Laser time is a function of contour length and pierces, not of part area | Fewer, larger openings; avoid dense perforation patterns unless functional |
| Bend count | Each bend is a handling step and a springback correction | Replace a fabricated corner with a bend, or vice versa, depending on quantity |
| Weld length | Stainless welding is slower than carbon steel, needs purge gas or backing, and each meter needs dressing | Design seams that are continuous only where continuity is functional |
| Post-weld treatment | Pickling and passivation are additional wet operations with handling and waste costs | Not a place to save if the service is corrosive — the saving is repaid in the first failure |
| Hardware and gasket | Stainless hinges, latches and studs cost several times their zinc-plated equivalents | Match hardware to the environment rather than to the shell; indoor boxes do not need stainless latches |
| Inspection scope | FAI, CMM reports, leak testing and PMI are labour, not material | Scope the report to what the customer's quality system actually requires |
What to Send With a Stainless Enclosure RFQ
The single most useful thing a buyer can send is not the drawing — it is the environment. A drawing defines the geometry; the environment decides whether that geometry survives, and therefore what the box is made from and how its welds are treated. State the environment and the grade becomes an engineering output rather than a guess the buyer has to make alone.
| Send this | Why it changes the quote or the design |
|---|---|
| 3D model and a dimensioned 2D drawing | STEP or the native format for geometry; the drawing carries tolerances, datums and finish, which the model does not |
| Operating environment | Indoor, outdoor, coastal, washdown, chemical, or cyclic wet-dry, with chloride concentration and temperature if known |
| Cleaning regime | Agent, concentration, temperature and frequency — this is what usually decides between 304 and 316L, and it also decides the gasket compound |
| Grade, if already specified | If your drawing already names a grade, say so; if not, say that it is open and let engineering recommend one |
| Protection target | IP or NEMA type, or "design to IP66, test not required" — the two are different scopes and different prices |
| Sheet thickness, or the load it must carry | Either the gauge or the component weights and mounting arrangement, so the door and body can be sized |
| Door configuration | Single, double, lift-off, hinged with latch type, or fixed cover; and the gasket section if one is already chosen |
| Surface finish per face | Exterior and interior separately, and whether any surface is class-A visible |
| Post-weld treatment | Whether pickling, passivation or electropolishing is required, and whether an inspection record is required for it |
| Documentation and inspection scope | MTC to EN 10204 3.1, dimensional report, FAI, leak test, PMI, weld records — each is a separate line of work |
| Quantity and horizon | Prototype, pilot, or annual volume; a laser-and-bend route and a tooled route cross over at different quantities |
| Any existing enclosure this replaces | Failure mode, service life achieved and where it corroded — the most useful input of all, and the one most often left out |
Frequently Asked Questions
What is a stainless steel sheet metal enclosure?
Should I specify 304 or 316L for my enclosure?
Can you supply the enclosure with a specific IP or NEMA rating?
How are the welded seams treated after fabrication?
Why does stainless steel rust at the weld if it is stainless?
What sheet thickness should I specify?
What gasket material should I use?
Can the enclosure be built for washdown or food processing?
What documents do you provide with a stainless enclosure?
What do you need to quote a stainless steel enclosure?
Request a Quote for Custom Stainless Steel Enclosures
Send the drawing, the operating environment and the cleaning regime. We will come back on grade, weld treatment, gasket section, thickness and the inspection scope the protection target actually needs — before anything is cut.
Request an Enclosure QuoteSTEP, DWG, DXF or PDF drawings. Enclosures from single prototypes to repeat production runs.
See sheet metal and stamping parts →