





Custom Painted Anime Figures | Collectible Finishing
|
Attribute
|
Details
|
|
Product Name
|
Utaha Kasumigaoka Swimsuit Style Custom Scale Model
|
|
Material
|
Environmentally Friendly PVC Material
|
|
Target Audience
|
Adult Collection Enthusiasts
|
|
Product Type
|
Custom Scale Model / Collection Doll
|
|
Purpose
|
Collection Display / Gift Giving
|
|
Craft Features
|
Handcrafted Detail Carving / Custom Coating
|
Description
Finishing and acceptance guide
Custom Painted Figurines: The Finishing Chain That Decides Whether It Sells
A collectible figure is bought on its surface. The model can be perfectly proportioned and still fail, because a seam was left in, a support mark shows through the topcoat, a mask line wanders, or the second run does not match the approved sample. None of that is a modelling problem — it is a finishing specification problem, and finishing is the part of the chain where cost and reject rate are actually decided.
Scope of this page, and what it deliberately is not
This page covers the finishing chain for custom painted figurines and character models: how a moulded or printed part is taken to a painted, assembled, inspectable product, and how that product is specified so it can be accepted rather than argued over. It assumes the part already exists in some form.
It is not a general guide to 3D printing figurines, to which print process suits which shape, or to toy safety and market compliance — those are covered on our custom 3D printed toys page, which also covers character design and rights considerations at project level. The underlying print technologies and material data are on 3D printing services.
This page is written for original designs and for designs the client has the right to manufacture. We do not publish, and will not quote, a reproduction of a character owned by a third party without documentation of the client's rights. That is stated as a commercial condition rather than as a disclaimer, because it changes what a project needs before it can start — see Rights and Documentation.
At a Glance
Toy Grade and Collectible Grade Are Different Specifications
Short answer: a toy is judged for function and handling, a collectible is judged for appearance at close range. The same part can pass as a toy and fail as a collectible, and the difference is entirely in the acceptance criteria — not in how well it was made.
This distinction decides money. A figure specified at toy grade can be produced at a fraction of the finishing cost of one specified at collectible grade, because most of the visible surface never needs to be levelled, masked or hand-detailed. Buyers who do not make the distinction either overpay on a product that did not need it, or receive something that meets the drawing and still cannot be sold.
| Toy grade | Collectible grade | |
|---|---|---|
| Judged at | Arm's length, in the hand, in use | Close viewing distance, on display, under directed light |
| Seam and parting lines | Tolerated if not sharp or hazardous | Removed and levelled; a visible seam is a reject on a display face |
| Support and ejection marks | Tolerated on non-contact faces | Removed or placed out of view by agreement |
| Paint edges | Broad and forgiving | Mask lines held to the scheme, checked at the boundary |
| Colour match | Consistent with the approved colour family | Held to an approved master across the run, including reorders |
| Gloss | Uniform enough not to look faulty | Specified per area, because mixed gloss is often the design intent |
| Markings | Legible and durable | Placed to the artwork, with the carrier method chosen for the substrate |
| Reject cause that hurts | Function or safety failure | Cosmetic failure that only appears in the buyer's hands |
The practical instruction: state which grade you are buying, on which surfaces, before tooling or printing starts. Everything downstream — sanding time, paint hours, inspection time, reject allowance and therefore the unit price — follows from that one decision.
Eight Steps, and What Each One Can Ruin
Short answer: the chain is sequential and unforgiving. A defect introduced early cannot be painted over later, and a step skipped to save time reappears as a reject at final inspection.
- Part production and support removalThe figure is printed or moulded, then supports, rafts and sprues are cut away. Cut too deep and the surface is gouged below the intended form, which no amount of paint will hide.
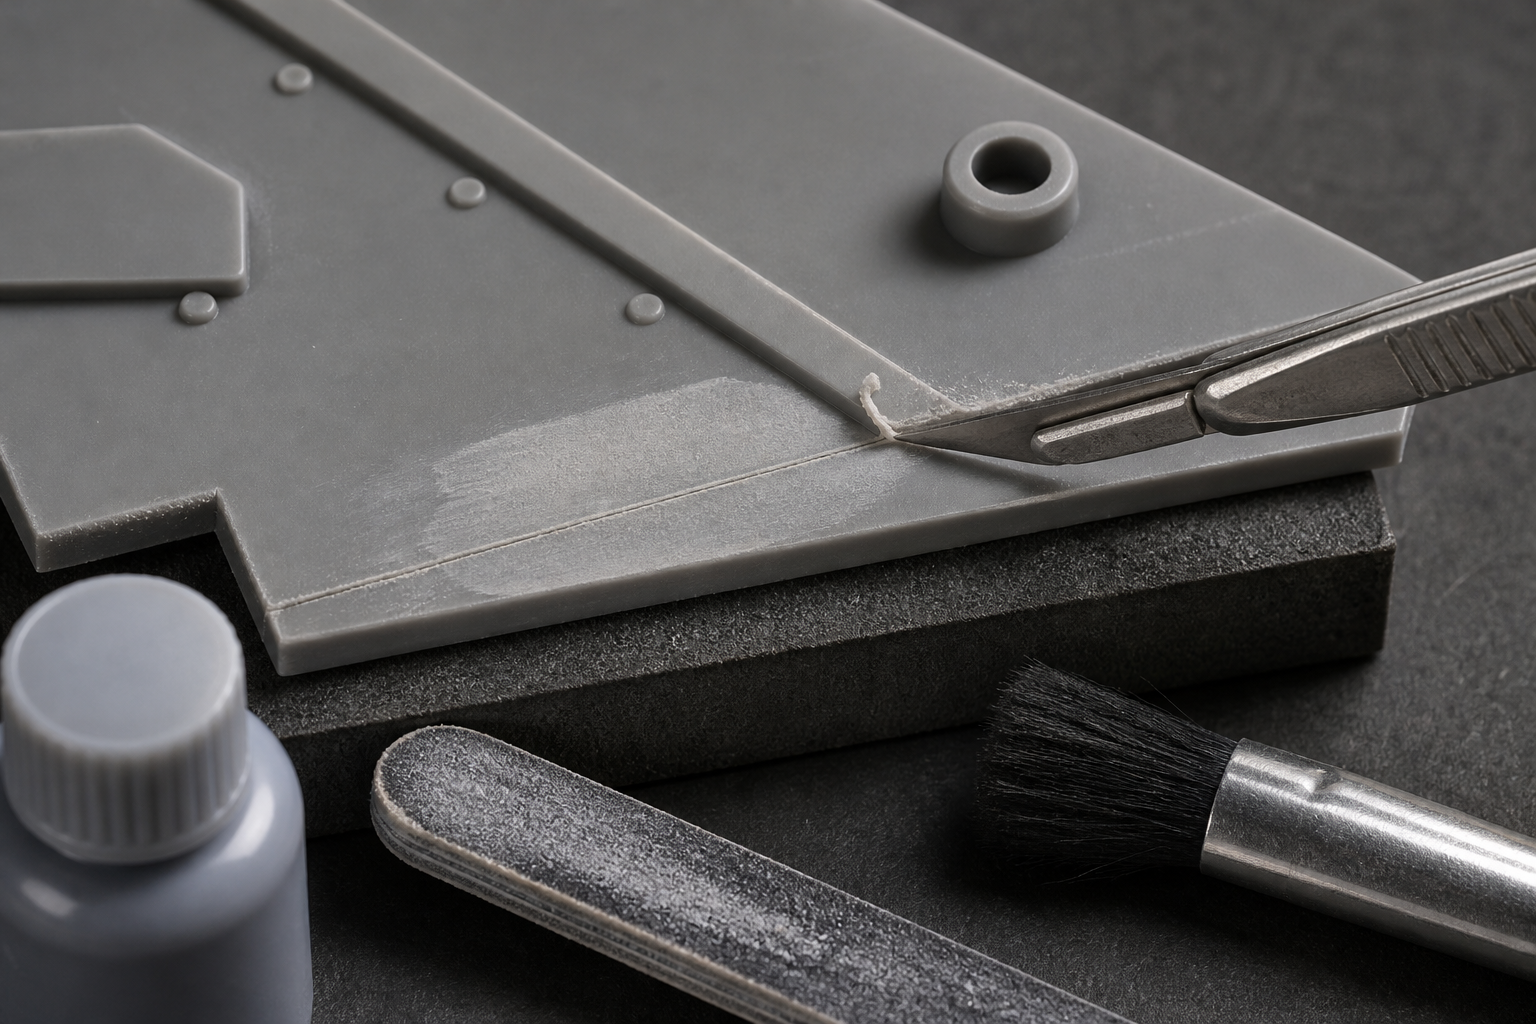
- Seam and flash removalParting lines are scraped and shaved flush. Left proud, they read as a hard ridge under a satin topcoat; cut concave, they read as a groove along the seam.
- Progressive sandingThe surface is levelled through finer grits, including layer texture on printed parts. Skipping grits leaves deeper scratches that reappear after priming as ghost lines.
- PrimerA primer coat fills fine texture and unifies tone, and it is also the inspection step: defects that were invisible on bare resin show up clearly. Surface defects found here are still cheap to fix.
- Base colour and blockingThe main colours go down in order, usually large areas first. Insufficient drying or too heavy a coat produces runs, orange peel, or a soft layer that the masking tape later lifts.
- Masking and detail paintingBoundaries between colours are masked and cut in. Lifting tape too early smears the edge; too late tears the layer beneath. This step holds most of the labour cost.
- MarkingsDecals or printed graphics are applied and settled onto the surface. Applied over a dusty or unsealed coat, they silver, bubble or lift at the edges later.
- Clear coat, assembly and inspectionThe sealing coat fixes the finish and the gloss; then the figure is assembled to its base and inspected. A clear coat applied too dry dulls the surface, and too wet attacks decals or detail paint.
Surface Preparation: Where Layer Lines and Seams Are Actually Solved
Short answer: paint is thin and it follows whatever is underneath. Any texture, seam or support scar present before priming will still be there afterwards, only shinier — so preparation is a specification item, not an invisible cost to be negotiated away.
| Defect on the bare part | Why it survives paint | How it is dealt with |
|---|---|---|
| Layer texture on a printed part | A topcoat is microns thick; it replicates the ridges rather than filling them | Mechanical levelling through progressive grits, then primer fill, repeated until the surface reads smooth before colour |
| Raised parting seam | Reads as a hard line under any gloss level, and catches light specifically on display faces | Shave flush, then sand locally and blend into the surrounding curve rather than flat-sanding a patch |
| Support scar or gouge | A depression cannot be filled by spraying colour; it stays as a shadow | Fill and re-level, or relocate supports in the print orientation if the part is still pre-production |
| Mould flash on a cast part | Sits proud of the surface and shows as a bright edge | Trim and scrape level, taking care not to round a nearby sharp feature |
| Mould release or handling contamination | Paint refuses to wet the surface, producing fisheyes and poor adhesion | Clean and degrease before priming, and handle with gloves from that point |
| Sharp edge or thin fin | Paint bridges it, then chips at the first contact | Blunt or remove the feature at design stage; a fin cannot be made durable by painting |
Two preparation decisions are worth making explicitly on the drawing or the finish specification, because they change the price materially: which surfaces must be fully levelled, and which may keep an as-produced texture as a deliberate effect. Printed parts in particular are sometimes asked to show layer texture on purpose; that is a legitimate choice, but it has to be stated, or it will be mistaken for a defect.
Paint Layers and Masking: Where the Labour Cost Lives
Short answer: the number of separately masked colours, not the size of the figure, sets the painting cost. Each additional colour break adds a masking cycle, a drying interval, a handling risk and an inspection point.
| Layer | Purpose | What goes wrong |
|---|---|---|
| Primer | Adhesion, tone unification, defect revelation | Too thick and it fills fine detail; too thin and the surface still shows texture |
| Base colour | The dominant colour of each region | Applied over an incompletely cured layer, it lifts when masked |
| Secondary colours | Blocked areas and large secondary regions | Mask edge creep produces a soft or ragged boundary |
| Detail and line work | Fine features, eyes, edges and small accents | Brush marks and uneven opacity; the most skill-dependent step |
| Wash and shading | Depth in recesses, definition of form | Pooling in the wrong places, or a dirty overall tone |
| Clear coat | Protection and the final gloss level | Dry spray dulling the surface, or a wet coat attacking decals and detail paint |
Colour drift across a run almost never comes from the pigment being wrong on day one. It comes from film thickness, number of coats, cure state and paint batch, which is why the reference has to be tied to a method: the same number of coats, the same flash-off, measured against the same master under the same light.
Decals and Printed Markings: Choosing by Surface, Not by Habit
Short answer: the marking method follows the artwork and the surface. Fine multicolour graphics on a curved panel and a single-colour code on a flat face are not the same problem, and using one method for both is how markings end up either expensive or short-lived.
| Method | Suits | Limits |
|---|---|---|
| Water-transfer decal | Fine multicolour artwork, gradients, thin carrier, curved or irregular surfaces | Carrier edge can show on gloss; needs a settled, sealed surface and a clear coat over it |
| Pad printing | Small single-colour markings on flat or gently curved faces, high durability | One colour per pass; artwork complexity is limited; pad geometry constrains reachable areas |
| Silk screen | Larger, simpler flat areas of colour and thicker ink deposit | Needs a flat or near-flat surface; not practical on strong compound curves |
| Laser marking | Permanent single-tone marks on suitable substrates | Contrast depends on material; not a route to colour artwork |
| In-mould or moulded-in detail | Features that must survive abrasion or be part of the form | Fixed at tooling; no colour variation, and changes require tool modification |
The order of operations matters as much as the method: markings go onto a clean, cured, sealed surface, and the clear coat that follows is what protects them. Apply a decal onto a dusty or unsealed coat and it will silver under the carrier and lift at the edge later — a failure that appears in the customer's hands, not at inspection.
Clear Coat, Assembly and the Base
Short answer: the clear coat fixes the gloss and protects everything beneath it, and the assembly decides whether the figure stands correctly. Both are frequently treated as afterthoughts and both generate returns.
- Gloss is a specification, not a default. A figure often mixes matte and gloss deliberately; if the drawing does not say which area is which, the result will be uniform and wrong.
- Clear coat over decals needs compatibility. A solvent-heavy coat can attack the decal film or the detail paint beneath it; the coat and the marking system have to be chosen together.
- Contact points are where paint fails first. Where the figure meets the base, or where removable parts seat, paint is under load; those interfaces are better masked than painted.
- Base stability is a product requirement. A centre of mass outside the footprint shows up as a figure that leans or tips, and no amount of paint quality compensates for it.
- Removable parts need a fit decision. Peg and socket clearance has to allow assembly after painting, because paint thickness changes the fit — usually in the direction of not going together.
- Assembly order is part of the specification. Parts painted separately and joined afterwards leave an unfinished joint; parts joined before painting need their joint masked.
Rights and Documentation: What a Character Project Needs Before It Starts
Short answer: if the figure reproduces a character, design or artwork owned by someone else, we need evidence that you hold the rights or a licence to have it manufactured. Original designs and designs you own need written confirmation of ownership, which is a much lighter requirement.
This is a commercial condition rather than a legal disclaimer, and it is stated on the page because it changes project timing. It is also the single most common reason a character-based enquiry cannot be quoted the same day.
| Project type | What we ask for | Why |
|---|---|---|
| Original design created by you or your studio | Written confirmation of ownership, and confirmation that the design does not incorporate third-party elements | Establishes that nobody else's rights are engaged |
| Licensed character or brand | Licence or authorisation showing the rights holder, the licensed scope and the term | Production outside the licensed scope is not something we can take on |
| Commissioned artwork from an illustrator | The assignment or licence under which you may manufacture physical products | Owning an image for display is not the same as a right to manufacture goods from it |
| Fan or tribute project | Authorisation from the rights holder | Non-commercial intent does not create a manufacturing right |
| Client-supplied 3D file with no provenance stated | A statement of where the file came from and on what basis it may be produced | A file arriving by email carries no rights with it |
Two practical consequences for planning. First, clear the rights before commissioning artwork or tooling, because a design that cannot be manufactured is a sunk cost. Second, if you hold a licence, send the scope with the brief: it usually defines territory, quantity and term, all of which affect how a run is planned and packaged.
Inspection and Acceptance for a Painted Figure
Short answer: inspect the way the customer will look at it. On a figure that means close, in the hand, under a defined light — and it means grading the surfaces, because the face and the underside cannot be held to the same standard.
| Check | What is being verified | Typical failure it catches |
|---|---|---|
| Seam and support-mark audit | That preparation was completed on every display surface | A seam shaved on the sample and skipped on production parts |
| Colour against the approved master | Match under the agreed light and distance | Batch drift hidden under workshop lighting |
| Mask line walk | That each boundary sits within the agreed tolerance | Ragged edges where tape was lifted early |
| Gloss by area | That matte and gloss regions are where the scheme says | A uniform coat over a mixed-gloss design |
| Marking adhesion and registration | That decals or print are placed correctly and will not lift | Silvered decal edges, or a marking a millimetre off |
| Assembly and base fit | That parts seat after painting and the figure stands stable | Pegs too tight once paint thickness is added |
| Surface protection at contact points | That painted interfaces are not load-bearing | Paint chipping at the base joint in transit |
| Sampling against the approved prototype | That production still equals the approved sample | Silent drift after the sample was signed off |
The written standard is what makes this possible. A painted prototype approved with a note saying "looks good" has no predictive value three months later; a prototype approved against a numbered list of checks, with the light source and distance recorded, can be used by an inspector who never met the buyer.
Packing: Paint Is the Fragile Part
Short answer: the resin usually survives transit. The paint does not — it scuffs where it touches packaging, chips at contact points and marks against other figures. Packing is therefore part of the finishing specification, not a logistics detail.
| Requirement | Reason |
|---|---|
| The figure must not contact the box wall | Any rigid contact point becomes a rub mark under vibration |
| A shaped insert holding the figure clear of the walls | Distributes shock and prevents movement inside the pack |
| Separate cavities for base and accessories | Hard parts abrade painted parts when they share a space |
| Surface protection on painted areas | Thin film or soft wrap prevents scuffing during insertion |
| Figure-to-figure separation in multi-packs | Two painted surfaces in contact mark each other immediately |
| Drop test of the packed unit, not the bare figure | A figure that passes a hand check can still fail as packed |
Retail packaging adds a second constraint: the insert has to be removable without touching the painted surface, and the figure has to look correct when the pack is opened, because that moment is the product experience. If the packaging is being designed alongside the figure, say so at brief stage — it affects the base design and where the figure can be held.
Cost Drivers in a Painted Figure Programme
Short answer: hand work dominates. Material is a small part of the price, and the decisions that move cost most are the number of colours, the size of the painted area, the fineness of detail and the cosmetic reject rate.
| Driver | Effect on price | Where the buyer has leverage |
|---|---|---|
| Number of separately masked colours | Each adds a masking cycle, a drying interval and a handling risk | Consolidate colours where the design allows; a colour break that reads the same at viewing distance is free to remove |
| Painted area | Larger areas cost more in paint and time, but less than added colour breaks | Accept as-produced texture where it is hidden |
| Detail fineness | Fine line work and small features are the slowest work | Decide which details must be hand-painted and which can be a decal |
| Marking method | Decals and pad printing cost differently per colour and per area | Choose by surface and artwork, not by habit |
| Gloss variation | Mixed gloss needs masking for the clear coat | Accept a single gloss if the design tolerates it |
| Cosmetic reject allowance | A tight cosmetic standard raises the inspection cost and the scrap rate | Apply the strict grade only to surfaces actually visible on display |
| Packaging | Shaped inserts and surface protection add unit cost | Design the pack with the figure, not after it |
| Volume and batch size | Setup, colour mixing and masking jigs amortise over the run | Consolidate sizes and colourways into fewer, larger runs |
A useful sanity check on any painted-figure quotation: ask how many separately masked colours and how many hand-painted detail operations the price assumes. If the answer is vague, the price is a guess, and it will move as soon as production starts.
Project Inputs for a Painted Figure Quote
Short answer: send the model, the paint scheme with a reference per area, the marking method per graphic, and the acceptance standard. Those four decide most of the price; everything else is commercial.
| Input | What it determines |
|---|---|
| 3D model in a usable format | Whether the part is printable or mouldable as drawn, and the support strategy |
| Target size or scale, and the base dimensions | Print or tool envelope, and the stability requirement |
| Paint scheme with a colour reference per area | Number of masking cycles, and the colour control method |
| Which markings are decals, which are printed, which are moulded | Marking cost and the order of operations |
| Gloss level by area | Clear coat masking and the final finish specification |
| Number of pieces, and which are removable | Assembly sequence, masking strategy and peg clearance |
| Quantity per run and expected reorders | Process choice, jig investment and whether colour needs a retained master |
| Cosmetic acceptance standard, or which grade applies | Inspection time, reject allowance and the finish level |
| Packaging requirement | Insert design and unit cost |
| Rights documentation, for character or third-party designs | Whether the project can be quoted at all |
Commercial terms, payment and shipping are handled on the quotation page rather than repeated here. For projects that move to volume production after prototyping, the tooling and moulding route is on injection molding services.
Frequently Asked Questions
What does custom painted figurine production involve?
It is a chain rather than a single step: the part is produced by a suitable process, support and seam marks are removed, the surface is sanded and primed, the paint scheme is applied in layers, markings are added by decal or printing, a clear coat seals it, and the figure is assembled on its base and inspected. Each step can undo the one before it, which is why the chain is specified as a whole.
What is the difference between toy grade and collectible grade?
Toy grade is judged on function and safety for handling; collectible grade is judged on appearance at close viewing distance, because the buyer displays it. That means seam lines, support marks, paint edges, colour consistency and gloss are all in scope on a collectible and often invisible on a toy. The acceptance criteria have to be written for the grade you are buying.
Why do 3D printed figures show layer lines under paint?
Paint is thin and follows the surface it is applied to. Layer texture and support marks remain visible under a topcoat unless the surface is mechanically levelled and primed first. Sanding and primer fill are therefore part of the finishing specification, not an optional extra, and primer is applied to reveal defects that were hard to see on bare resin.
Can you produce a painted prototype before mass production?
Yes, and it is the normal way to settle a paint scheme. A painted prototype is the only point at which colour, gloss, mask lines and marking placement can be judged on the actual geometry. Approving that prototype against a written standard is what makes a later production run checkable rather than a matter of opinion.
What is the difference between decals, pad printing and silk screening?
Water-transfer decals carry fine multicolour artwork including gradients and give the thinnest edge, so they suit complex graphics on curved or irregular surfaces. Pad printing transfers a single colour from a plate via a silicone pad, which suits small flat or gently curved markings and hard-wearing simple graphics. Silk screening applies a thicker ink layer through a mesh and suits flat surfaces with larger, simpler areas of colour.
How is paint colour controlled in production?
By agreeing a physical master or a measured colour value before production, stating the light source and viewing condition, and checking production against that reference. Colour drift comes from paint batch, film thickness and cure, so the reference has to be tied to a method rather than to a description such as matching the artwork.
Do you need rights documentation for character figures?
Yes. For any figure based on a character, design or artwork that belongs to someone else, we ask for evidence that the client holds the rights or a licence to have it manufactured. We do not produce reproductions of protected characters on the instruction of a buyer who cannot show that. Original designs and designs the client owns do not need third-party clearance, though we still ask for written confirmation of ownership.
What determines the cost of a painted figurine?
Mainly the amount of hand work rather than the material. The number of separately masked colours, the fineness of the detail, the size of the painted area, the marking method, the gloss and finish requirement, the reject rate on cosmetic criteria, and the packaging all move the price more than the resin does. A figure with many small colour breaks costs several times one with two broad colours.
How should painted figures be packed for export?
Paint is the most fragile part of the product, so the figure must not contact hard packaging or other figures. Protection is normally a shaped insert that holds the figure clear of the box walls, with the base and any accessories in their own cavities, plus a surface protection layer on painted areas. The pack should be drop tested as packed, because a figure that survives a hand check can still be marked in transit.
What files and information do you need to quote a painted figure project?
A 3D model in a usable format, the target size and scale, the paint scheme with colour references per area, which markings are decals or printed, the gloss level, the number of pieces and whether any are removable, the base design, annual or per-run quantity, packaging requirement and your cosmetic acceptance standard. For character work, add the rights documentation.
Related Pages
| Page | What it covers |
|---|---|
| Custom 3D printed toys and figurines | Print process selection, articulation, toy safety, compliance and character design considerations |
| 3D printing services | Underlying print technologies, materials and tolerances |
| 3D printing capability overview | Process and material capability for printed parts |
| Injection molding services | The moulding route for volume production after prototyping |
| Custom plastic components | Moulded component capability and finishing options |
| Engineering materials | Resin and material families with property data |
| Quality certifications | Quality system and certification status |
| Quotation | Commercial terms, payment and shipping |
Send the Model, the Paint Scheme and the Acceptance Standard
Most painted-figure projects become difficult for one of two reasons: the finish was never defined beyond “high quality”, or the rights position was never settled before tooling. Send the model, the colour scheme with a reference per area, the marking method for each graphic and the grade you are buying — and for character work, the licence or ownership confirmation — and the review will come back with the finishing chain, the cost drivers and the points where the specification is still open.
What this page does and does not claim
This page publishes no universal colour tolerance, gloss figure, sanding specification or reject percentage, because each of those follows from the artwork, the substrate, the paint system and the grade you are buying. Where a value matters, it is agreed against your project and recorded on the finish specification.
It does not reproduce, depict or reference any third-party character, and it does not use another company's product photography. The images on this page show our own finishing process on original components.
It also does not restate the print process selection, toy compliance or character-design content already published on our custom 3D printed toys page. That page is linked instead, so the two keep separate jobs. Technical content is reviewed before publication and the page carries a revision date.